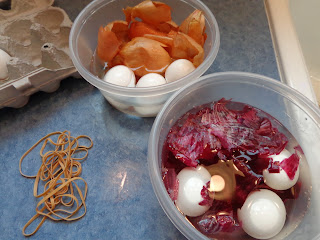
Once I got home, I did a quick google search and discovered that Spanish onion skins create a nice, red color, but since I had a red onion and a few yellow onions at home, I decided to see what color they would produce.
In addition to the onion skins and eggs, I gathered rubber bands and some muslin I cut into squares.
I added a little water to each bowl to soak the onion skins and added the eggs to moisten them, too.
Next, I wrapped each egg in onion skins, trying to cover it completely.
Then I wrapped the egg tightly in a muslin square and secured the ends with a rubber band.
Into the pan and onto the stove!
For the perfect hard-boiled egg, fill a non-aluminum pan with warm water and the eggs. Put the pan on the stove on medium-high and bring it to a boil. Turn the temperature to 'low' and set a timer for 15 minutes, letting the eggs barely simmer. When the timer goes off, run cold water over the eggs to cool them. (If you want to eat them in a day or two, peel them immediately under running water and store in a ziploc bag in the refrigerator.) Store dyed eggs in the refrigerator.
After the eggs were cool enough to handle, I snipped of the rubber bands and opened the muslin bundle.
Wait for it....
Ta-da!! I was surprised -- the red onion skins tie-dyed the eggs shades of green, red-brown and orange. The yellow onion skins colored the eggs a beautiful shade of burnt orange. To finish them off, I rubbed a little vegetable oil on each egg and wiped the excess off with a paper towel.
Best thing about this method of egg-dying: it didn't cost any more than an onion I will use, and it's non-chemical and non-toxic. I think I'll be doing this for many years to come!


No comments:
Post a Comment