Monday, August 11, 2014

The harvest is coming in...time to can and freeze the bounty!

It's been a while since I last posted.  The summer has just flown by!  While a lot of people relax and take it slower in the summer, my June and July has been very busy.  I'll be posting more about the projects I've been working on over the next few weeks.

But now in mid-August, the bounty of my garden and local farms is amazing, and I find myself following my mother's and grandmother's footsteps to the kitchen to can or freeze the fruits and vegetables that are in season.

One day's harvest from my garden.
The two new garden beds that my dear husband built are small but mighty.  Production for such a small space is somewhat astounding!  Each bed is 3' x 8'.  This spring, I planted three tomato plants (one heirloom, one roma and one 'Juliette', a variety of cherry tomato), two rows of radishes, three rows of green beans (with about 8 plants in each), five cucumber seeds, six broccoli plants, three different pepper plants, and a few herbs.  The garden went from this:


to this:


Radishes were first to be harvested, followed shortly by green beans.  There were a lot of beans!!  By the third time I'd picked, I had so many that we decided to can them.


Canning beans is not difficult...no brines or seasonings required.  But you must have a pressure cooker/canner in order to seal the jars properly.  With my d.h.'s help, we canned five pint jars in an evening. A small batch for sure, but the right amount for my pressure canner, plus we will eat these in the fall and winter -- no waste.

The Juliette tomatoes are going wild -- I've never seen a tomato plant this large before!  It has grown out of the top of our 6' 'squirrel' cage, and over the top of the re-purposed cast iron clothing rack that I use to tie them up.  I finally had to cut back some of the branches because they were casting shade on the other plants.
Luckily, that meant picking my first tomato of the season on July 4th -- my mother's gold star date for the first tomato!  While my son eats these like grapes, we have so many that I have given tomatoes away.  Pretty soon I will be canning them, simply because I can't keep up with the harvest.

In the meantime, local farmers are having a good year, too.  I made it out to Highland Orchards (www.highlandorchards.net) in West Chester, Pa., to pick black raspberries the first week of July.  The season for my favorite jelly-making fruit is very short -- about a week or two, but I picked plenty!  I brought them home, juiced them and froze the juice.  When I run out of jelly, I'll pull juice from the freezer and make a new batch.

I've also been hitting up the local farmer's market for corn, blue berries and blackberries to eat.

The humble Lodi apple. 
This weekend, d.h. and I made another trip to Highland Orchards, this time to pick up some peaches and apples. Yes, I said apples.  It's early for apples, but that's exactly the variety I want.

My mother always made applesauce, favoring the 'early, green' apples of July.  I finally found out the name of the apples she liked:  Lodi.  This apple variety was introduced in 1924 in upstate New York, a cross between a Montgomery and a Yellow Transparent.  The trees grow about 10-25 feet tall, making it a bit easier to pick than some varieties.   It's tart, cooks down quickly and makes delicious applesauce.


We bought a half-bushel of apples (that was about 55 apples, but I set 10 aside for a pie).  Like any project, it helps to have the right tools.  For applesauce, this includes an apple slicer/corer, a cutting board, a potato ricer*, large (6 quart) pans, a large bowl (or in my case, the top to my Tupperware cake carrier), and containers for the finished product.


Potato Ricers consist of a cone-shaped sieve, a pestle and a stand.
Look for them at old-time hardware or cooking stores.


Fill the kitchen sink with clean water, and dump in the apples to wash them.  One by one, use the apple slicer/corer to cut the apples.  Discard the cores.  Notice I didn't tell you to peel the apples -- no need to! You'll see.

Fill your pan/s with apples and add about 1 cup of water.  (For my half-bushel, I cooked the apples in four batches.)  Cover and place on the stove on medium-high heat until the water boils, then lower the heat and simmer the apples for about 8-10 minutes, stirring frequently.    As the apples cook, the will begin to fall apart and get mushy. When no single slice of apple still holds its shape, remove the pan from the heat and let the apples cool for about 5 minutes.

While the apples are cooking, wash the containers in warm, soapy water, rinse well and dry.

Set the potato ricer over a large bowl.  Spoon or pour about 1/2 of the pan of apples into the ricer at a time, using the pestle to push the sauce through the sieve.


When all of the sauce has been removed, all that is left are the skins and a few seeds.  Use a rubber scraper to discard this from the ricer.  Repeat until all of the apples have been cooked and run through the ricer.
 
The ricer separates the applesauce from the peels and seeds.
Now taste the applesauce.  You get to decide how much sweetener, if any, you want to add -- a great way to control the sugar in your family's diet.  Since Lodi apples are tart, I added 2 cups of sugar to the whole batch of applesauce.  Stir the sugar in well.

Ladle the applesauce into the prepared containers.  Be sure to leave 'head' space to allow the frozen applesauce room to expand.  Seal each container, label and date it, and place all of them in the freezer.  Enjoy for the next year or so.

A half-bushel of apples yielded 27 cups of applesauce.  I used 2-cup plastic Rubbermaid containers, plus a few assorted 2- and 1-cup plastic containers from the cabinet.


If you don't have a large freezer, it is possible to can applesauce so it is shelf-stable.  You will need a boiling water canner (not a pressure cooker), glass canning jars and lids/rings.  I found some great instructions here: http://www.freshpreserving.com/recipes/applesauce  

I grew up eating my mother's applesauce, and so did my nieces and nephews.  When they were here for a visit last year, they nearly had a fight over who would get to take some home from my freezer! (That was after they each got 2 jars of Black Raspberry jelly, another of Grandma's favorites).  

*P.S.  If you don't have a potato ricer, don't fret -- you can still make applesauce.  You simply have to peel and core every apple before you begin cooking.  Let each batch of apples cook a full 10-15 minutes, and use a potato masher or a dinner fork to smash up any apple slices that are still holding their shape.  Transfer apples to a large bowl, and stir well until the sauce has an even consistency.  

And another note:  my applesauce is pale yellow-green.  If you use red apples and don't peel them, your applesauce will be light pink...your kids will think it's weird, but it still tastes yummy!! Or peel the apples to make pale yellow sauce.  It's that easy!


Friday, May 23, 2014

They Don't Make 'Em Like This Anymore

Every year in May, the Philadelphia Chapter of the American Sewing Guild holds a "Sewing Camp" -- five days and four nights to sew anything you desire, visit with sewing friends and share tips and techniques for creating great garments, accessories and quilts.  This was the 10th year we've held camp, and for nine years, we've spent our time on the campus of Eastern University, in Radnor, PA.  The conference staff sets up a large room as our sewing space, we sleep in the dorms and eat in the cafeteria.

Every year, we marvel at the beautiful campus as we walk to the cafeteria, which is located in what is now called Walton Hall.  But that building was once a 'great house,' a Main Line mansion built as a home for the family of Charles S. Walton, a leather manufacturer of considerable means.

A view of Walton Hall, Eastern University
Ceiling detail, Library, Walton Hall
My fascination with these great, old estate homes overwhelms me when I stroll into the building.  They simply don't make mansions -- or any building -- like this anymore. Designed by Philadelphia architect David Knickerbacker Boyd, the 40 room mansion was built in the northern Italian villa style in 1914 on the property then called Walmarthon.


Fireplace Mantel Detail, Library


Charles Walton  died just two years after the home was built.  His family resided there for a while, and the property changed hands a few times before being purchased by Eastern University in 1952.


His son, Charles S. Walton, Jr., also a successful businessman, became chairman of the board of the University in the early '50's.  He brought in architect William Henry Lee to convert the estate's many buildings into usable space for a college campus while maintaining some of the original integrity of the structures.


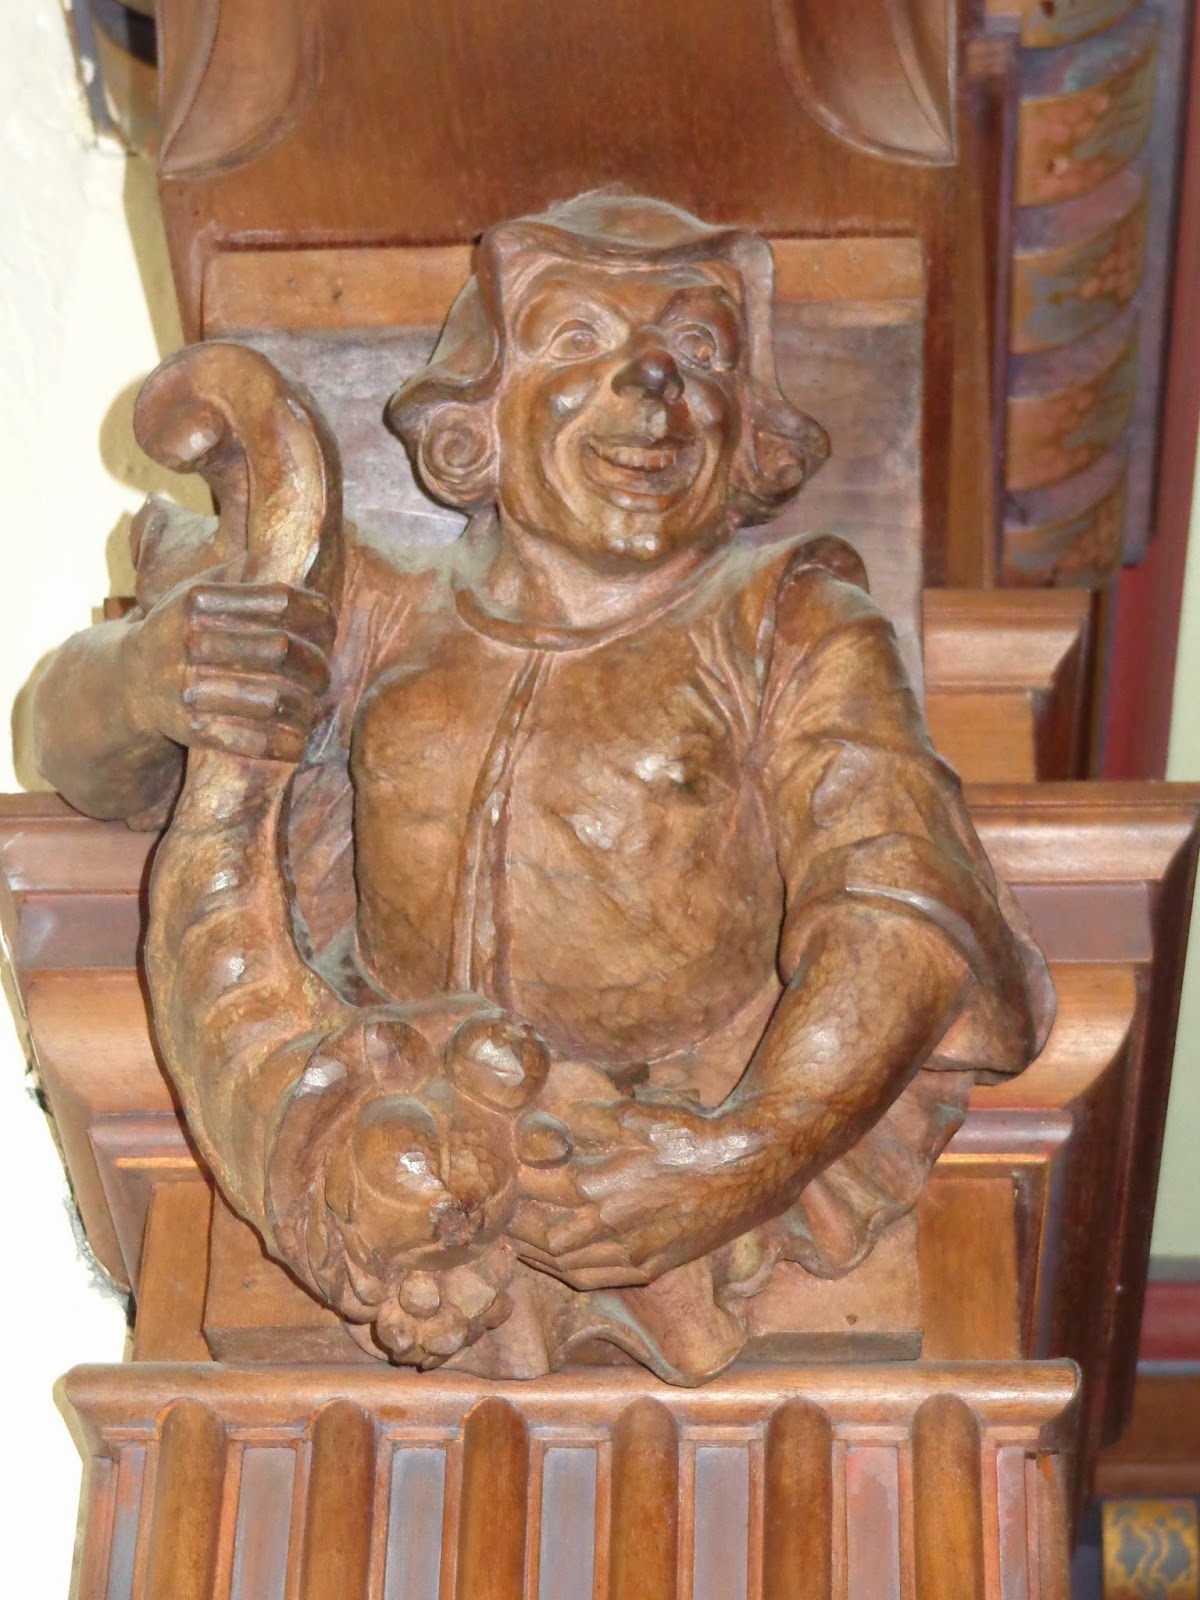
Ornate fireplaces, marble floors and staircases, stained glass, and my favorite decor, the tiny human figures that decorate the corners of the library reading room, are found throughout the building.


I only hope  that the historic nature and fine craftsmanship of the space is not lost on the young college students that use the buildings on a daily basis.

I also hope that the University continues to find the money to maintain the integrity of the buildings and the entire property, and doesn't allow Walton Hall and the other historic buildings to fall into disrepair.  

If you have the chance to go there some nice day, a visit to Eastern University's campus is worth your time. Try to imagine life in the early 1920's as you stroll through the campus...swimming or ice-skating on the lake, horse-back riding around the estate, or breakfast in the Observatory.     

A beautiful photo of Walton hall! www.eastern.edu
Walton Hall, once the great mansion of a Main Line estate.

Tuesday, May 20, 2014

Ahh...Dirt Under My Fingernails, and the Garden Is Planted Once Again.

The past few weeks have been busy with a number of things, not the least of which was planting my kitchen garden.  We're trying a few new things this years, and I wanted to share them with you.

First, we moved the location of the garden.  In years past, it was near the house, with a full Southern exposure.  But, after replacing the French drain in our basement, we decided to move the garden away from the foundation and plant grass there instead for water control.  So my D.H. (dear husband) picked a sunny spot near the garage for the kitchen garden.

Using 6" by 6" posts that were once a retaining wall for the driveway, he built two raised beds, three feet across by 8 feet long, with a little path between the two gardens.  This will allow me to pull weeds and harvest vegetables from both sides, making maintenance a bit easier.  One cubic yard of mushroom soil (once used by the local mushroom farms) filled both beds.  


For the first time, I'm trying 'straw bale gardening.'  Basically, you buy a bale of straw (not hay, which still has plant seeds in it and is used for animal food) and condition it for 12 days or so, then plant directly into the bale.  The conditioning process starts decomposition within the straw bale, which provides nutrients to the vegetable plants.  By the end of the growing season in the fall, the straw will be nearly composted, at which time it gets spread across the soil to fertilize the garden bed.  Here's a link for a site that explains the conditioning process:  http://www.daddydoctrines.com/2013/05/09/straw-bale-gardening-part-2-conditioning/.  This is a great way to use the straw bales you buy in the fall for Halloween decorating.

The garden center where I bought the straw bale had a wide selection of vegetable plants, so several went into my cart.  For the straw bale, I decided on broccoli -- a variety that can take the heat, and matures in about 60 days.  I added a little soil to each hole in the bale and dropped in a plant.
I planted four broccoli plants in the straw bale...they are a little closer than they should be...we'll see how they do!
I love home-grown tomatoes!  Nothing beats the fresh taste right off the vine.  I've also discovered that squirrels love them too, so we're still working on a method to keep the critters off the tomato plants.  In the meantime, I have three varieties growing next to my trellis -- Beefsteak, for one-slice coverage on sandwiches; Roma, to whip up home-made bruschetta; and Juliet, a mass-producing grape tomato.  Grape tomatoes are so easy to grow, and once they start turning red, they keep going until hard frost at the end of September or early October.  And the squirrels pretty much leave them alone.
The Juliet tomato already has some blossoms!
One Jalepeno and one yellow bell pepper found their way into the other bed, along with three rows of radishes and four rows of Blue Lake green beans.  I planted one hill of four cucumber seeds, and they all germinated, so I should be good for cukes by July.  When planting seeds, I follow the "Square Foot Gardening" concept (http://squarefootgardening.org/), whereby you space out your seeds to their optimum growing space when you plant them.  This eliminates the need to 'thin' the rows (and waste the plants), and allows you to grow quite a bit of food in a small plot.

From this angle, the peppers are in the front, followed by radishes, green bean plants, and the cucumber mound on the back left, under the green cage.  Another broccoli plant is tucked in the back right corner.
The contraption made of plastic PVC pipe and chicken wire is designed to keep out the bunnies, squirrels and my dogs.  Another plus -- in the spring and fall, it can be covered with plastic and used as a greenhouse.
It was designed by my brother, who lives on 30 acres in Missouri and has to protect his garden from deer, too.
 
We made one more investment for the new garden...a rain barrel.  I bought mine for about $80
at http://www.rainbarrelsandmore.com/ .  It was easy to divert the downspout from the garage roof into the barrel, which came with the spigot installed.  I use the rainwater to give the garden a good soaking.  One drawback with this method is that the hose is gravity-fed...there is not much water pressure, so I have to fill up a watering can and water by 'hand', not by hose.  Since the gardens are small, it don't take much time or more than three watering cans full to give the plants a drink.  You can buy specially-designed soaker hoses and rain barrel pumps, but I'm going to stick with this for a while.  

This barrel was used for imported olive oil, then recycled into a rain barrel.    
Basil, cilantro, oregano and mint in large planters round out my kitchen garden.  I'm looking forward to July to begin my harvest!  I'll post again later in the summer, especially the straw bale, to show you how things came out!


Wednesday, May 7, 2014

It's Wedding Season...Time to Make Bridal Shower Cards!

There are 7...that's right -- 7, "Save the Date" cards on my 'fridge.  It's Wedding Season again, and I've been invited to a few bridal showers this Spring.  After shopping for the gifts (and wrapping them), it is time to make a card!

I saw something I liked in a store for about $8.00, but thought I could mimic it with materials I had in my studio.  So, I snapped a quick pic on my cell phone and gathered up supplies.


Distress Ink in dusty concord, with a JudiKins duster to apply the ink, is the right color palette for this card.


I selected a 5" x 7" card in light purple, with a matching envelope, and a few favorite wedding/shower- themed rubber stamps.


A spool of ribbon and a little flat-backed 'bling' would help finish things. I couldn't decide which gem to use -- the oval pearl or the large crystal, so I waited until I had everything put together before making up my mind.


I started by tracing out the pattern for a flip flop on thin cardboard.  While it wasn't to scale (unless you're about five years old), you can tell what it is, right?  Then I found sparkly white paper in my stash and opted to use it.  I traced carefully around my flip flop on the back side of the paper, then cut it out.


The paper alone was a bit boring, so I decided to emboss it with an overall design, using a Darice folder and my Cuttlebug.

I dusted the edges of the card with ink, stamped my greetings inside and out, and then assembled the flip flop with a little tacky glue, attaching it to the front of the card with a tape runner.  As you can see, the pearl beat out the crystal, in part because I used glitter paper.  The pearl makes it look more sophisticated.


Of course, artwork isn't finished until it is signed!  I put my personal signature stamp on the back, and I'm ready to go to the shower!


Such an easy card!  And easy to make multiples for all of the showers I'll be attending this year!

Happy Stamping!!

Sunday, April 13, 2014

Quick Zip Bag

Not so long ago, I was 'gifted' a HUGE bag of zippers -- over 300! -- and I've been looking for fun projects to make using some of them.

One of the customers at the shop where I work came in with a purse she bought in  Indonesia, and I was all over it.  It had a top zipper, plus two more zipper pockets on the front, and a long strap so it could be worn over the shoulder or across the chest.  She let me examine it closely so I could see the construction techniques used, particularly how the zippers were applied.  I couldn't wait to rush home and create one for myself.  So here it is!


Now for the step by step instructions:  I used double-sided, pre-quilted fabric so the purse would have some body and did not require lining, but you could make your own quilted fabric with something in your stash, or use a heavier fabric (maybe upholstery weight?) and line it.

Of quilted fabric, cut two  pieces 8 1/2" by 11 1/2" for the front and back, cut one piece 8 1/2" x 4" for pocket A, cut one piece 8 1/2" x 7 1/2" for pocket B.

You will need: thread, 60" of 1" wide nylon or cotton webbing to match your fabric, two 1" D rings, two 1" swivel clips, and 3 zippers to match your fabric, 8" or 9" long.

I used leftover scraps from another project for my zip bag.  I decided to use the 'reverse' side (red print)  for pocket B
Clean finish the raw edges of the bag and pocket pieces.  I used the serger to do this.  

This bag calls for an unusual zipper application that I call the "Inside Out" zipper application.  The first side of the zipper tape is stitched to the top of each pocket with topstitching, but the second side of the zipper tape is stitched right sides together to underlying pocket.  When you flip the pocket into it's finished position, the zipper tape is hidden. 
  
Apply Pocket A to Pocket B using this technique.  Fold under one long edge of Pocket A 1/4" and press well. With the zipper tape right side up, pin the wrong side of the pocket to the zipper tape, being sure that the zipper pull is 1/2" in from the edge of the pocket.  (If you are using a longer zipper, it's o.k. for it to hang off the other side of the pocket, as long as the pull is 1/2" in from one side.  Or you can shorten it to 7 1/2" by using a close zig-zag stitch across the zipper and snipping off the excess.)    Using the zipper foot on the sewing machine, topstitch the pocket to the zipper tape.
  

Draw a placement line on Pocket B, 3 1/4" from the bottom of the pocket.  Lay Pocket A, right sides together, on top of Pocket B, lining up the free edge of the zipper tape on the placement line. In this photo, Pocket A is to the left (the top of Pocket B).  Using the zipper foot, stitch the free edge of the zipper (with the wrong side of the zipper tape up) to Pocket B.
  
Pocket A is laying RST over the top of Pocket B when stitching down the second part of the zipper tape.   
Now flip Pocket A down over the bottom of Pocket B.  Machine baste along the bottom edges to hold Pocket A to the bottom of Pocket B.

Apply the zipper to Pocket B in the same manner:  fold and press under 1/4" on the top of the pocket, pin the pocket to the right side of the zipper tape, being sure the zipper pull is at least 1/2" from the edge of the pocket, and topstitch.  NOTE:  Make sure the zippers on both pockets will open in the same direction.  Draw a placement line 7 1/4" from the bottom of the purse front.  With right sides together, lay the pocket to the bag front, pin the free zipper tape along the placement line, and stitch in place on the wrong side of the zipper tape.

When pinning the pocket to the bag front, the pocket is laying over the top of the bag, and the wrong side of the zipper tape is showing.  
After stitching down the zipper, flip the pocket over, so the wrong side of the pocket is against the right side of the bag front.  Pin the bottom edge of the pocket to the bottom of the purse front.  (Trim off any excess fabric, so the edges are even).  Baste along the sides and bottom of the pocket.

Apply the zipper to the top of the bag front and back.  Clean finish the top edges, fold under 3/8" and press.
Lay the zipper right side up, and place the bag front and back on top of the zipper tape, wrong side down, the right sides of bag facing up.  Align the edges of the bag so they are even, and carefully pin the bag fronts to the zipper tape, making sure the zipper tab is at least 1/2" from the side of the bag.  (A glue stick on the zipper tape or a skinny fusible like Steam a Seam would come in handy here, but a lot of pins will do the job as well.)  Top stitch the zipper to the bag front and back using the zipper foot on your machine.

The zipper is pinned in place, ready for top stitching.  Note that the zipper pulls are 1/2" from the side edge of the bag are facing the same direction.  All of the zippers will open left to right when the bag is finished.  
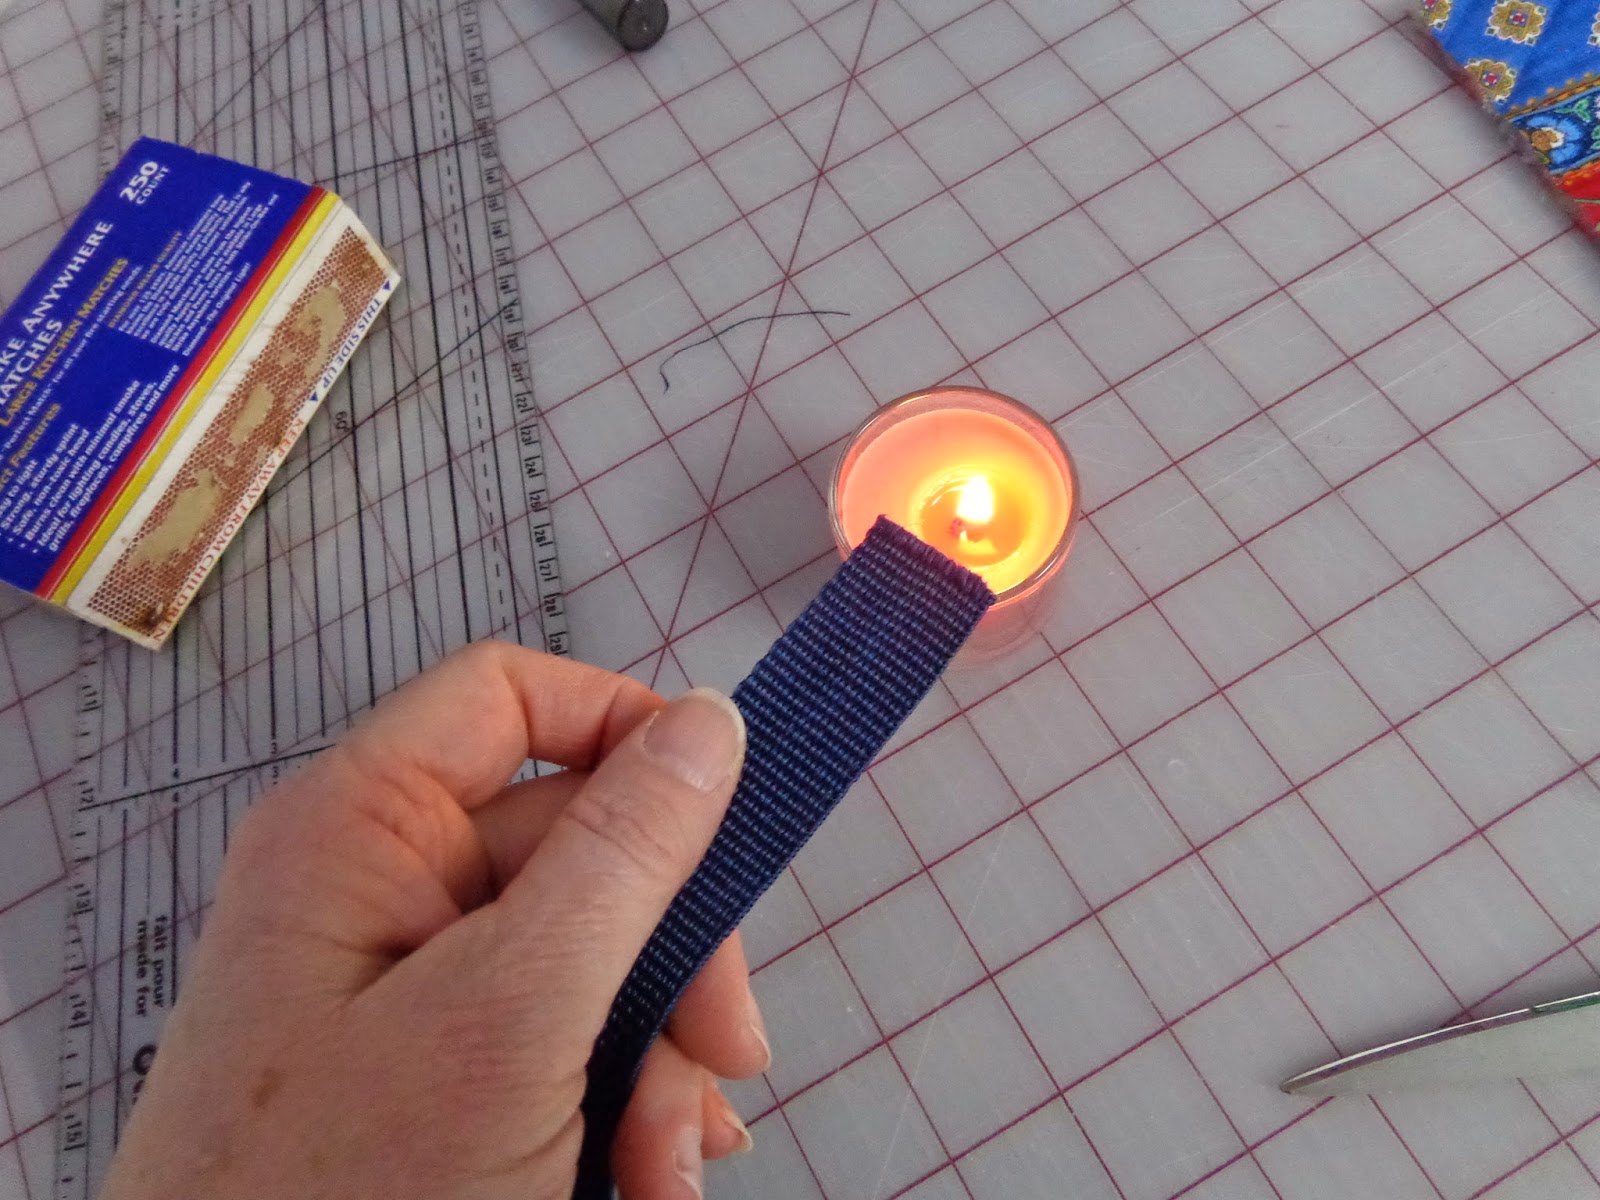
Before you sew the bag together, you need to create the hanging strap on the back of the bag.  If you are using nylon webbing, cut two pieces 2" long.  I use a candle to melt the ends of the webbing so they don't fray.  Carefully hold the webbing about an inch away from the flame for about 10 seconds.  Don't touch the webbing until it cools -- it will burn you when it is hot!  Do this for all cut edges of nylon webbing.  You can use Fray Check on cotton webbing to keep it from fraying.


Draw a placement line 1 1/2" below the zipper on the purse back.  Fold the 2" tab of webbing in half and slip a D ring into the fold.  Pin the tab just below the placement line, one inch from each side edge.  Baste in place.
  

Cut one 8 1/2" piece of webbing and pin along the placement line.  Top stitch a scant 1/4" from both edges of the 8 1/2" strip to secure the D ring tabs in place.


Now you are ready to sew the sides of the bag together.  VERY IMPORTANT:  un-zip the top zipper half way before you pin and sew the sides of the bag, otherwise you'll have difficulty turning it right side out.  Pin the purse front to the back, right sides together, aligning the bottom edges and side seams.  Use a 3/8" seam allowance.  If you used 9" zippers, be careful when stitching over the ends.   After sewing the side seams, you can trim the zipper ends from inside the bag.  Turn bag right side out.

Create a strap using the remaining 1" webbing by stitching it to two swivel clasps.  

It's finished!  This is just the right size for an e-reader, a wallet, cellphone, and a few essentials.


Monday, March 31, 2014

Get Off the Interstate...Small Town America is Waiting for You!

I live on the East Coast, very near the 7th largest Metropolitan Statistical Area in the country. Yes, that's Philadelphia.  And while I've come to enjoy living there, I miss the open spaces and small towns of the Midwest.

I'll admit it -- I'm a Missouri girl.  What does that mean?  It means that I appreciate a freshly-plowed farm, the clack-clack-clack of a freight train rolling down the tracks, and the quirky small towns found on the back roads that don't have names or numbers, but letters to identify them.

Today I drove to one such small town on a quest to find my maternal great-great grandfather's grave.  Eli Reno was buried on his farm, just south of Chester, Illinois, a stone's throw from the Mississippi River.  It's about two hours south of St. Louis.  Some distant relative that I still haven't been able to place in the family tree found his grave site, as well as those of a daughter, son-in-law and grandson, back in the 1970's.  She gave me a few clues to follow in a letter sent to my mother back then.  About four years ago, a Randolph County, Illinois, historian helped me locate the farm my great-great grandfather owned.  She had been to the burial place and found the other headstones, but didn't find Eli's.  She surmised that it had fallen over and become buried in soil or under the native grasses.  She suggested that I return in the winter or early spring, before the fields were planted and the grasses started to grow, and that I bring along some tools to find it.

I packed my car with a hoe, gloves, a cold drink, my notebook and a camera.  I headed down the interstate, but soon got off on Highway 61, then onto Highway H toward Perry County, Missouri.  I drove over the two-lane Chester bridge on Highway 51 into town and stopped at the Visitor's Center. I was greeted by this:

 
For those of you in your 50's, you'll recognize Popeye, a cartoon character that first appeared in 1929 in the "Thimble Theater" comic strip.  Popeye, the strong, hardworking sailorman, soon became the 'star' of the strip.

Popeye, and all of his cartoon friends, were created by Elzie Crisler Segar, born in Chester in 1894, just a year after my grandmother.  They probably went to the same one-room schoolhouse as children.  Elzie took a mail order cartoon course, then moved to Chicago before breaking into the comics.  It's said that he based some of his characters on people he knew from Chester.

The city has embraced his legacy, and is erecting statues of his beloved characters all over the town.
Olive Oyl, Swee' Pea and Eugene, near the Randolph County Courthouse
The Annual Popeye Picnic is held on the weekend following Labor Day every year (www.popeyepicnic.com).  The three-day event is filled with attractions and entertainment for all ages.  A new Popeye Character Trail statue has been unveiled annually since 2006.
Wimpy's statue is near the Popeye Museum.
This is why I love the back roads of our country -- you'll never know what interesting things you find in the small little towns where people settled 150 years ago. It's fun to drive through downtown areas and see how life used to be.  It's interesting to visit local historical homes or museums, or talk to the people who to genealogical research, who are familiar with your family surname and can tell you stories about the town and its people.

Back to my quest.  I found the Reno homestead, which is still being farmed some 150 years later. However, the tree stump that was my landmark in the field was gone.  And after trudging around in the field for nearly two hours, I concluded that the headstones were also missing.  This is unusual, because most farmers are respectful of family burial plots and will plow around them.  I have the telephone number of the owner of the property -- his neighbor was kind enough to call him and ask for permission for me to hike around, and the owner thought the gravestones were still in the field. I'm hoping to talk to him soon and see if he can find them or at least talk to the man who is farming the land and see what happened to them.  At first, I was a little distressed, but then realized that the Catholic tradition of placing ashes on the forehead at the beginning of Lent has some relevance here:  remember man that you are dust, and unto dust you shall return.

And, after further reflection, my ancestry quest won't end because I couldn't locate a headstone.  The bigger question that has still gone unanswered is who were Eli Reno's parents?  It may be one that I never answer.

And while I'm a Missouri girl, my maternal ancestors were from Illinois (by way of Ireland), and now I have a real connection with this little town off the beaten path.  (And I'll have spinach salad in tribute to its native son!)

Monday, March 3, 2014

From Old Sweater to Trendy Handbag

I'm jumping onto the bandwagon of recycling old wool sweaters into felt, and here is my first project:

Felted wool purse, with a leather strap and floral print lining.
My friend Sherrie hooked me up with the Salvation Army store about five miles from my house, where every Wednesday is "Half-Price Day."  So the $3.99 sweaters I found there cost me just two bucks each!  (It's also been a gold mine of leather that I'm recycling into other things...and just wait until you see my latest t-shirt quilt project, made from 50 cent tees!)

The key to felting sweaters is to be absolutely sure they are 100 percent wool -- no nylon, no acrylic, no rabbit fur, no cotton -- just 100 percent wool.  Garments are required to be labeled with the content of the fabric, but if you happen to come across one that isn't labeled, leave it on the rack.  It isn't worth your time or money.  Brands like LLBean, Land's End and Woolrich make wool sweaters, but always check the label. Crew necks and cardigan sweaters will yield the most felted wool...don't forget to look in the men's department for larger sizes!

Some sweaters will felt quicker than others but overall, it's an easy process.  Set your top-loading* washing machine to the hottest water temperature and add about 1/4 cup of inexpensive shampoo or laundry soap like Ivory Snow (but not detergent).  Use a long wash cycle; when finished, throw the sweater into the dryer on high heat until it is just damp.  Check and see if it is sufficiently felted -- shrunken to about half its original size and the fabric is about 1/4" thick.  If not, repeat the wash and dry cycle one (or two) more times.  Remove it from the dryer while it is still damp, pat it flat, and allow it to finish air drying.  (*I tried this in my front-loading washer, it is didn't do well, so I made a run to the local laundromat.  The agitator is the key to felting.)

When the sweater is completely dry, cut it apart along the seams.  Then it's ready to turn into something fun!
The sleeves, cut apart along the seam lines.
This handbag pattern was in Sewing Basket Fun, edited by Barbara Weiland (House of White Birches, 2005).  Designer Lucy Gray made the pattern 12" by 7.5", but I enlarged it a bit to 14" by 8.5".  I cut a rectangle that size from pattern material and rounded the four corners for the purse back/flap piece.  I needed a gusset strip 3" wide by 21" long, but had to piece it because I didn't have a long enough piece of fabric.  After cutting those pieces, I folded the back/flap pattern in half to cut a purse front (7" by 8.5").
The purse pieces, cut from felt:  one back/flap, one front and two 3" strips to make a 21" long gusset.
From a half-yard of coordinating floral print fabric, I cut out all three pieces for the lining.  With the remaining fabric, I cut three 2" wide bias strips.  I sewed them together to create one long piece, then pressed it in half and machine-stitched a single row of gathering stitches along the length.

Pressing the bias trim in half, wrong sides together.
I gathered the bias strip and pinned it into place on the inside of the flap, with about 1/2" of fabric peeking out to the right side.  I basted it in place, being careful that my stitching didn't show through on the right side of the felt.

The ruffle, pinned in place along the inside of the flap.
With wrong sides together, using a 3/8" seam allowance, I stitched the gusset to the back and front of the purse.  Because I'm using felt, I don't have to worry about the cut sides fraying, and thought having the seam allowance exposed looked cute.

Sewing 'wrong sides together' leaves the seam allowances on the outside of the purse.
I decided to add a piece of plastic canvas to the gusset inside, so the bag wouldn't be floppy and could stand on its own.  I cut it 2" wide and 20" long.

With the plastic canvas inserted into the bag, it can stand by itself.
I sewed together the lining pieces using 1/2" seam allowances, and slipped the lining inside the purse, wrong sides together, to check the fit.  I removed the lining and pressed under the raw edges all around about 1/4", so it would lie a scant 1/4" below the edges of the purse.

I slipped the lining back into the bag and pinned it all around the purse edges, then top-stitched it into place, leaving a 2" opening on the flap and around the purse top.  (Note:  the book instructions called for the lining to be hand-sewn into the purse, but I really wanted it to be secure, so I decided to top-stitch it.  If I make another, I may hand-sew it.)

I cut plastic to back the snap closures.
Now it was time to insert a magnetic snap.  After marking the center point of the flap, I marked where to cut two tiny slits in the fabric, and then slipped the 'male' part of the snap into place.  I backed it with the accompanying ring, then added a 1" x 2" piece of thin plastic, to reinforce the snap.  After bending the prongs down, I glued a piece of batting over the whole set-up.  I repeated the procedure for the 'female' side of the snap, then whip-stitched the opening in the lining closed.

Place the 'male' snap on the flap, then mark the spot for the female snap.


The directions suggest using a recycled strap taken from an old purse, but I had some dusty blue suede from a jacket I had recycled, and decided to make my own strap.  It needed to be about 30 inches long, so I sewed a few pieces together to give me the correct length, then sewed two straps, right sides together, along each side.  The strap was attached to the purse with 'D' rings.


The 1 inch wide strips of blue suede were sewn together to create a strap for the purse.  
I really loved this sweater, which was from Land's End, because even though it was made of wool, it had bright, spring-like colors in it.  The floral print, which I found at JoAnn Fabrics, coordinated perfectly.  I'm really happy with the way it turned out.  However, if you are a beginner, I'd skip the ruffle trim...it made a seemingly simple project much harder.

Happy sewing!!