I was out in Missouri just before Easter for a funeral and a few days of visiting with my sister. The guest bed mattress is a little firm for my taste, but I was snuggly warm under a quilt made nearly 50 years ago by my grandmother, Mae Prost.
It's a Sunbonnet Baby, with applique dresses and bonnets and embroidery 'trim.' My grandmother made a few of these, plus Sunbonnet Sue and Overall Boy quilts. But my all-time favorite quilt that she made was the "Trip Around the World."
She made two of these...this one started with red in the center and worked its way through the rainbow to end with purple (she would say 'violet') at the border. The other started with purple in the center and ended with red around the edge. As a little girl, I was fascinated with the print fabrics she selected in each color family, and how small the squares were. My cousin has this one; the other went to my Uncle Jay, who had it buried with him.
My mother loved to make clothing and didn't take up quilting until later in her sewing life. This tiny quilted wall hanging decorated her seashore-themed bathroom.
She made a shower curtain with sailboats and lighthouses on it, too. I have it hanging on the wall of my sewing room.
When my mom died, she left two partially finished quilts...one was called Cream and Sugar, and was a block of the month project made of cream and cafe-au-lait colored fabrics. I added borders to it, had it quilted and gave it to my nephew Chris, her oldest grandson. She had made quilts for all of the granddaughters and had told me that she ought to start on quilts for the boys. She didn't live long enough to make 10 (the number of grandsons she had), but at least this one got finished!
The second unfinished quilt was another block of the month project using 1930's inspired fabrics. She really had trouble with this particular block.
She was working on it while recuperating from a heart attack and I guess the medicine made her a bit loopy. She struggled with the quarter-square triangle blocks and cut them too small. Luckily, the quilt shop had more of the fabric, so I made a run to pick it up and helped her with the math.
After she died, my niece Melissa saw the blocks and really liked them. She asked me if she could have them so she and her mom could complete the quilt. I sketched out a 'modern' layout for the 12 blocks.
I don't know how much work Melissa did on the quilt, but my sister got it finished and sent to the long-arm quilter. I was hoping to finish the binding for it while I was in Missouri, but we couldn't find the piece of fabric she had set aside for the binding. She'll get to it eventually!
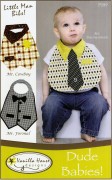
My sister loves to make baby quilts. Many of her friends and acquaintances have been the beneficiary of her enormous stash of fabrics. While I was visiting, I worked on the binding for this bright quilt, made of jelly roll strips and charm squares. (For those of you who don't know, jelly roll strips are pre-cut pieces of fabric 2 1/2" wide by 42" long. Charm squares are precut 5 1/2" squares.)
She had already finished another baby quilt (or wall hanging, I couldn't be sure) that I just loved!
It is made up of 'jars' of aquatic life -- fish, turtles, alligators, frogs and octopi (or octopusses, if you prefer Greek over Latin). Isn't it adorable?!
I bought a kit and fabrics to make a similar quilt, but instead of sea life, my 'jars' will be filled with different kinds of candy and snacks -- jelly beans, peanuts, licorice, and candy corn are just a few of the fabrics in the kit. My sister's quilt has me motivated to find my kit and get it started!
There's one more quilt I'd like to share today...this one was made by my mother's friends to commemorate the 25th anniversary of the American Sewing Guild. When the ASG started in 1978, my mother was among the first in the St. Louis area to join. During the ASG's silver anniversay year, her neighborhood group made a quilt for her, each person designing her own block. My sister, Carol, made the block in the center -- the black sewing machine bordered in red.
Her friends gave my mother this gift to acknowledge her years of service to ASG and her friendship to more than one generation of sewers.
It's funny how my mom, sister and I have 'fallen' into quilting, while my grandmother was known as a quilter. It's another artistic endeavor using the skills we learned as we began sewing clothing.
My daughter has a friend who is expecting her first child this fall...I think she'll be coming out to my house soon, to dig through my stash and design a special gift for a sweet new baby. And so the tradition gets passed along...
Showing posts with label sewing. Show all posts
Thursday, April 23, 2015
Thursday, February 26, 2015
Sewing Heaven
My sewing buddy, Martha, and I got together a few Sundays ago to do some stitching. She was finishing up some pillowcases to donate to ConKerr Cancer, a local charity that the American Sewing Guild supports (http://www.conkerrcancer.org/volunteer/sew-pillowcases). I was working on a gift for my daughter-in-law, whose birthday is fast approaching. Sometimes, sewing is more fun when you have someone to talk to while you work!
But, I couldn't leave her house without asking permission to take a few pictures of her sewing space -- truly a Sewing Heaven! The post about my sewing room organization has been one of the most-viewed since I started my blog (Dec. 3, 2012), and while I love my space, it doesn't compare to Martha's.
She lives with her husband in a lovely home in suburban Philadelphia. Her only daughter is married and has two children, so Martha and her d.h. have the place to themselves. Her sewing space is on the second floor of her home, next to her bedroom. Her room is large enough that she set up a narrow six foot table for my sewing machine on the day I visited
A sewing cabinet for her machines is centered in the room. Her serger is to the left by the window, her sewing machine takes center stage, and she has a machine dedicated to embroidery on the right. With this configuration, she can move around the cabinet to each machine, and use the wall space for storage cabinets.
Some of the cupboards are open, others have doors and drawers. By keeping the storage units white, the room seems spacious. Martha loves to decorate with sewing-themed items, and they are sprinkled throughout her space.
She made a great score when a local fabric store was closing. She was able to buy two pattern cabinets for a very reasonable price, then had a formica top made to cover the tops, giving her a lot of space for her collectibles. The drawers are used for patterns, fabrics, machine manuals and a whole lot more.
I would really love to find a pattern cabinet, but I'm not sure it would fit in my space because of the sloped walls.
A few years ago, Martha splurged on a special piece of sewing equipment, a six needle embroidery machine.
This machine can do some amazing things. Martha helped me monogram the fronts of tote bags that I otherwise I couldn't have done, because this machine has an open throatplate. It can change thread colors without having to stop and re-thread the machine. It also features a very large hoop, which allows her to create large monograms and stitch large designs without re-hooping.
What you don't see here is what's behind the door to the right of this machine...it's a walk-in closet. Martha had it outfitted with shelving so she can store her stash of fabric and supplies sorted into clear plastic bins. It makes it easy for her to find things.
Martha has a comfortable room that would be any sewer's dream. Lucky girl!!
Sunday, February 22, 2015
And baby makes...five!
My lovely niece Mary and her husband recently welcomed her THIRD baby -- another boy! Yea!
When her oldest son was born, I made my 'traditional' Irish print fabric quilt, at his mother's request.
Two years later, when his little brother was born, I decided to make the new baby something fun. And a funny thing happened...Big Brother recognized the animals and wanted to claim it for his own!
I told my niece to let him have it, and Little Boy Two's blanket could be the Irish one. Now that Number Three Son has come along, I wonder if Mary's middle child, who is just two, will have the same reaction, and want this new quilt for himself!
This toddler blankie started life as a 24" by 44" panel called "Barnyard Counting," by Laurie Wisbrun for Robert Kaufman fabrics. My daughter and I found it at a quilt shop in Maine 18 months ago. It has been in my stash, waiting for the next great-nephew to come along.
As with most of my quilts, I started with the sketch. I decided to cut the panel into blocks, which measure 8 1/2" by 11", and mix them with brightly colored prints.
Digging through my stash, I found several prints that would work. After trimming them into the same size block, I began to lay out the rows.
Sewing this together was easy-peasy! The blanket is five blocks wide by four rows long. I added a solid yellow border to tie everything together. The green polka-dot fabric was used on the back of the quilt.
I also made bias binding out of the green polka-dot to finish the edges.
I used my sewing machine to make even lines of quilting, both horizontal and vertical, including stitching in 'the ditch' between the blocks.
It's so stinkin' cute, isn't it?! I just love it, and I hope Number Three Son loves it, too!!
Sunday, February 8, 2015
Something Cute for a Baby Boy
While I make four or five baby quilts every year, sometimes I need a little something to give as a baby gift that isn't as labor intensive or cost expensive.
Now, there are a lot of cute patterns for baby GIRL things, but not so many for baby BOYS. Maybe it's because I have three sons, but I get a little frustrated when I find so much designed for little girls and nearly nothing I can make for a boy. Then, while on vacation in Branson, Missouri, last fall, my sister and I popped into a very nice quilt shop, Quilts and Quilts (http://www.quiltsandquilts.com/).
BINGO! I found the cutest 'boy' project that doesn't take much time or fabric.

The fabric requirements are minimal: 1/3 of a yard for the bib, a fat quarter for the scarf, and a small scrap for the star. Notions include thread, three buttons and snaps or velcro.
While her pattern is great, I tend to tweak things a little, sometimes to save time, sometimes because it makes more sense from a construction point-of-view. I did that in this case.
The pattern for the 'shirt' has two pieces, which are overlapped and stitched together on the back side of the bib. Instead, I taped the pattern pieces together and cut just one front and one lining piece from a lightweight denim.
Two front pieces can be taped together to make just one for easier construction. Use medical tape, and you can always take the pieces apart later! |
After sewing the bandana, right sides together to the bib front, you layer the bandana 'lining' right sides together and stitch the two neckerchief pieces together. |
Close up of edge-stitching |
The faux 'pocket' was stitched down on the lower right-hand side of the bib. It's a cute little detail that makes the bib look like a shirt.
I found three blue buttons in my stash...red would have been cuter, but alas, there were none in the button box. The placement of the buttons was measured from the bottom up because the neckerchief covers a bit of neckline.
Zig-zag stitching the point of a star is tricky! |
The star 'badge' took the most time. There was a scrap of fabric in my stash just the right color. I used fusible web (wonder-under) to hold it in place so it could be appliqued. I used a 30 weight rayon embroidery thread to match. Turning the corner at the point of the star was a bit tricky...I think I should have practiced that a few times before I did it on the bib, but unless you're looking really close, I don't think you'd notice!
The pattern called for snaps or velcro at the neckline, and behold, I found red velcro in my stash!
OMG!! Red velcro! |
Mr. Businessman will be next!!
A little footnote about Quilts and Quilts. It's a locally owned and operated business in Branson, Mo., with three generations of the same family working in the shop. On February 29, 2012, the shop was hit by a tornado and destroyed. The owner found a new location immediately, and the shop re-opened just FIVE weeks later. They carry 14,000 bolts of fabric and over 2,000 patterns. The staff is so knowledgeable, it is a pleasure to shop there. Check out their on-line store!
Thursday, January 22, 2015
R-TV Revisited -- Making an iMovie
Most of my friends don't know that I have a Bachelors of Science in Radio-Television from Southern Illinois University - Carbondale. I started my professional life as a radio newscaster before jumping to public/media relations. I do admit I miss those news-gathering days.
I joined the American Sewing Guild many years ago -- it is a national organization that promotes sewing as an art and life skill. But really, it is a group of (mostly) women who meet on a local level to share the common bond of sewing. We welcome beginners and experienced sewers, and have a lot of fun at monthly meetings and chapter events. One of my favorite activities is Sewing Camp, five days of uninterrupted sewing, held each year in May by the Philadelphia Chapter. It's like a sleep-over party for adults!
This year, the national organization is sponsoring a contest, asking individuals or groups to submit videos on the theme of "What ASG Means to Me." Given my background, I couldn't resist.
For the last few years, I have been collecting and sorting through family genealogical papers and photos. My grandmother didn't throw anything away, so I have a pretty good stack of letters, some dating back to 1870, newspaper articles and photographs. I also have some first-person accounts about various relatives. Then, a woman approached my sister after church one Sunday, introduced herself and said "I think we may be related." Sure enough, she was! I met her and two of her cousins for dinner, and they were kind enough to bring along what family genealogy and photos they had to share with me.
When I starting thinking about producing a video, I decided to take a unique approach and write a story about how sewing has been passed down from generation to generation of women in my family. I drafted a script and began pulling together photos to tell the story, but didn't know how I would make it into a video. (I should tell you that I'm not much of a techie.)
My young friend, Niyi, was happy to help. He downloaded iMovie onto my iphone, and gave me a quick lesson on how to drop in photos, add music and record my voice. Under his direction, I learned the basics of putting photos to text, and then played around with iMovie until I had something I was pleased with.
Here is the finished product:
I can't believe how easy it was to use iMovie. Yes, there were some limitations. For instance, I wanted to start with a black screen and fade up to my first video clip, but couldn't figure out how to do that or if it was possible with iMovie. And I wanted the music to begin with the first photo, but could get that to work either, so it's under the entire video. Minor things that I don't think affected the overall video. Maybe if I play around some more, I'll figure those things out.
Now that I know what I'm doing, I hope to use it again! I see tutorials in my future!
And here's a request...if you are so inclined, would you please share this video with someone you think would enjoy it? This is a competition, after all, and the video with the most views by June 15, 2015, will win a prize for the video and for their ASG Chapter. Thanks in advance for your help!
I joined the American Sewing Guild many years ago -- it is a national organization that promotes sewing as an art and life skill. But really, it is a group of (mostly) women who meet on a local level to share the common bond of sewing. We welcome beginners and experienced sewers, and have a lot of fun at monthly meetings and chapter events. One of my favorite activities is Sewing Camp, five days of uninterrupted sewing, held each year in May by the Philadelphia Chapter. It's like a sleep-over party for adults!
All packed up for Sewing Camp! |
Me, with my fourth cousins! |
When I starting thinking about producing a video, I decided to take a unique approach and write a story about how sewing has been passed down from generation to generation of women in my family. I drafted a script and began pulling together photos to tell the story, but didn't know how I would make it into a video. (I should tell you that I'm not much of a techie.)
My young friend, Niyi, was happy to help. He downloaded iMovie onto my iphone, and gave me a quick lesson on how to drop in photos, add music and record my voice. Under his direction, I learned the basics of putting photos to text, and then played around with iMovie until I had something I was pleased with.
Here is the finished product:
I can't believe how easy it was to use iMovie. Yes, there were some limitations. For instance, I wanted to start with a black screen and fade up to my first video clip, but couldn't figure out how to do that or if it was possible with iMovie. And I wanted the music to begin with the first photo, but could get that to work either, so it's under the entire video. Minor things that I don't think affected the overall video. Maybe if I play around some more, I'll figure those things out.
Now that I know what I'm doing, I hope to use it again! I see tutorials in my future!
And here's a request...if you are so inclined, would you please share this video with someone you think would enjoy it? This is a competition, after all, and the video with the most views by June 15, 2015, will win a prize for the video and for their ASG Chapter. Thanks in advance for your help!
Sunday, April 13, 2014
Quick Zip Bag
Not so long ago, I was 'gifted' a HUGE bag of zippers -- over 300! -- and I've been looking for fun projects to make using some of them.
One of the customers at the shop where I work came in with a purse she bought in Indonesia, and I was all over it. It had a top zipper, plus two more zipper pockets on the front, and a long strap so it could be worn over the shoulder or across the chest. She let me examine it closely so I could see the construction techniques used, particularly how the zippers were applied. I couldn't wait to rush home and create one for myself. So here it is!
Now for the step by step instructions: I used double-sided, pre-quilted fabric so the purse would have some body and did not require lining, but you could make your own quilted fabric with something in your stash, or use a heavier fabric (maybe upholstery weight?) and line it.
Of quilted fabric, cut two pieces 8 1/2" by 11 1/2" for the front and back, cut one piece 8 1/2" x 4" for pocket A, cut one piece 8 1/2" x 7 1/2" for pocket B.
You will need: thread, 60" of 1" wide nylon or cotton webbing to match your fabric, two 1" D rings, two 1" swivel clips, and 3 zippers to match your fabric, 8" or 9" long.
Now flip Pocket A down over the bottom of Pocket B. Machine baste along the bottom edges to hold Pocket A to the bottom of Pocket B.
Apply the zipper to Pocket B in the same manner: fold and press under 1/4" on the top of the pocket, pin the pocket to the right side of the zipper tape, being sure the zipper pull is at least 1/2" from the edge of the pocket, and topstitch. NOTE: Make sure the zippers on both pockets will open in the same direction. Draw a placement line 7 1/4" from the bottom of the purse front. With right sides together, lay the pocket to the bag front, pin the free zipper tape along the placement line, and stitch in place on the wrong side of the zipper tape.
After stitching down the zipper, flip the pocket over, so the wrong side of the pocket is against the right side of the bag front. Pin the bottom edge of the pocket to the bottom of the purse front. (Trim off any excess fabric, so the edges are even). Baste along the sides and bottom of the pocket.
Apply the zipper to the top of the bag front and back. Clean finish the top edges, fold under 3/8" and press.
Lay the zipper right side up, and place the bag front and back on top of the zipper tape, wrong side down, the right sides of bag facing up. Align the edges of the bag so they are even, and carefully pin the bag fronts to the zipper tape, making sure the zipper tab is at least 1/2" from the side of the bag. (A glue stick on the zipper tape or a skinny fusible like Steam a Seam would come in handy here, but a lot of pins will do the job as well.) Top stitch the zipper to the bag front and back using the zipper foot on your machine.
Draw a placement line 1 1/2" below the zipper on the purse back. Fold the 2" tab of webbing in half and slip a D ring into the fold. Pin the tab just below the placement line, one inch from each side edge. Baste in place.
Cut one 8 1/2" piece of webbing and pin along the placement line. Top stitch a scant 1/4" from both edges of the 8 1/2" strip to secure the D ring tabs in place.
Now you are ready to sew the sides of the bag together. VERY IMPORTANT: un-zip the top zipper half way before you pin and sew the sides of the bag, otherwise you'll have difficulty turning it right side out. Pin the purse front to the back, right sides together, aligning the bottom edges and side seams. Use a 3/8" seam allowance. If you used 9" zippers, be careful when stitching over the ends. After sewing the side seams, you can trim the zipper ends from inside the bag. Turn bag right side out.
Create a strap using the remaining 1" webbing by stitching it to two swivel clasps.
It's finished! This is just the right size for an e-reader, a wallet, cellphone, and a few essentials.
One of the customers at the shop where I work came in with a purse she bought in Indonesia, and I was all over it. It had a top zipper, plus two more zipper pockets on the front, and a long strap so it could be worn over the shoulder or across the chest. She let me examine it closely so I could see the construction techniques used, particularly how the zippers were applied. I couldn't wait to rush home and create one for myself. So here it is!
Now for the step by step instructions: I used double-sided, pre-quilted fabric so the purse would have some body and did not require lining, but you could make your own quilted fabric with something in your stash, or use a heavier fabric (maybe upholstery weight?) and line it.
Of quilted fabric, cut two pieces 8 1/2" by 11 1/2" for the front and back, cut one piece 8 1/2" x 4" for pocket A, cut one piece 8 1/2" x 7 1/2" for pocket B.
You will need: thread, 60" of 1" wide nylon or cotton webbing to match your fabric, two 1" D rings, two 1" swivel clips, and 3 zippers to match your fabric, 8" or 9" long.
I used leftover scraps from another project for my zip bag. I decided to use the 'reverse' side (red print) for pocket B |
Clean finish the raw edges of the bag and pocket pieces. I used the serger to do this.
This bag calls for an unusual zipper application that I call the "Inside Out" zipper application. The first side of the zipper tape is stitched to the top of each pocket with topstitching, but the second side of the zipper tape is stitched right sides together to underlying pocket. When you flip the pocket into it's finished position, the zipper tape is hidden.
Apply Pocket A to Pocket B using this technique. Fold under one long edge of Pocket A 1/4" and press well. With the zipper tape right side up, pin the wrong side of the pocket to the zipper tape, being sure that the zipper pull is 1/2" in from the edge of the pocket. (If you are using a longer zipper, it's o.k. for it to hang off the other side of the pocket, as long as the pull is 1/2" in from one side. Or you can shorten it to 7 1/2" by using a close zig-zag stitch across the zipper and snipping off the excess.) Using the zipper foot on the sewing machine, topstitch the pocket to the zipper tape.
Draw a placement line on Pocket B, 3 1/4" from the bottom of the pocket. Lay Pocket A, right sides together, on top of Pocket B, lining up the free edge of the zipper tape on the placement line. In this photo, Pocket A is to the left (the top of Pocket B). Using the zipper foot, stitch the free edge of the zipper (with the wrong side of the zipper tape up) to Pocket B.
Pocket A is laying RST over the top of Pocket B when stitching down the second part of the zipper tape. |
Apply the zipper to Pocket B in the same manner: fold and press under 1/4" on the top of the pocket, pin the pocket to the right side of the zipper tape, being sure the zipper pull is at least 1/2" from the edge of the pocket, and topstitch. NOTE: Make sure the zippers on both pockets will open in the same direction. Draw a placement line 7 1/4" from the bottom of the purse front. With right sides together, lay the pocket to the bag front, pin the free zipper tape along the placement line, and stitch in place on the wrong side of the zipper tape.
When pinning the pocket to the bag front, the pocket is laying over the top of the bag, and the wrong side of the zipper tape is showing. |
Apply the zipper to the top of the bag front and back. Clean finish the top edges, fold under 3/8" and press.
Lay the zipper right side up, and place the bag front and back on top of the zipper tape, wrong side down, the right sides of bag facing up. Align the edges of the bag so they are even, and carefully pin the bag fronts to the zipper tape, making sure the zipper tab is at least 1/2" from the side of the bag. (A glue stick on the zipper tape or a skinny fusible like Steam a Seam would come in handy here, but a lot of pins will do the job as well.) Top stitch the zipper to the bag front and back using the zipper foot on your machine.
Draw a placement line 1 1/2" below the zipper on the purse back. Fold the 2" tab of webbing in half and slip a D ring into the fold. Pin the tab just below the placement line, one inch from each side edge. Baste in place.
Cut one 8 1/2" piece of webbing and pin along the placement line. Top stitch a scant 1/4" from both edges of the 8 1/2" strip to secure the D ring tabs in place.
Create a strap using the remaining 1" webbing by stitching it to two swivel clasps.
It's finished! This is just the right size for an e-reader, a wallet, cellphone, and a few essentials.
Monday, March 3, 2014
From Old Sweater to Trendy Handbag
I'm jumping onto the bandwagon of recycling old wool sweaters into felt, and here is my first project:
My friend Sherrie hooked me up with the Salvation Army store about five miles from my house, where every Wednesday is "Half-Price Day." So the $3.99 sweaters I found there cost me just two bucks each! (It's also been a gold mine of leather that I'm recycling into other things...and just wait until you see my latest t-shirt quilt project, made from 50 cent tees!)
The key to felting sweaters is to be absolutely sure they are 100 percent wool -- no nylon, no acrylic, no rabbit fur, no cotton -- just 100 percent wool. Garments are required to be labeled with the content of the fabric, but if you happen to come across one that isn't labeled, leave it on the rack. It isn't worth your time or money. Brands like LLBean, Land's End and Woolrich make wool sweaters, but always check the label. Crew necks and cardigan sweaters will yield the most felted wool...don't forget to look in the men's department for larger sizes!
Some sweaters will felt quicker than others but overall, it's an easy process. Set your top-loading* washing machine to the hottest water temperature and add about 1/4 cup of inexpensive shampoo or laundry soap like Ivory Snow (but not detergent). Use a long wash cycle; when finished, throw the sweater into the dryer on high heat until it is just damp. Check and see if it is sufficiently felted -- shrunken to about half its original size and the fabric is about 1/4" thick. If not, repeat the wash and dry cycle one (or two) more times. Remove it from the dryer while it is still damp, pat it flat, and allow it to finish air drying. (*I tried this in my front-loading washer, it is didn't do well, so I made a run to the local laundromat. The agitator is the key to felting.)
When the sweater is completely dry, cut it apart along the seams. Then it's ready to turn into something fun!
This handbag pattern was in Sewing Basket Fun, edited by Barbara Weiland (House of White Birches, 2005). Designer Lucy Gray made the pattern 12" by 7.5", but I enlarged it a bit to 14" by 8.5". I cut a rectangle that size from pattern material and rounded the four corners for the purse back/flap piece. I needed a gusset strip 3" wide by 21" long, but had to piece it because I didn't have a long enough piece of fabric. After cutting those pieces, I folded the back/flap pattern in half to cut a purse front (7" by 8.5").
From a half-yard of coordinating floral print fabric, I cut out all three pieces for the lining. With the remaining fabric, I cut three 2" wide bias strips. I sewed them together to create one long piece, then pressed it in half and machine-stitched a single row of gathering stitches along the length.
I gathered the bias strip and pinned it into place on the inside of the flap, with about 1/2" of fabric peeking out to the right side. I basted it in place, being careful that my stitching didn't show through on the right side of the felt.
With wrong sides together, using a 3/8" seam allowance, I stitched the gusset to the back and front of the purse. Because I'm using felt, I don't have to worry about the cut sides fraying, and thought having the seam allowance exposed looked cute.
I decided to add a piece of plastic canvas to the gusset inside, so the bag wouldn't be floppy and could stand on its own. I cut it 2" wide and 20" long.
I sewed together the lining pieces using 1/2" seam allowances, and slipped the lining inside the purse, wrong sides together, to check the fit. I removed the lining and pressed under the raw edges all around about 1/4", so it would lie a scant 1/4" below the edges of the purse.
I slipped the lining back into the bag and pinned it all around the purse edges, then top-stitched it into place, leaving a 2" opening on the flap and around the purse top. (Note: the book instructions called for the lining to be hand-sewn into the purse, but I really wanted it to be secure, so I decided to top-stitch it. If I make another, I may hand-sew it.)
Now it was time to insert a magnetic snap. After marking the center point of the flap, I marked where to cut two tiny slits in the fabric, and then slipped the 'male' part of the snap into place. I backed it with the accompanying ring, then added a 1" x 2" piece of thin plastic, to reinforce the snap. After bending the prongs down, I glued a piece of batting over the whole set-up. I repeated the procedure for the 'female' side of the snap, then whip-stitched the opening in the lining closed.
The directions suggest using a recycled strap taken from an old purse, but I had some dusty blue suede from a jacket I had recycled, and decided to make my own strap. It needed to be about 30 inches long, so I sewed a few pieces together to give me the correct length, then sewed two straps, right sides together, along each side. The strap was attached to the purse with 'D' rings.
I really loved this sweater, which was from Land's End, because even though it was made of wool, it had bright, spring-like colors in it. The floral print, which I found at JoAnn Fabrics, coordinated perfectly. I'm really happy with the way it turned out. However, if you are a beginner, I'd skip the ruffle trim...it made a seemingly simple project much harder.
Happy sewing!!
Felted wool purse, with a leather strap and floral print lining. |
The key to felting sweaters is to be absolutely sure they are 100 percent wool -- no nylon, no acrylic, no rabbit fur, no cotton -- just 100 percent wool. Garments are required to be labeled with the content of the fabric, but if you happen to come across one that isn't labeled, leave it on the rack. It isn't worth your time or money. Brands like LLBean, Land's End and Woolrich make wool sweaters, but always check the label. Crew necks and cardigan sweaters will yield the most felted wool...don't forget to look in the men's department for larger sizes!
Some sweaters will felt quicker than others but overall, it's an easy process. Set your top-loading* washing machine to the hottest water temperature and add about 1/4 cup of inexpensive shampoo or laundry soap like Ivory Snow (but not detergent). Use a long wash cycle; when finished, throw the sweater into the dryer on high heat until it is just damp. Check and see if it is sufficiently felted -- shrunken to about half its original size and the fabric is about 1/4" thick. If not, repeat the wash and dry cycle one (or two) more times. Remove it from the dryer while it is still damp, pat it flat, and allow it to finish air drying. (*I tried this in my front-loading washer, it is didn't do well, so I made a run to the local laundromat. The agitator is the key to felting.)
When the sweater is completely dry, cut it apart along the seams. Then it's ready to turn into something fun!
The sleeves, cut apart along the seam lines. |
The purse pieces, cut from felt: one back/flap, one front and two 3" strips to make a 21" long gusset. |
Pressing the bias trim in half, wrong sides together. |
The ruffle, pinned in place along the inside of the flap. |
Sewing 'wrong sides together' leaves the seam allowances on the outside of the purse. |
With the plastic canvas inserted into the bag, it can stand by itself. |
I slipped the lining back into the bag and pinned it all around the purse edges, then top-stitched it into place, leaving a 2" opening on the flap and around the purse top. (Note: the book instructions called for the lining to be hand-sewn into the purse, but I really wanted it to be secure, so I decided to top-stitch it. If I make another, I may hand-sew it.)
I cut plastic to back the snap closures. |
Place the 'male' snap on the flap, then mark the spot for the female snap. |
The directions suggest using a recycled strap taken from an old purse, but I had some dusty blue suede from a jacket I had recycled, and decided to make my own strap. It needed to be about 30 inches long, so I sewed a few pieces together to give me the correct length, then sewed two straps, right sides together, along each side. The strap was attached to the purse with 'D' rings.
The 1 inch wide strips of blue suede were sewn together to create a strap for the purse. |
Happy sewing!!
Subscribe to:
Posts (Atom)