Friday, December 21, 2012

Let's Make Christmas Cards, FAST!!

 
I knew this would happen...Christmas is sneaking up on me, and I have so many little things yet to finish.  I realized last night that I should have mailed Christmas cards a week ago.  Even if I get them into the mail today, I'm not sure they will arrive by Monday.  Oh, well...I won't let that stop me!  With the advent of email and text messaging, people don't get much 'real' mail anymore, and I want to be a person that doesn't stop sending cards (and letters) just because. 
 
So, I need to make some cards, FAST!  Lucky for me, my sister sent me a box of mostly Christmas stamps about a month ago.  Great -- something new in my stamp collection to use!!  She found them for a dollar each at a thrift store...some still with price tags and never used!  After looking through my idea book, this is what I came up with. 


I started by cutting 8.5" by 11" blue cardstock in half lengthwise, to  make the card a 'top fold' style.  After folding the cards in half, I used Versamark ink to stamp the large snowflake (Hampton Arts, studio 6) in the upper third of the card.  I tried out several different colors of embossing powder, and decided to mix my own custom blend.  I used two parts Silver Pearl by Personal Stamp Exchange, and one part each white by Jo-Ann CraftEssentials, and Pearl by Judi-Kins.  The blend of finer powder (the silver) and coarse grains (white) created a happy accident...my snowflakes look 'distressed.' 

I worked assembly-line fashion...after cutting and folding all of the paper, I stamped all of the snowflakes, and sprinkled them with embossing powder.  When I was finished stamping, I went back and tapped off the excess embossing powder, and heat-embossed each card, one after another.  I made a template from a scrap of cardstock (green in the photo) and traced the shape on the inside of each card front.  Using scissors, I cut each card, to give it a shorter, rounded front. 
It's hard to stamp a greeting on dark paper, so I wanted to add a white liner inside the card.  To dress it up, I decided to run it through a dry embossing folder.  I just wanted the bottom 2 inches of cardstock embossed, so I inserted the cardstock only that far into the folder.  I trimmed the liner to 5 1/4 " by 4", so it was a smidge smaller than the card.  The result was exactly what I had in mind.
 
I added a greeting (Stamp City, 1999) and the cards were finished!  It took me less than two hours to create 24 cards! 
 
Well, they were almost finished.  Someone once said 'Artwork isn't finished until it is signed.'  A long time ago, I found a stamp with my name on it.  Now, everyone who gets one of my cards knows that I took the time to make it myself. 
 
Need to make about 30 more cards to finish up my mailing list...you can bet the next design will be a simple as this one! 
Even if you aren't on my mailing list, I hope you have a wonderful Christmas!!
 

Monday, December 17, 2012

It isn't Christmas without Cookies!

It's that time of year again...time to dig out all of my cookies cutters, baking sheets, cooling racks and large crock bowls to mix up several batches of Christmas cookies!

I like to bake, but as my children have grown older, I do it less and less (fewer class parties and lazy weekends with nothing to do).  While I may mix up a small batch of cookies once in a while, the Christmas season brings on a flurry of baking.  This year, my daughter and future daughter-in-law joined me in the kitchen to help.

Today, I'm going to share a treasured family recipe that has become our favorite -- Grandma Coerver's German Chocolate Cookies. 


Grandma Hilda Coerver
When I was a child, my Grandma Coerver would come and stay with us for a couple of weeks after Thanksgiving.  Walking into the house after school was heavenly -- she had been baking, and the house smelled delicious!  Her German chocolate cookies were the best.  The recipe is a little labor-intensive, but it's worth it!  Here goes!
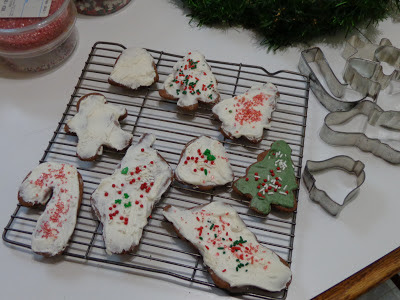
They don't look 'magazine worthy,' but they taste amazing!
 
Grandma Coerver's German Chocolate Cookies
1 cup of butter (no substitutes), softened
2 cups white sugar
6 ounces Baker's German (Sweet) Chocolate - this comes in a 4 ounce box in the baking section
2 large eggs*, fork beaten
2 teaspoons baking powder
3 1/2 cups all purpose flour
 
Put butter in a large bowl.  Allow it to come to room temperature, or microwave it for 20 seconds to soften.  Add sugar, and cream together using a spoon until well blended. 
 
Finely grate the chocolate into the bowl.  Stir well to incorporate the chocolate into the butter mixture.  Break two eggs into a separate bowl and beat with a fork for a minute or two.  Add to the butter mixture and stir well. [*A note about eggs.  Size does matter...if you use 'medium' eggs, start with less flour (2 3/4 cups); if you use 'extra large' eggs, you may need to add more flour (4 cups or more) to create a stiff dough.]   
 
On a piece of waxed paper or in a separate bowl, sift together the flour and baking powder.  Add to the butter mixture, and stir well to form a ball of dough.  The mixture may be somewhat dry...you may need to finish blending the dry ingredients by hand to create the dough ball.  When all of the flour is incorporated and a ball of dough is formed, cover the bowl and place in the refrigerator for 3-4 hours or more.      
 
After dough has chilled, pre-heat the oven to 350 degrees.  Grease or spray cookie sheets.  Sprinkle a little flour on the countertop.  Take about 1/3 of the dough from the bowl, and flatten it a bit with your hands.  Use a floured rolling pin to roll the dough out to about 1/4 inch thickness, sprinkling more flour on the underside of the dough to keep it from stitcking to the countertop, if needed.  Cut dough with cookie cutters, and transfer to the greased baking sheets.  Bake for about 12-15 minutes, until edges of cookies just start to turn brown.  Remove the cookie sheet and let cool on a wire rack.  Continue with remaining dough, chilling the scraps of dough if needed.  Frost and decorate cookies as desired.  Makes 4+ dozen, depending on the size of your cutters.   
 
It took me a few years to figure out a technique that makes cutting out the cookies go a bit faster.  After I roll out the dough, I arrange ALL of my cutters on the dough, nestling them up against each other, before I press down.  This lets me 'cut to advantage' -- it creates fewer scraps, and speeds things along.  
 
 
 I have amassed a large collection of cookie cutters, but this easily would work with three or four.
 
You could frost the cookies with store-bought icing, but if you'd like to make your own, here is the Wilton buttercream frosting recipe:
 
1 teaspoon vanilla
2 Tablespoons of milk (or water)
1 cup butter (or hard Crisco)
1 pound powdered sugar (about 4-5 cups)
1 Tablespoon of meringue powder (optional)
 
Put vanilla, milk and butter in a mixing bowl, and mix on medium-low speed until blended.  Slowly add powdered sugar, one cup at a time, beating on medium-high speed, until you reach the desired spreading consistency (at least four cups of suger, more if you desire a stiffer frosting), scraping bowl occasionally.  Beat another minute until smooth and creamy. 
 
I have other, old family cookie recipes that I make every year, and some newer ones that have become favorites of my kids and husband, and I'm sure many of you have as well.  I encourage you to get your hands dirty an make up at least one batch of home-made goodness this year!
 
Yum!


Thursday, December 13, 2012

A Little Christmas Gift...

With all of the beading, sewing and crafting that I enjoy, you'd think that every gift I give is handmade.  Alas, that isn't the case.  Although I put a lot of time and materials (read:  money) into the things that I create, sometimes I feel like they just don't measure up to what other people give.  I question whether my stuff reads 'expensive' enough for gift-giving.  It holds me back from gifting a lot of what I make. 

However, I'm hopeful that the little Christmas gift I just finished measures up.  I'm attending a brunch on Sunday, and we're supposed to bring a gift in the $20-25 range. 

I found this project in Fons & Porter's Love of Quilting magazine (Nov/Dec 2009).  Designed by Kelly Mueller (www.thewoodenbear.com), it looked like it would take only a couple of hours.  I dug through my stash to find some coordinating Christmas prints.

Fabrics from my stash!
Unfortunately, I didn't have everything I needed, so I made a quick run to Cloth and Bobbin, a small but mighty quilt shop in Narberth, Pennsylvania (www.clothandbobbin.com).  I found a dark green background fabric, a yellow print, and two white on white prints.  They were kind enough to cut fat quarters of what I needed! 
 
I made a copy of the full-sized pattern that was printed in the magazine, and applied fusible webbing to my fabrics. After tracing and trimming the pieces, I fused them in place on the background fabric, and was ready to sew!   
 
Tracing around the pattern pieces on fabric backed with fusible web.

Another reason I love my Bernina Artista 635 -- it has a great blanket stitch!  I can't imagine doing all of the blanket stitching by hand.  What would take hours took me about 20 minutes by machine.   I was able to vary the length and the width of the stitch.  It was much easier to sew around the mustache with a shorter, narrower stitch.  There were two faceted glass buttons in my button jar, and I searched through my embellishments and got lucky -- I had four red jingle bells!  I only needed three to tack on the ends of the praire points, but they do give the pillow an added punch.  The finished pillow is roughly 14 inches by 12 inches.  It took nearly 20 ounces of poly fiberfill to stuff firmly. 
 
 
If I can find a kitchen tea towel in green, I may add the applique to it and include it with the pillow.  So, tell me, do you think this gift is worth $20-$25??


Happy sewing!!

Monday, December 10, 2012

Using One Strand of Beads to Create Three Necklaces

Not too long ago, my daughter and I went to a bead show.  As we browsed the tables, looking a beads and findings, she spied a strand of chunky red coral beads.  She had been searching for a red necklace, and liked the look of these beads, but she didn't have an idea about how to use them. 

Five minutes later, I won an attendance prize -- a $15 gift certificate good for any vendor in the show!  That $14 strand of coral was suddenly 'free'!   

Beads are typically sold on a 16 inch strand, strung on cheap fishing line.  There were 24 coral nuggets on this strand, but my daughter didn't want to simply restring them on beading wire or knot them with silk cord. 

I have a binder of beading ideas that I clipped from magazines and catalogs, and I started my search for ideas there.  This first necklace was based on a design by Jennifer Judd Velasquez, which appeared in Stringing Magazine in the Summer 2009 issue.

 
I used silver-plated chain and some smaller 'rice' shaped coral beads I had in my stash.  I added the 2 mm silver balls between each bead to give them some breathing room.  The beads are strung on a short piece of beading wire, which I crimped to the chain.  The finished neckace is 16.5 inches long.
 

 The second necklace is done up in gold tones, with small, freshwater pearls and vermeil spacers between the coral nuggets.  It looks a little 'dressy.'  I took my inspiration from a similar design by Patricia A. Henry.  Her "Royal Jasper" necklace appeared in the Winter 2007 issue of Stringing Magazine.  The beads toward the back resemble 'paper' beads, but are gold plated.  This necklace is a little longer, with a finished length of 22 inches. 

The final neckace I created with the coral nuggets also resembles a piece found in the Winter 2007 issue of Stringing Magazine (designer unknown).  I love mixing chain with beads, and this allowed me to create a longer necklace using just a few beads.  I used gun metal colored chain in two styles, and picked up some antique silver filiagree beads to help balance the coral.  Although the coral beads are bright red, using the slightly larger silver beads gives them equal weight.  It is hard to see in this photo, but I used 4 mm black Swarovski crystals between the red beads, and 6 mm crystals between the silver beads.  They add just a bit of sparkle to an otherwise 'flat' piece.  I didn't put a clasp on this necklace, because it is 26 inches long.  My daughter wanted a longer piece to wear with sweaters.   
 
 
After finishing all three necklaces, I still had three beads left!  I'm sure I'll find something else to do with them.  And, instead of having just one red necklace, my daughter has three from which to choose, each with its own character -- flirty, formal and fun! 


Monday, December 3, 2012

More Craft Room Organizing Ideas

Take a peek into my studio...rest assured, it doesn't always look this tidy!

I promised more organizing ideas for your craft supplies, but I guess I'm really just sharing what works for me. 

First of all, I am very fortunate to have a room to call my own.  That wasn't always this case in this house.  For the first several years here, all of my supplies were in boxes in the attic, and my sewing machine was put up and taken down many times a month.  When we finally started working on the basement, I was able to carve out some space for a sewing room, and was happy down there for several years. 

But my four children grew up, and the youngest boys weren't so keen on sharing a room when they were home from college, so I gave up my sewing room for my son, and my husband and the boys started roughing out a space for me in the attic. 


My studio is 10 feet by 15 feet, but has sloping ceilings along the 10 foot walls.  I have two windows on the wall facing the street, and a door in the opposite 15 foot wall.  While I would love to have floor to ceiling shelves on all four walls, the sloped ceilings prohibit that, so I've had to make the best of the space.  On the wall between the windows, there is a large computer desk. My embroidery thread racks are up top, along with binders of beading, quilting and sewing projects that I have kept from magazines. I have space for my laptop, and some storage underneath. 

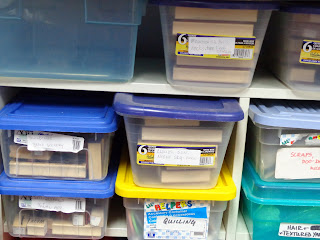
 On the right side of the room, I have a full size dining table, including the leaf, as a cutting/work table.  I used bed risers to make it the right height.  There is plenty of space underneath for Rubbermaid bins (mostly fabric storage) and a bookshelf and plastic drawers provide storage for smaller items. The plastic shoe boxes hold rubber stamps and other craft supplies.  Even though they are clear, I still label everything.    


On the left side of the room, I have two hand-me-down dressers.  The one on the left holds beads
and jewelry making supplies, with the bottom drawer filled with scrapbooking paper and dies for a Cuttlebug die cutting machine.  The one on the right has a whole drawer for buttons, pressing tools, glues and other adhesives, book-binding supplies, and larger sewing equipment.  On top is a two-drawer antique thread box that was my grandmother's.

My sewing table is an island in the center of the room, with space to walk around it on both sides.  It is a little over 6 feet long.  I bought this at Ikea about 20 years ago.  The base is made up of two cabinets -- one has double doors, the other has a single door.  I keep a lot of sewing supplies in these cabinets -- again, stashed in clear shoe boxes, so I can find zippers, velcro, bias tape and cone thread easily.  I keep the sewing notions that I use frequently in that small brown tackle box on top of my sewing table.  It's within easy reach of my machine. 
 Across from my sewing table, next to the door, is a tall bookshelf.  Plastic bins hold more sewing and embroidery supplies, the pizza boxes and binders hold rubber stamps, two other tackle boxes hold beading tools, and there is space on the shelves for some scrapbooking supplies. 

There is another, small bookshelf to the left side of the door, which holds 30 quart Rubbermaid bins of quilting fabrics, t-shirt knits, patterns, and antique linens and laces.

Yes, I've labeled just about everything.  That is the hardest part about moving into a new space...things are not where they used to be.  Although I found a place for everything, I don't want to spend too much time looking for my supplies, so I labeled as much as I could.   
My dear husband (d.h.) had made me two large pegboards for my basement sewing room, but I just didn't have the wall space for them in the attic.  So he kindly offered to cut one down for me, and you see it fits nicely around the window.  (The other one somehow ended up in his workroom!)

I picked up the clear plastic pegboard shelves at two different stores that were going out of business.  These hold ribbons (at the very top), some rubber stamps, punches and scissors, embossing powders, and other papercrafting supplies. 

There are few other things in the room.  A small wooden bookshelf holds sewing, beading, stamping and craft books.  You saw my carousel for rubber stamps and ink in the last post; I also have an Iris cart with other small stamps tucked between the dresser and the bookshelf.  And I have the rocker I bought when my oldest was born, right next to the computer desk.  It's important to have a place for visitors to sit in the studio, because someone is always popping in to chat while I work (or while they are waiting for me to finish mending something for them).  One last little cabinet holds my special things. 

My grandfather was a skilled carpenter, and he built this child-sized cupboard for my mother when she was a girl.  When I was little, my brother painted it white and gave it to me on Christmas.  I played with it for many years, and after I moved out of the house, my mother used it in her sewing room.  I inherited it when she died.  It holds many little sewing related knic-knacs, including my grandmother's sewing basket.  Behind the upper doors are music cd's.  The drawers and lower cabinet are used to store keepsakes and supplies for my letterboxing hobby.

I hope you enjoyed this little tour of my studio, and picked up a few ideas to incorporate into your own crafting space, no matter how big or small.  If you will indulge me, I'd like to reiterate:  label as much as you can, so you don't waste precious time looking for what you need.  Then you'll have more time to craft! 

Now, go make something fast!

Monday, November 12, 2012

Organizing Your Rubber Stamping Supplies

How to find something when you need it!

Not too long ago, I moved from my tiny little basement sewing studio into much bigger space up in the attic of my home. The new room is 10' x 15', but because of the slope of the roof, it has just two 'tall' walls. While I would love to have floor to ceiling shelving on all four walls, that just isn't possible. Further, there are two windows on one 'tall' wall, and the door to the room on the other.
I found that I had to get creative on storage solutions for my rubber stamping supplies (not to mention the sewing and beading stuff).

I like to re-cycle and re-purpose things. One of my favorite places to find storage options is at a store that is closing and selling their displays. When a national bookstore chain was closing, I popped in to see what kind of displays they had, and found this four-sided, spinning unit, with small, divided shelves. I have no idea what was displayed on it, but it is perfect for rubber stamps and ink pads!

     
It takes up just one foot of floor space, but needs about another foot around it so it spins freely. The base was originally 16 inches tall, but my d.h. was kind enough to cut it in half, making the case a better height for me.  
There is plenty of room to store my dozens of stamp pads.  I have this thing about ink -- I want to have every color, so I can match it to cardstock, embellishments or my general mood.  The "color index" cards hang right next to the pads.  It takes just seconds to find the right color for my projects.  There is room for the re-inker bottles, too. 
 
Most of the stamps I store on this display are 'words and sayings' that I use for cards.  I'm a true believer in labeling, so I sorted through the stamps and categorized them, then got out my trusty Casio Label Maker and labeled each shelf.  It really makes finding the right stamp easier!
 
TheNot all, but a lot of the rest of my stamps were sorted into general categories, mostly by holiday.  I ran down to our local pizza shop and sweet-talked them out of a few new boxes, and labeled each one.  I love pizza boxes as a storage solution-- the stamps are in one layer, so you can see everything in the box, and the boxes stack well on the shelf.  When I start to work on Christmas cards in a few weeks, I'll just get out those two boxes, and I can see everything I have to work with.  I enjoy scenic stamping, and had the opportunity to buy series one and two of Stampscapes stamps by Kevin Nakagawa. (http://www.stampscapes.com/home.html)  I keep these stored together -- sorted, of course, by the type of scenery -- in clear plastic shoe boxes.  There are so many really tiny stamps that the pizza boxes didn't work as well as shoe boxes.   
Check back later this week to see the different ways I store embellishments, ribbons, sewing and beading supplies, and try to make the most of my studio space!  Maybe something I have tried will inspire you!   
 

Friday, November 9, 2012

Unsolicited Advice on Little Steps to Organize Your Life

I was browsing on Pinterest the other day, and saw a pin called something like "10 Ways to Organize Your Life and Reduce Stress."  The writer did have some good ideas -- encouraging kids to help out, 'a place for everything and everything in its place,' doing a quick wipe down of the bathroom before going to bed every night.  Some of her suggestions, though, didn't work for me, and I realized that organizing your life is not a 'one size fits all' proposition.  As you move through various stages of adulthood, the demands on your time change, and you may have to re-think how you approach a certain task.  This must be why women's magazines run "Organize Your Life!" articles every year.

So, for what's it worth, here are some of the organizing (and de-stressing) tips that have worked for me and my family.

1)  "I cook, you clean."  This is very simple.  Whoever cooks the meal gets to put their feet up after dinner, and the other partner cleans up the kitchen.  What's even greater:  when you have kids, they can help the dish washer, and once they hit, oh, about 12 or 13, they can do all of the dishes themselves, while Mom and Dad both put their feet up. 

For those of you who aren't married yet, I suggest that you start "I cook, you clean" from the very beginning.  Your partner will probably want to hang out with you in the kitchen anyway -- just hand them a towel and ask them to help.   

2)  Prepare brown bag lunches the night before (right after you eat dinner is even better).  There are several good reasons to take your lunch to work (or have your kids take a lunch to school.)  Number 1:  You can control what you eat -- pack healthy foods, things you like, things you know your kids will eat.  Number 2:  You will save a ton of money! 

By fixing lunch(es) the night before, you eliminate the effort and thought you have to put into the task when you're trying to get out the door in the morning, increasing the chance that you'll actually make and take a lunch.  ... Brown...


Another bonus...once they are in elementary school, your kids can help, too.  Start them off writing their names on the bags, and work them up to bagging snacks, dessert and sandwiches.  By middle school, they'll be capable of making their own lunch.

3)  Pay your bills on-line.  Everything I know about computers I've learned from someone else.  I once met a church business manager who convinced me that paying bills through my bank's website is a smart thing to do.

I usually put the bills in a file folder as they come in, and twice a month I sit down and pay several at once.  I have set up a few bills that have the same "amount due" each month (like my cell phone and 'balanced budget' energy bill) to pay automatically on the same day each month.  But the beauty of on-line bill paying is that you can go on-line the day you get the bill in the mail, and schedule the bill to be paid on its due date, and then forget about it.  Or, you can schedule the bills to be paid on your payday, and not worry if there will still be money in your account when a payment clears. 

I convinced my 30-something nephew that he needed to pay bills on-line.  He would write out the check and put a stamp on the envelope, then tuck the bill in his briefcase or stick it in his car, and forget to mail it.  Those late payments started adding up.  Now, he schedules the bill when it comes in, and doesn't worry about it again.   
 
4)  Do all of your laundry at once.  This contradicts one of the tips I read on that other blog.  Some people say you should wash and dry a load of laundry every night before going to bed.   Not me!  I want to do it all at once, put it away, and not have to think about it again for a week or more.  If you do a load a day, you're never done with this chore!!

I sort it all, start the first load, and set the buzzer to let me know when it's finished, and repeat until all the loads are washed, dried and folded.  When all four of my kids were living at home, it sometimes took a day and a half to finish all the loads, especially in the winter, but when it was finished, I was finished for a week. 
Laundry B...
Two hints will make this go even more smoothly:  Number 1:  Have a laundry basket for every person in your household.  Number 2:  Fold (or hang) the clothes as you take them out of the dryer and put them in the basket for the appropriate person.  Don't dump them into a basket to fold later. (Clothes get really wrinkled that way!)  It only takes a few minutes to 'fold as you go,' and when the last load is out of the dryer, everything will be neat and ready to be put away.  As your kids get older, they can begin to help put away their clothes, and by the time they're in middle school, they can haul their baskets to and from the laundry area and put it all away.  When they hit high school, teach them how to run a load of laundry, so they can wash sports uniforms or the things they have to have cleaned 'now.'

5)  Be willing to relax your standards when your partner or your kids do chores.  It used to drive my friend Peachy crazy when her husband offered to do something, and it wasn't done to her expectations.  I finally convinced her that the help was more important than having it done 'her way.'  Of course, you want to teach children (or spouses) how to perform a task correctly or well.  Remember that it takes people a few times doing something to become successful at it.  (It took me nearly 20 years to make gravy that was edible!)  Try not to criticize, or rush right in to 'fix' things.  Let their first effort slide, and if you really can't stand it, re-do the task in a day or two.   

For example, when I was first married, my husband decided to do the laundry.  He gathered up all the clothes in our room, including my Pendelton wool suit that I had set aside to take to the dry cleaner, and ran three or four loads of wash.  When my suit came out of the dryer, it would have fit a 6 year old.  While he had dry-cleaned his suits for years, he didn't realize that my suit need special treatment, too.  Even though I was really upset at first, we ended up laughing about it, and it has become one of those 'family stories' that gets re-told every so often.  He still pitches in with the laundry after 27 years of marriage.  (Remeber my gravy comment?  Another family story revolves around the Thanksgiving when even the dog refused to eat my gravy!)


If you haven't picked up one of my underlying themes, I'll spell it out for you:  Teach your children how to do their part to keep your/their house clean.  Make it a responsibility.  I believe that the nuclear family is the basic unit of a child's social circle, and you need to teach them that they carry part of the load in ensuring the family is healthy and intact.   My kids have hear me say countless times, "Six people live here, and it takes all six people to keep this house clean."

My personal philosophy on raising children is this:  we're not raising kids, we're raising adults. 
From the day your bring a baby home from the hospital, you are teaching him how you want him to act.  In the beginning, you teach him how to sleep in his own bed, how to soothe himself, how to entertain himself, if even for just a few minutes.  At six months, you're teaching him how to sleep through the night, how to act around strangers, how to laugh, how not to become frustrated.  At a year, you're teaching him how to interact with other children, how not to grab for things, how to say 'please' and 'thank you' and 'goodbye.' At three, you teach him how to behave when he is four, and so on.   Some day he will leave your home for good, and don't you think it's important that he knows how to cook, do dishes and laundry, clean a toilet, put gas in the car, and pay bills on time?  He won't learn these things unless you teach him.  That is one of the best de-stressers out there -- having helpful children that turn into happy, productive adults.

Ok, I'm off my soap-box for a while.  Let me know if any of my suggestions work for you!

--Renee 

Wednesday, November 7, 2012

Gifts for All Seasons

It may be snowing outside today, but I just put away the last of the Halloween decorations, and pulled the few Thanksgiving things I have out of storage.  My neice is getting married in a couple of weeks, and I really had to give some thought to what to give her for her bridal shower.  Her registry was wiped out, and I'd rather make something anyway, but what??

Then I remebered that I had a pattern for a quick table runner, and that got me going.  I decided to make her home decor for Spring, Summer, Fall and Winter, and I started with Autumn. 

This ZigZag table runner, designed by Genii Lehmann (www.LehmannQuilting.com) would be a good beginner project, except that the finishing instructions were very sketchy.  She makes no recommendations on quilting, and there are no step-by-step instructions on how to apply the binding.  Mitering the corners of this pointed table runner is a bit tricky.  She also didn't include instructions on how to handle fabrics with a one-way design.  I had to figure that out on my own.

The table runner is 40" long by 15" wide.  It requires just three fabrics:  1/4 yard each of fabrics A and B (the zigzag) and 1 1/4 yards for the background, backing and binding, plus a piece of batting 45" x 20". I had these fabrics in my stash.  This project goes together fast because you sew together 'units' and then stitch them to other pieces to create the zigzag.  Start to finish, this project took about three and a half hours -- one for cutting it out and stitching the top, another for machine quilting, and the balance of the time spent making binding, stitching it down and hand stitching it on the back. 

The table runner wasn't enough by itself, so I created a silk flower arrangement to go with it.  I found a cute little fall-themed bucket at the local crafts store, purchased floral foam and some silk mums, and went to town.  After arranging the flowers, I added cattails and silk leaves, and Spanish moss to cover the floral foam. 
I added a bow after I took the photo!

I made a second, reversible table runner for Spring, stitching one side up in pink and red hearts and the reverse in green shamrocks.  I added three pink votive candles for Valentine's Day, and another silk floral arrangement in green and white, with a sparkling shamrock, to celebrate St. Patrick's Day.
  

My neice can decorate for two holidays, just by flipping the table runner over and switching out the decor on top!


I was stumped about what to make for Summer, when I remebered a cute apron my sister had made for me.  I went out to the local thrift store and purchased two men's shirts, and whipped one up.


This apron was designed by Mary Mulari   (www.marymulari.com) and is featured on the cover of her book, Sew Green Makeovers.  By positioning the pattern pieces carefully, two men's shirts have enough fabric to make the apron reversible...on the back, the bottom half is yellow, and the top is blue stripe. 

To the Summer gift bag, I added an oven mitt stuffed with a couple of utensils. 


The last project I needed to make was for Winter.  I had saved the instructions for this adorable snowman since I first saw it in the November/December 2002 issue of Today's Creative Homearts Magazine.  It was designed by Cheryl Natt. 

The body was stitched up from white felt.  I hand embroidered the smile on the face and added button eyes.  The nose was made of orange felt, and stuffed firmly with polyester fiberfill.
 Stitching up the body on my new Bernina.

I ran to the children's thrift store to shop for clothes...I spent about $12 for the lumberjack 'sleeper' in size 12 months, the toddler hiking boots, and the stocking cap, but aren't they adorable??  The scarf was made from a scrap of polar fleece.  As I was stuffing the snowman's body, I added a music button that plays "White Christmas" when you press on his hand.  This snowperson was the hit of the wedding shower! 

I bagged each seaon's gift into its own labeled gift bag.  My neice loved it, and I hope she will use these things for years to come. 

Keep stitching!


Stuffing Mr. Snowman!


Wednesday, October 24, 2012

My "Bless Me and Protect Me from Evil" Necklace

or, what to do with all of those old religious medals.


A while back, I created a one-of-a-kind necklace for myself that generates a conversation whenever I wear it.  I took 15 old religious medals (that kind generally worn by faithful Catholics), spaced them out, and hung them from a brass-colored chain with large links.  I picked out different shapes and sizes, some from my grandmother and mom, others that I had collected along my way in life.  Its longer length is great to wear with sweaters, and I really like that is jingle-jangles.  I call it my "Bless Me and Protect Me from All Evil" necklace. 

Here's a brief tutorial on how you can make one!

First, collect all of the medals you have (or can get your hands on).  Looks a flea markets, thrift stores, and through the drawers and jewelry boxes of relatives and/or friends.  Let people know you're looking for them, and you'd be surprised how many you'll get!  You may have to pay a couple of dollars each for them at a flea market, but don't be afraid to bargain!


Sort through the medals and select the ones you'd like to use -- you can pick a theme (one of mine has medals featuring the Blessed Virgin Mary, another is made up of only saints), or stick to a color (silver, brass, gold), or make a mixed metal necklace, which is what I prefer.  I like to select unusual shapes -- crosses, ovals, cut-out medals, squares, etc.  Lay out your medals in a pleasing manner.  This necklace has the largest medal in the center, and each one is a bit smaller working out to each side.  I have put smaller medals next to the large one in the center on occasion...it helps fill in the gaps created by very large medals.
You'll need 21 inches of chain, and one jump ring for each medal, plus two for the clasp.

The center medal is a 'book' that opens!
I select a chain with larger links in a 'neutral' color, usually gun-metal grey or brass.  I buy this by the inch/foot at The Bead Garden, in Havertown, Pa., (www.thebeadgarden.com ) which is my local bead store.  These necklaces are 21" long.  You'll also need jump rings -- these are the little round or oval-shaped rings that can open with a pair of chain nose or round nose pliers.  Start in the center of your necklace.  Open a jump ring, slip on the medal, and slip the jump ring through the center link on your chain.  Close the jump ring.  A note about opening and closing jump rings:  jump rings are in a nice, round circle.  Don't pull the cut ends away from each other and distort the circle.  Instead, use the pliers to hold one side of the ring, and use your thumb to push the ring down and away from you, until you have a big enough opening to slip on the medal.  Then, use your fingers (or a second pair of pliers) to pull the ring back up toward you, until the cut ends are even and touching.  Some medals may already have a jump ring on them...you can use it, but I replace them so all of the jump rings are the same.

 
Depending on how big your center medal is, you'll want to count over a few links to hang the next one.  In the photo above, I hung the next medal four links over to the right, and then the third four links over to the left of center.  After I put on each pair of medals, I hold the chain up and see if the placement is good -- I want the medals to be separate, but still clink together when the necklace is worn.  Continue adding medals, right and left, until all of them are on your chain.
  
The last thing to add is a clasp.  I prefer a hook and a jump ring ...it's easy for me to do myself.  The weight of the medals will keep the necklace from coming undone while you are wearing it. 
 
That's it!  You have a one-of-a kind piece of jewelry, with a little added protection from above (we hope!). 

Monday, October 22, 2012

Is anything as American as Apple Pie?

Well, maybe baseball...


Until a few years ago, I didn't know that Pennsylvania was a large apple growing state.  My d.h. and I took a little trip in the Fall of 2010 from Philadelphia to Gettysburg (my first time to the battlefield) and made our way further west to Pine Grove Furnace State Park.  The Appalachian Trail Museum is located there, and if you're up for a hike, the trail runs through the park and you can walk along it for a while. 

Back to my point -- we drove through miles and miles of apple orchards between York, Pa., and the park, and workers were harvesting truckloads of apples.  I can't resist the urge this time of year to visit my local orchard and pick up a half-bushel of apples and make applesauce (which I freeze), but  I always set aside 7 or 8 apples for a fresh pie.  My d.h. loves Dutch Apple best, and so do I.   

Here's the recipe:  Pre-heat the oven to 450 degrees. 
1)  One pie crust, unbaked, rolled out and placed in a deep dish 9" pie plate (You can make your own crust, but this year I used a Pillsbury refrigerated crust.)  Sprinkle about 1 tsp flour over the bottom of the crust.

I pinch the edges of the pie crust and press my finger into the ridge to make it look 'fluted.'
2)  Peel and slice 7 - 10 apples (depending on the size - enough to fill pie plate); place in a large bowl.
3)  In a small bowl, mix 1 cup sugar, 3 TBS flour, 1/2 tsp cinnamon and 1 TBS Minute (dry) Tapioca.  Pour over apples and stir gently to coat.  (The tapioca absorbs the juices as the apples bake.)
4)  Prepare crumb topping:  1/4 cup sugar, 1/3 cup flour and 3 TBS cold butter or margarine.  Use a pastry blender or two knives to cut the butter into the sugar and flour, until it resembles coarse crumbs. 
5)  Spoon apples into pie crust, heaping them high...they will shrink when they bake.  Sprinkle the crumb topping over the apples. 
A heaping pile of apples, before adding the crumb topping!

6)  Bake at 450 degrees for 10 minutes.  Lower the temperature to 350 degrees, and bake for another 40 minutes. 
7)  Remove from oven and let cool.  You can it serve warm...it tastes especially good with vanilla ice cream!
Hint:  you may want to put a piece of foil on the oven rack beneath the pie...the apple juice may bubble up and spill, and the foil will keep the oven from getting messy.      

Yum!  I may have to make another!


Friday, October 19, 2012

A True Blue Baby Quilt

It may be blue, but it's for a new baby girl!

I recently finished up a 'wearable art' jacket, using Moonlight Design's "Sunset Strip" pattern (www.moonlightdesignquilts.com).  The jacket called for eight different fabrics in the same color family, and blue was my color of choice.  The lining was navy, but the strips ranged from light periwinkle to teal to true blue. 

Funny thing, though...when I finished the jacket, I had stacks and stacks of leftover strips of fabric that were 1 1/2" wide.  Since I hate to throw anything out, I browsed through a few quilting books, and found a block suitable for using up the leftovers, plus a few fabric scraps I pulled from my stash.  It is a variation of a log cabin block, called "Barn Raising Log Cabin." 

There are two things that make this quilt block different from a regular log cabin block.  The first is the center square.  On the barn raising block, the center is made up of two triangle pieces, one light and one dark (also called 'half square triangles').  Second, the fabric strips were sorted into three piles:  light, medium and dark.  The light strips were sewn on the two sides adjacent to the light triangle, and the dark strips were sewn on the two sides adjacent to the dark triangle.  The medium strips were mixed in on both sides. 

This baby quilt is made up of 16 blocks.  When I laid the blocks out, I arranged the dark sides of four blocks together to form the center.  As I added the other blocks, I matched the light sides to another light side, and the dark sides to dark sides.  By aligning dark to dark and light to light, another design pops out...a square, on point, in the center, within a band of light, then dark, surrounding it. 

I framed the quilt with a dark, narrow border, and added a four inch medium-toned border all around.  Can you imagine what this would look like if the quilt were 12 blocks wide by 16 blocks long?  It would make a beautiful queen-sized quilt.

So, why is this quilt for a baby girl?  Well, you can't see it too well from this photo, but the fabrics have floral prints, swirls and patterns that read 'girly,' and there's a lot of  periwinkle (bordering on violet) in the border print.  Plus, I have a friend who is expecting in mid-winter, and I think she'll really love this for her firstborn. 

There is still a pretty large pile of 1 1/2" wide strips left over...some day, I'll make something else from them.  In the meantime, I have to get busy on two other baby quilts...we're expecting two grand-nephews or neices on my husband's side of the family soon!

Keep stitchin'!

Renee


Saturday, October 6, 2012

Stamping Techniques: Brayered Background and Basic Embossing

I belong to a monthly ATC (artist trading card) swap, and every month around this time, I'm working on cards to trade with the other stamp artists.  Having a deadline keeps me stamping, and I like to try out different background techniques and coloring methods.  But, after all of these years of stamping, I do go back to some 'tried and true' methods to create my ATCs.  The tutorial for today is mostly for newbies...using a brayer to apply color for a background, and how to heat emboss.

The swap theme this month is "Fall Leaves."  There are several stamps in my stash that I could use, but I decided I wanted a really large leaf, so it would take up most of the 2.5" by 3.5" card.  I didn't have much time to spend making the cards, so I decided to use my hard rubber brayer to apply the color to the cardstock.

Kaleidacolor, by Tsukineko, makes an "Autumn Leaves" stamp pad that has orange, red-orange, brown, goldenrod and moss green inks on it.  Each color has its own separate pad, and when you are ready to use them, you flip a little switch on the plastic container to push the pads together.

My brayer is pretty old, but Speedball sells a hard rubber brayer with a nice handle on it.  The key to inking the brayer is to remember to roll it over the pad a few times (so the entire cylinder is inked) and to go in the same direction on the pad, so you get a good saturation of color in the same spot.  If you roll the brayer across the pad horizontally and then vertically, the colors will get muddied, both on the brayer and on your ink pad.    

This technique works best on glossy paper.  The ink sits on top of the paper for a bit, and allows you to brayer over it a couple of times to move the ink around and better cover the paper.  (You can try it on regular cardstock, but you'll have to re-ink frequently, and once the ink is on the paper, it soaks in and can't be 'moved'.)

I was working on a scrap of cardstock about 4" x 6", so I didn't have to repeat the brayering more than twice.  If you are covering an 8.5" x 11" piece of cardstock, you will have to repeat the brayering process several times.  Here's another hint -- after you lay down the first roll of color, flip the paper over for the second roll...this will create a mirror image of the ink pattern, giving you a wider swath of color on the paper.  I did this with the paper I'm using here.  You can see the green ink left and right, with more orange in the center.

After I laid down the color, I stamped the image using a VersaMark ink pad (also by Tsukinkeo).  This is a clear ink that can be embossed.  On regular cardstock, it appears as a watermark when allowed to dry without embossing. 

Working quickly, I sprinkled on my embossing powder over the wet ink.   I used copper embossing powder.  Don't be afraid to use a lot of embossing powder; just flip over your card and tap the back with your finger to remove the excess onto a piece of scrap paper, then pour the excess back into its container.

Be careful not to touch the image before you heat emboss it, or the powder will smear off.  It can wait to be heat embossed, so if you are doing a number of the same images, work in an assembly-line fashion before you heat emboss them all.  Turn on your embossing gun and let it warm up for a few seconds, then hold it over your embossed image (about 2-3 inches away) until the powder begins to melt.  Move the heat gun back and forth, so you don't burn the powder or your paper.  You will see the design raise up and begin to get shiny. 
 
Continue to move your heat gun around the image until the entire thing is embossed.  Let it cool a few minutes before you touch it, or it will smear.

For this project, I trimmed my glossy cardstock down to 2.25" x 3.25", then mounted each on a piece of burnt orange cardstock. 

Then I decided to try something a little different with my leaf image.  Instead of brayering the background, I stamped and embossed the image, then used Judi-Kins duster brushes to apply the ink from my Kaleidacolor pad.  It creates a softer image, but I like it, too.  The last thing I did was rub over the embossing, to remove any residual ink and really make the image shiny. 
 
I had an extra leaf, so I trimmed around it closely, and mounted it to the front of a card that I made. 
 
 
So, I finished up my ATCs and they'll get into the mail tomorrow.  I hope this tutorial will inspire you.  More stamping again soon!