Sunday, May 19, 2013

Sewing Camp: A Long Weekend of Fun!

I'm back from Sewing Camp, and I'm exhausted and exhilarated at the same time.

"Sewing Camp?" you ask.  Well, you can call it a camp or retreat or get-away, but what it means is five days and four nights of (nearly) non-stop sewing and fun.

I'm packed for Sewing Camp!
The Philadelphia Chapter of the American Sewing Guild holds a sewing camp every year around the third weekend of May at Eastern University in St. David, Pa.  We move in the week after the students move out, setting up in a very large conference room room and sleeping in the dormitory across a breezeway from our sewing space.  This year, we started at noon on Wednesday and the last camper packed up and left at 5 p.m. on Sunday.

We stay in the dorms at Eastern University in St.  David, Pa.
If it's not too crowded, each sewer gets two six-foot tables upon which to set up her machines and supplies.  We share a few cutting tables (raised to the proper cutting height by bed risers) and ironing boards.  And then we start to work on our own projects.  We break for meals in the dining hall, which is a ten minute walk through a beautiful campus.
 
Candace is set up with her serger, her sewing machine and laptop.   
What's the thrill?  "The best thing is knowing that the time is dedicated to sewing and I don't have to worry about anything else," says Sue, a first-time camper.  No cooking, cleaning or laundry, no husbands, kids or work, and (for me) a 'no-phone zone.'  

Having a room full of other women who sew is an invaluable resource.  If you get stuck on a procedure or need help with fitting, there is someone who 'speaks the same language' just across the room.  This year my sewing friends empowered me to charge a more realistic price for altering a prom dress that had three layers of skirts to hem and a circumference of 135 inches!

Each of us has our own sewing agenda.  My friend Sherrie spent the first two days working on a quilt top made from beautiful hand-dyed batik fabrics she had picked up when she visited Ghana in 2003.  The women of the village gave her many pieces of fabric and garments and she bought others.  She had packed them away years ago, waiting for a time when she could devote herself to creating a one-of-a-kind quilt.

Sherrie arranged four inch blocks into a colorful quilt top.
Another friend, Janet, makes teddy bears for families who have lost a loved one, using some of their clothing.  These memory bears  often become cherished possessions.  My friend Pat has been creating her own textiles for the past few years -- she spent several hours stenciling and embellishing her hand-dyed fabric.  Some people come to cut out projects -- they have limited space in their home, and being able to spread out and walk around a cutting table is a treat.

Lest you think we're all work and no play, don't be fooled.  There is plenty of laughter, a few 'road trips' to fabric and sewing stores and show-and-tell when someone finishes an item.  Sometimes there is friendly competition to see who can make the most things during the weekend.  It's not unheard of for someone to complete a dozen or more garments.

Marge is happy with her $1.99-a-yard fabrics purchased on a road trip to Fabric Mart in Sinking Springs, Pa. 
The sewing room is open nearly around the clock...a couple of ladies stay up until 4 a.m., and the early-to- bed, early-to-rise folks are back in the sewing room at 6 a.m.

Martha's quilt

We sleep two to a room in a four person suite, with a bath between the rooms.

I'll bet the dorm rooms don't normally get this dressed up!
Aunt Pat's first quilt


Phyllis' quilt features cardinals


One of the many t-shirt quilts I have made
Personally, I spent one afternoon shopping for fabric for my 'mother of the groom' dress for the upcoming wedding of my son.  I made a fitting muslin from the pattern for the dress, and transferred the adjustments onto the pattern.  The dress is underway, but not quite finished yet.  I was able to complete several smaller mending and hemming projects, including the aforementioned prom dress.  While I didn't get as many projects finished as I have in past years, the weekend was successful just for the fact that my wedding attire is well underway.  

This week, the board will book the dates for Sewing Camp 2014.  I can hardly wait!   

Tuesday, May 7, 2013

Scratch another "wedding task" (or two) off the list!

My son's wedding is fast approaching, and while the mother-of-the-groom doesn't have too many responsibilities, my sweet, future daughter-in-law has asked me to take care of a couple of things.

The first request was to find some sort of vessel to put on the gift table to hold cards.  The catering company wanted some ridiculous price to 'rent' a bird cage for the evening.  I mentioned this to my friends before Christmas, and shortly thereafter, one called me with great news -- she had seen a bird cage at a thrift store for $15 and picked it up for me!  This photo isn't too great, but here's what it looked like...


All it needed was a couple of coats of white spray paint, and it looked totally 'bridal.'  


I added a large white bow to the finial at the top, and wove some violet netting through the curlicues around the top edge, and it was finished.  Cards can slip between the wires of the curved dome, or the tray at the bottom can slide out to add a larger cards.  (For my friends in other parts of the country, it is customary on the East coast to give wedding gifts of cash or checks in lieu of a physical item.  This Midwestern girl doesn't claim to understand why, mind you.  It's just the way it is.)

A few weeks later, my son's bride asked if I could help with her gift for her attendants.  Since it is a summer wedding, she wanted to give them personalized beach tote bags, filled with goodies to take on vacation.  She found an on-line source for the bag, but wondered if I could embroider each girl's initial on the front of the tote. The black bags are heavy nylon, lined with a lighter-weight nylon in bright colors.  She thought white thread would look the best.

Once I received the bags, I realized my home embroidery machine would not be sufficient for the task, so I called upon my good friend Martha for help. I tease her about being the "Queen of Machine Embroidery" because she always has beautiful embroidered items for 'show and tell' at our monthly American Sewing Guild meetings (www.asg.org).  A few years ago, she took her art up a level and purchased a Babylock Endurance six-needle embroidery machine (http://www.babylock.com/embroidery/endurance/).  It is a professional grade machine that allows her to change colors of thread effortlessly and work on larger-scale designs.

Baby Lock Endurance 6 Needle Embroidery Machine (BND9)
The six-needle Babylock Endurance
We met for dinner at her house (great pasta and wine!) and then got to work.  She had purchased a design disk of 3" and 5" alphabets, and we selected the font that had the best looking 'J,' since that was one of the letters that we needed to embroider on a tote bag.    (I don't know why, but many embroidery alphabets have an ugly or unreadable 'J'.  The look like 'I' or 'T' or a squiggle.)

I began marking the center point on each bag.  After hooping the bag, we put in on the machine, maneuvered it to the center point.
The hoop holds the tote bag on the machine and allows us to place the design right where we want it.  
Martha got the machine set up with white thread and downloaded the design to the machine's computer.


We decided that the 5" letters would look the best.  Each letter has between 3,000 and 5,000 stitches!  Once you press 'start,' the machine does all of the work.

The letter 'A', almost finished!
Martha kept a close eye on things, in case there were problems like a broken thread or the need for a new bobbin.

Martha at work in her sewing room.
After ten minutes, viola!  A perfectly monogrammed tote bag!  One down, 12 to go!

A $7 tote bag has become a $25 fashion statement!
So, check two items off of the list of wedding preparations!  I still have a few more things to take care of, plus my mother-of-the groom dress.  I sure hope there's enough time!
 

Friday, May 3, 2013

I planted my tomatoes today -- oh yes, I did!

While the weather has been unsettled in other parts of the country, the last several days have been just BEAUTIFUL in and around Philadelphia!  Daytime temps are in the mid- to upper-60's, with lots of sunshine.  I've also been watching the overnight low temperatures, and I believe we're past the last chance for frost in this area.  So...I decided to plant my tomatoes today!


Yes, I'm a week early (Mother's Day is usually when gardeners in this area get digging), but there were two reasons I needed to get them into the soil:  
1)  the plants I ordered were delivered last week, and a few of the leaves were starting to turn yellow; and
2)  the earlier I plant, the earlier I harvest!

I read about grafted tomato plants and found them through the  Burpee Catalog Company.   (http://www.burpeehomegardens.com) .  They take a sturdy tomato plant that is disease resistant and graft an heirloom tomato onto the stem.  The upper part of the plant -- the leaves and fruit -- are heirloom varieties, which taste delicious.  For my husband, I bought a Mortgage Lifter Heirloom, which produces huge, 16 to 24 ounce tomatoes -- the kind where one slice covers a piece of bread.  I also bought a Rutgers and a Yellow Pear tomato, which is a small, cherry-like variety.  

A few years ago, I discovered the book "The Square Foot Garden" by Mel Bartholomew.  He has a new edition out, which is available on Amazon.

Product Details

The idea is to subdivide your garden (mine is about 7' by 10') into one square foot plots, and plant your seeds or plants according to how much space each needs to grow.  Instead of planting a row of radishes for instance, and thinning them once they have sprouted, I make little holes, four inches apart, and plant just one seed in each hole.  When I harvest them later in the spring, I can re-plant radishes, or plant another vegetable in that one square foot plot. Mel is also a proponent of setting up a sturdy trellis for plants that grow up, like tomatoes.

Years ago, when we moved into this house, I found an old iron clothing rack behind the garage.  My d.h. rigged it up with wire fencing, and I use it in the garden as a trellis for the tomato plants.  As the tomatoes grow, I tie them up to the trellis with strips of plastic bags or fabric.

Following Mel's guidelines, I plant the tomatoes about 2 feet apart.  The red half-circles are something my husband found a few years ago...they are for slow watering.  You fill the plastic dish with water, and it seeps out through a few holes in the bottom of the dish.

In the background, you may be able to see my garlic plants...I planted them last fall, and they should be ready to harvest around July 1st.  I'm hoping to put in some green beans, radishes and at least one variety of basil in the next few weeks.

With any luck, I'll have fresh, home-grown tomatoes by the Fourth of July!

Happy planting!
 
While I was working, Lance decided a nap in the sun was in order!

Tuesday, April 30, 2013

Wedding (Mother of the Groom Dress) Countdown!

Somehow the spring has gotten away from me.  I can't believe it's the end of April already!  The countdown is on for my son's wedding at the end of June!  It's just 60 days away, and I have several projects to complete before then. 

I decided several weeks ago to make my 'mother of the groom' dress.  Like many women my age, I'm not really happy with my weight, shape or size, and purchasing a ready-made dress is always a challenge.  I generally take a petite, but it is hard to find something that fits my body the way I'd like it to.  Sewing it myself seems like a good option. 

One of the frustrations of sewing from a commercial pattern is that you take your measurements, find the correct size on the pattern envelope, cut out a dress (or pants or a top) and sew it up, only to try it on and find that it just doesn't fit you right!  I don't claim to be an expert by any means, but it usually means that there is too much or too little wearing ease, and you are not the same height as a model!

It's nearly impossible to 'fit' a pattern or muslin to yourself -- you really need a sewing friend who can do it for you while the pattern or muslin is hanging on your body.

I was in Missouri ten days ago, and was lucky to accompany my sister to a 'sewing weekend' that her neighborhood group of the American Sewing Guild had planned.  (For more information about the American Sewing Guild, go to www.asg.org.  This organization 'advances sewing as an art and life skill.'  There are chapters around the country, with local neighborhood groups that typically meet once a month to share ideas and inspiration.)  One of the other ladies in attendance is a home economics teacher, and was the perfect resource for fitting assistance!

I had selected two patterns...Simplicity 1754 - a Project Runway design, and Simplicity 2247 - from the Amazing Fit collection.  Both have princess seaming, which is easier to adjust.


To get the best fit, I made up the first dress in muslin, and tried it on 'inside out' so we could access the seam allowances.  What Janice found is that I have no waist! Letting a seam out here, and taking a little tuck there, and then transferring those adjustments to the pattern led to a better fitting garment.  It hung properly, with the seams hanging straight and no puckers or pulling across my stomach or tush.  I was able to fix the 'gap' that occurs across my upper chest, and adjusted the depth of the armholes, so I don't feel like I'm wearing a dress that's too long for me. 

Janice helps me transfer my alterations to the pattern pieces.
When I started on the second pattern, I was able to make the adjustments before I cut out the muslin; the fit needed very little 'tweaking' on the second garment.  I had brought along a third pattern for a casual summer dress, and was able to make the same changes on it, under Janice's direction, so I'm fairly confident that it will fit me, too.  After doing it three times, I think I know what changes to start with on a pattern before I begin cutting it out of fabric.       


Changes are transferred to the pattern pieces. 

The next step is to sew up two dresses using the newly altered patterns.  Then I'll get the input from my d.h. and my daughter as to which one I should make for the wedding.  I haven't decided on a color yet, but I'm leaning toward a shade of blue.

Check back in a couple of weeks to see my progress!  Until then, keep sewing!

Tuesday, April 9, 2013

An 'Irish' Quilt for Charity

I haven't done much sewing lately, but I cleared my work room of everything else and began an Irish fabric quilt on Easter Sunday.  I'm sewing with a heavy heart, for I'm making this quilt to donate to a charity auction being held for a young man in my neighborhood who was recently diagnosed with ALS.

Amyotrophic lateral sclerosis (ALS), often referred to as "Lou Gehrig's Disease," is a neurodegenerative disease that affects nerve cells in the brain and the spinal cord.  The progressive degeneration of the motor neurons eventually leads to a patient's death. The ability to control muscle movement is lost, and patients in the later stages of the disease may become totally paralyzed.  People with ALS live about three to five years after diagnosis.

Lou Gehrig played for the New York Yankees from 1923 to 1939.  He retired from baseball at age 36 because of the symptoms of ALS, and died two years later.  This illness has become known as 'Lou Gerhig's Disease' because of the attention brought to it through his life and death.  Many major league baseball teams, including the Philadelphia Phillies, hold fundraisers annually to help with the research that will someday lead to better treatment or a cure. This year the Phillies Phestival is scheduled for May 16.  Tickets go on sale April 12.  Read more about it on the Community page at http://philadelphia.phillies.mlb.com .

The book "Tuesdays with Morrie" by Mitch Albom tells the touching story about a student who, 16 years after graduation, reaches out to his professor who is dying of ALS.  If you haven't read it yet, check it out of the library and take the time.  For more information about this disease, try www.alsa.org.

Back to sewing...I saw this quilt block pattern on Pinterest.  It was designed by Megan Bohr.  It's called "Chevron and On" -- search for it here:  http://www.heyquilty.com/articles

A 'Chevron and On' block made in Irish print fabrics
The first thing I did was sketch out the design.  I decided to 'super-size' the blocks and make them 12" finished size.  

A quick layout of the baby quilt
By super-sizing the blocks, I would save time and money -- I needed only 16 fabrics, plus white, and the larger design would sew up quickly.  The fundraiser was only 12 days away, so this project needed to be fast.

Now, I have been making Irish-themed baby quilts for some time...my nieces ask for them when they are pregnant.  Every time I see a Irish-themed print, or even a green print or solid, I buy anywhere from 1/2 yard to 2 yards.  As a result, I have accumulated quite a stash of shamrock and Irish-print fabrics.  I didn't realize just how many fabrics I had collected until I began selecting prints for this quilt.  (I know, it's an addiction!)

My stash of 52 Irish print fabrics...that doesn't include the solid green or green prints!
After picking out light, medium and dark fabrics (and small, medium and large prints), I was ready to begin cutting.  

The pattern incorporates half-square triangles, so I cut one square of each print fabric 6 7/8", and another square 6 1/2".
Print fabrics cut into two different size squares
Half of the white fabric was cut into 6 7/8" by 42" strips.  From that, I cut 16 6 7/8" squares.  The remaining fabric was cut first into strips 6 1/2" x 42", then into 16 6 1/2" squares.

A rotary cutter and ruler makes the job go faster!
The 6 7/8" squares allow me to make 2  6 1/2" half-square triangle blocks quickly.  Here's how.   Layer the two 6 7/8" squares on top of one another (one print and one solid), right sides together. Draw a line across the diagonal of the square.  This is the cutting line.

Draw a cutting line on the diagonal, seen here in purple.
Now draw a line on either side of the cutting line, 1/4" away.  These are the stitching lines.

The stitching lines are drawn in blue.
Take the blocks to your machine and stitch along the stitching lines.  Cut the block along the cutting line, and open up the blocks.

With a quick snip, you'll have two 6 1/2" squares!
Press the blocks, with the seam allowances to the 'dark' side of each block.  Now you have two complete half-square triangle blocks.        

Viola!
I referred to my sketch frequently when I began to sew the blocks together.  To make it a bit easier, I sewed a half-square triangle block to the print first, then the other half-square triangle block to the white, pressing each seam allowance as I went.  Then I pinned the two pieces together and stitched them up.  The 16 blocks went together quickly.

The fun part of making a quilt like this is laying out the blocks.  I wanted to be sure I didn't put a dark fabric next to another dark fabric, and likewise, I wanted the spread out the large scale prints.  Once I had the layout down, I stacked up the rows and went back to the sewing machine to complete the quilt top.

I tried to mix up dark and light fabrics, large and small prints.
I gave the top a good pressing, and then layered the 'quilt sandwich.'  I had a 2 1/2 yard piece of green print in my stash that worked for the backing, although I did have to piece it together to make it large enough.  I laid the backing on my cutting table, wrong side up.  Then I topped it with a piece of batting.  I prefer "Warm and Natural" brand batting...it's not very thick, but it holds up well to repeated washing.  Then, I placed the quilt top over the batting, and smoothed out all of the wrinkles, and made sure that the backing and batting were large enough to cover the back of the quilt.  I use large safety pins to hold the quilt sandwich together for machine quilting, so the fabrics don't shift during the sewing process.  Some quilters hand-baste their tops together, but I find, for a small project, safety pins work great.

I try to use three or four pins on each square within the block.
For this quilt, I decided to simply stitch around each blocks, using a method called "stitch in the ditch."  Basically, that means the stitching should be made in the 'well' of the seam where the patches meet.  It takes a little practice to do this, and it really helps if you have a even-feed foot for your sewing machine.

After the quilting was finished, I clipped all the loose threads, and started with my binding.  I usually like to make bias binding, but I didn't have enough fabric for that, so I used strips cut on the straight grain of the fabric.  I did have to piece together several strips to make a binding long enough to go around the circumference of the quilt.  I sewed the strips together on a diagonal...that keeps the binding from getting bulky when it is sewn to the edges of the quilt.

This is easy to do -- just lay two strips at a right angle to each other, and draw a diagonal line from one corner to the other.  Stitch along the line, and trim off the excess.

I use a double-fold (also called French) binding.  To calculate the width to cut my strip, I use the following formula:  (2 x  finished binding width + seam allowance) x 2.  So, for a 3/8" wide binding, I made the strip 2" wide [(3/8" x 2) + 1/4" = 1" x 2 = 2" wide].  And you thought you'd never need math as an adult!

After cutting the strips, stitching them up and pressing them open, I folded the strip in half lengthwise and pressed it again. Now it was ready to stitch onto the quilt.

Starting and ending the binding was always a bit difficult for me, as I couldn't get it to lay smooth without a lot of bulk.  Then I discovered a method by Becky Herdle.


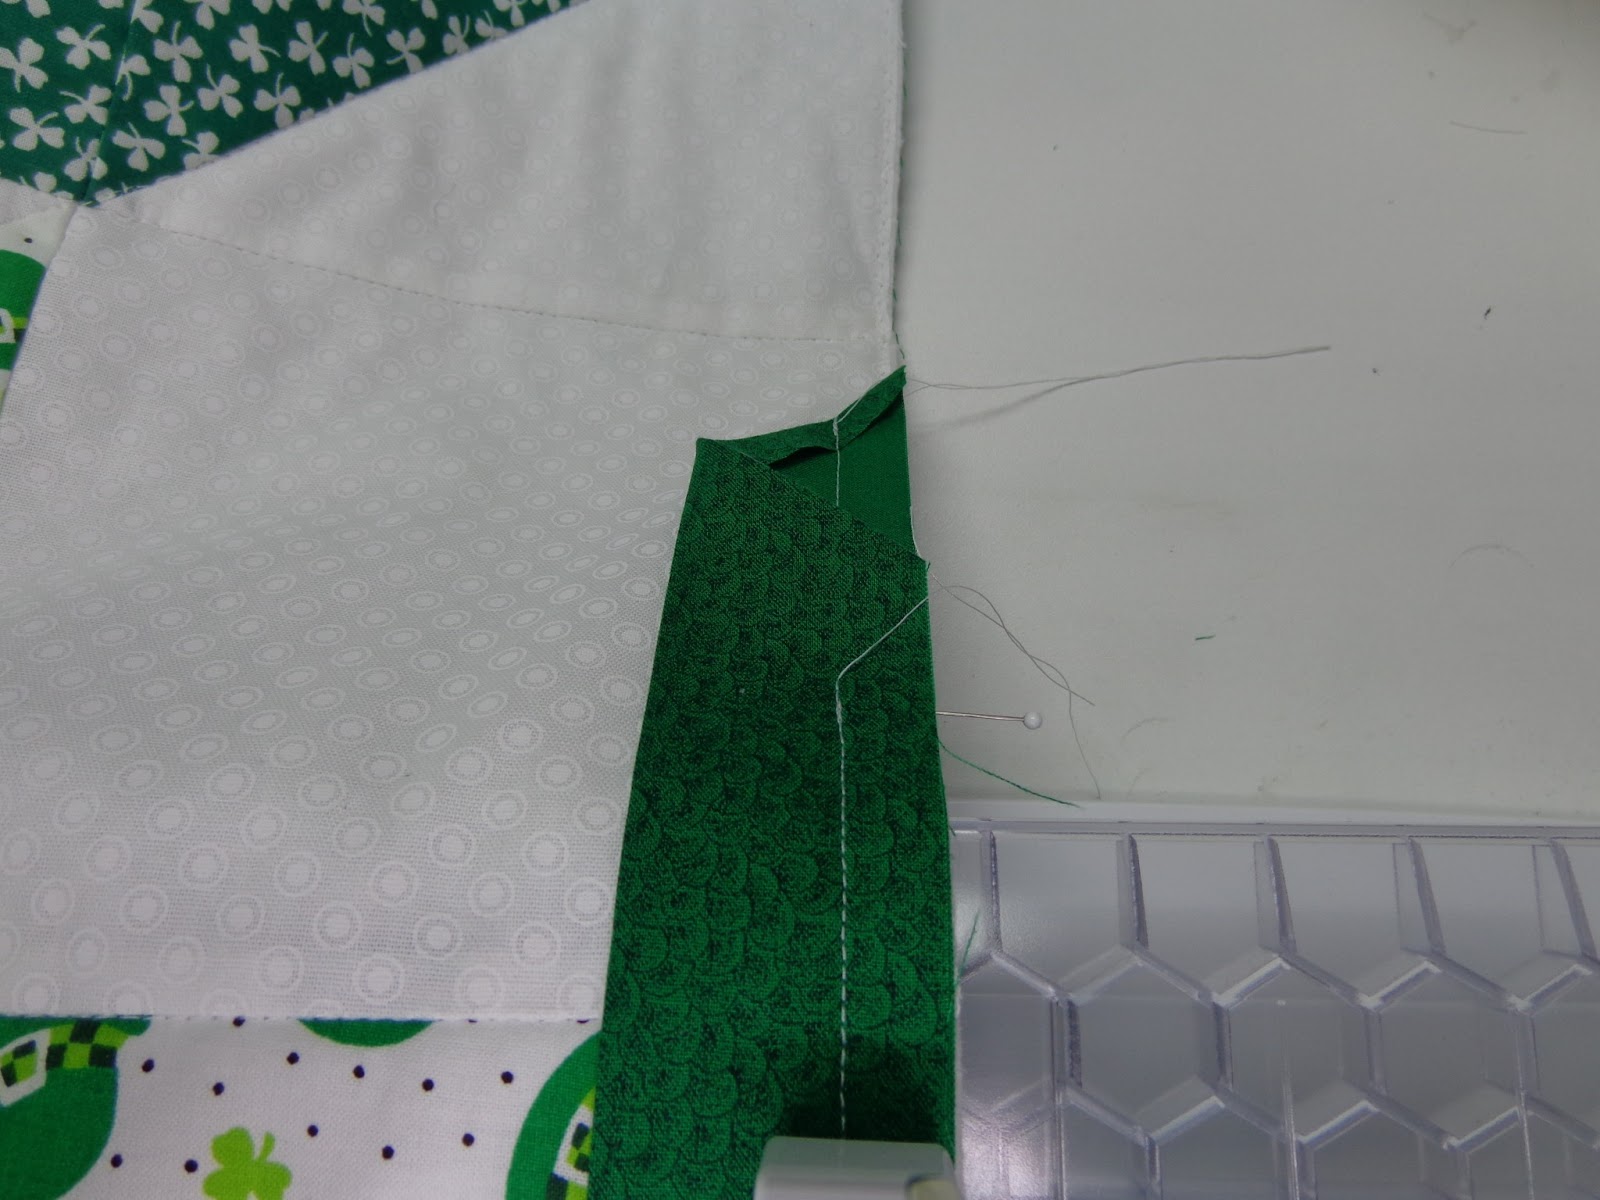
First, start at the end of the binding, open the strip, fold the end on the diagonal and press.  Trim a 1/4" away from the diagonal fold.  Starting on one side of the quilt, pin the first 3 to 4 inches of binding to the quilt with the fold open, keeping the raw edge of the binding and the quilt even.  Sew through one binding thickness for 3 to 4 inches, backstitch and clip the threads.


Lift the presser  foot and fold the binding into the doubled position.  Continue to sew the binding around the quilt.  After you have sewn around the whole quilt and return to the starting point, lower the needle into the first stitch.


Lay the binding over the single thickness sewn at the start and tuck the end into the pocket formed.  Cut off excess length.  Continue stitching through all thicknesses until you reach the second 'starting' point.


The beauty of this method is that the ends are hidden, and there is no bulk where you started and finished stitching the binding.

I also miter the corners of the quilt binding.  Most basic quilting books can teach you how to do this...here's what I do.  As I approach a corner, I stop (with the needle down in the fabric) and place a pin perpendicular to the stitching, exactly the distance of the seam allowance, from the side of the quilt.  This tells me where to stop stitching.

I continue stitching until the reach the pin, backstitch, and cut the thread.  Then I flip the binding up so it is perpendicular to the binding that I just stitched down, creating a diagonal fold from the corner to the center of the quilt.

Then I fold the binding back down on itself.  The fold should be even with the edge of the quilt on one side and the binding should align with the raw edge of the quilt on the other.  Start stitching down the side, beginning the width of your seam allowance from the top edge and from the side edge of the quilt (in this case, a quarter inch from the two sides of the corner).  You can place a pin exactly where to begin.  Having done this on several quilts, I can do it by 'feel' now and the pin is simply holding the binding so it doesn't move when I sew.
  

Make sure to use the same seam allowance width.  Continue on, and repeat the the next corner. (You may want to practice this before you try it on a quilt.  Just cut an 8" square and about 2 feet of binding, and play around until you get the hang of it.)  Press the binding well, pulling it away from the quilt so the seam is nice and flat, and fold the binding to the back of the quilt.  The corners will miter perfectly.


Now it's time for the needle and thread work.  I always blind stitch the binding to the quilt on the back side.  Some people prefer to pin the binding in place on the back of the quilt, but I find that pins get in the way.  Sometimes I use clips, other times I just hold it in place as I sew.  This baby quilt took about 3 hours of hand stitching, which I did while watching television with my d.h.

I was happy to deliver the quilt a couple of days early...I hope that someone will fall in love with it and make a hefty donation our friends coping with ALS.

Irish Chevron and On Quilt by Renee Devine
 P.S.  There's one more thing I'd like the non-quilters who read my blog to know...what it costs to make a 48" square baby quilt like this.  High quality quilting fabrics now cost $10.99 a yard.  There are 16 different fabrics that make up the blocks; a quarter of a yard of each would run $44.  Then, there are about 2 yards each of white and green fabric (for the back and binding), plus a piece of Warm and Natural batting for the middle of the quilt sandwich: add another $56.  So, before I spend even an hour of my time, the value of this quilt is $100.  The moral of the story is this:  if someone gives you the gift of a hand-made quilt, it is very special!  We do this because we love you!  And, if you ever consider buying a hand-made quilt, don't be surprised by the price and don't try to bargain with the artist.  It's worth every penny!

Monday, April 8, 2013

Easy Table Centerpieces

The past couple of weeks have been busy, preparing for the shower for my future daughter-in-law.  My daughter volunteered to create the table centerpieces, and drafted me to help.

The theme of the shower was "Spain" and she wanted to keep things simple and somewhat inexpensive.  I had been collecting wine bottles since Christmas (to make more luminaries, which were featured in a previous post) and my daughter thought we could use them (she may have seen something similar on Pinterest).


We removed the labels and most of the metal 'collars' at the top if each bottle, then sorted them by size and color.  We wanted to mix and match them a bit, so no one table would have three clear bottles on it.  for a dozen tables, we needed 36 bottles.

The day before the event, I made a run to Produce Junction, a local chain of bulk fruit/vegetable/floral stores.  Their prices on cut flowers are very reasonable.  In keeping with the theme, I found flowers the colors of Spain's flag -- sunflowers (yellow) and carnations (two shades of red) and a beautiful rose that was dark yellow at the base with tips of red.  I also picked up a bunch of fern and baby's breath for filler.

This whole bucket of flowers was only $27!

I selected a few stems for each of two wine bottles.  The necks of the wine bottles aren't very wide, so only two or three blooms would fit in each.  Then I used some raffia ribbon in red, orange and moss green to tie bows around the bottles.


For the third bottle, I cut a deep slit in a cork.  We had printed photos that my future daughter-in-law took during her many months studying in Spain.  We mounted those on colored card stock, and one photo went into the slit on the cork.  Each table had a different picture.


Here's the final product -- simple to create and just enough color to add interest to every table.  The future bride and her bridesmaids were thrilled to take home flowers at the end of the day, and I had plenty left over to create a bouquet to enjoy this week!

(P.S.  I made it home with about half of the wine bottles, so more luminaries will get made before summer!)

Thursday, March 28, 2013

Dying Easter Eggs, the Old-fashioned Way

Today at the grocery, I got side-tracked in the produce aisle.  Years ago, my sister dyed Easter eggs using onion skins, and those beautiful red onions were calling to me.  I bought one, and picked up a lot of loose, papery skins from the bin.  

Once I got home, I did a quick google search and discovered that Spanish onion skins create a nice, red color, but since I had a red onion and a few yellow onions at home, I decided to see what color they would produce.  

In addition to the onion skins and eggs, I gathered rubber bands and some muslin I cut into squares.  


I added a little water to each bowl to soak the onion skins and added the eggs to moisten them, too.
  

Next, I wrapped each egg in onion skins, trying to cover it completely.  


Then I wrapped the egg tightly in a muslin square and secured the ends with a rubber band. 
  
Into the pan and onto the stove!


For the perfect hard-boiled egg, fill a non-aluminum pan with warm water and the eggs.  Put the pan on the stove on medium-high and bring it to a boil.  Turn the temperature to 'low' and set a timer for 15 minutes, letting the eggs barely simmer.  When the timer goes off, run cold water over the eggs to cool them.  (If you want to eat them in a day or two, peel them immediately under running water and store in a ziploc bag in the refrigerator.)  Store dyed eggs in the refrigerator.  

After the eggs were cool enough to handle, I snipped of the rubber bands and opened the muslin bundle.


Wait for it....


Ta-da!!  I was surprised -- the red onion skins tie-dyed the eggs shades of green, red-brown and orange.  The yellow onion skins colored the eggs a beautiful shade of burnt orange.  To finish them off, I rubbed a little vegetable oil on each egg and wiped the excess off with a paper towel.  


Best thing about this method of egg-dying:  it didn't cost any more than an onion I will use, and it's non-chemical and non-toxic.  I think I'll be doing this for many years to come!