Tuesday, April 30, 2013

Wedding (Mother of the Groom Dress) Countdown!

Somehow the spring has gotten away from me.  I can't believe it's the end of April already!  The countdown is on for my son's wedding at the end of June!  It's just 60 days away, and I have several projects to complete before then. 

I decided several weeks ago to make my 'mother of the groom' dress.  Like many women my age, I'm not really happy with my weight, shape or size, and purchasing a ready-made dress is always a challenge.  I generally take a petite, but it is hard to find something that fits my body the way I'd like it to.  Sewing it myself seems like a good option. 

One of the frustrations of sewing from a commercial pattern is that you take your measurements, find the correct size on the pattern envelope, cut out a dress (or pants or a top) and sew it up, only to try it on and find that it just doesn't fit you right!  I don't claim to be an expert by any means, but it usually means that there is too much or too little wearing ease, and you are not the same height as a model!

It's nearly impossible to 'fit' a pattern or muslin to yourself -- you really need a sewing friend who can do it for you while the pattern or muslin is hanging on your body.

I was in Missouri ten days ago, and was lucky to accompany my sister to a 'sewing weekend' that her neighborhood group of the American Sewing Guild had planned.  (For more information about the American Sewing Guild, go to www.asg.org.  This organization 'advances sewing as an art and life skill.'  There are chapters around the country, with local neighborhood groups that typically meet once a month to share ideas and inspiration.)  One of the other ladies in attendance is a home economics teacher, and was the perfect resource for fitting assistance!

I had selected two patterns...Simplicity 1754 - a Project Runway design, and Simplicity 2247 - from the Amazing Fit collection.  Both have princess seaming, which is easier to adjust.


To get the best fit, I made up the first dress in muslin, and tried it on 'inside out' so we could access the seam allowances.  What Janice found is that I have no waist! Letting a seam out here, and taking a little tuck there, and then transferring those adjustments to the pattern led to a better fitting garment.  It hung properly, with the seams hanging straight and no puckers or pulling across my stomach or tush.  I was able to fix the 'gap' that occurs across my upper chest, and adjusted the depth of the armholes, so I don't feel like I'm wearing a dress that's too long for me. 

Janice helps me transfer my alterations to the pattern pieces.
When I started on the second pattern, I was able to make the adjustments before I cut out the muslin; the fit needed very little 'tweaking' on the second garment.  I had brought along a third pattern for a casual summer dress, and was able to make the same changes on it, under Janice's direction, so I'm fairly confident that it will fit me, too.  After doing it three times, I think I know what changes to start with on a pattern before I begin cutting it out of fabric.       


Changes are transferred to the pattern pieces. 

The next step is to sew up two dresses using the newly altered patterns.  Then I'll get the input from my d.h. and my daughter as to which one I should make for the wedding.  I haven't decided on a color yet, but I'm leaning toward a shade of blue.

Check back in a couple of weeks to see my progress!  Until then, keep sewing!

Tuesday, April 9, 2013

An 'Irish' Quilt for Charity

I haven't done much sewing lately, but I cleared my work room of everything else and began an Irish fabric quilt on Easter Sunday.  I'm sewing with a heavy heart, for I'm making this quilt to donate to a charity auction being held for a young man in my neighborhood who was recently diagnosed with ALS.

Amyotrophic lateral sclerosis (ALS), often referred to as "Lou Gehrig's Disease," is a neurodegenerative disease that affects nerve cells in the brain and the spinal cord.  The progressive degeneration of the motor neurons eventually leads to a patient's death. The ability to control muscle movement is lost, and patients in the later stages of the disease may become totally paralyzed.  People with ALS live about three to five years after diagnosis.

Lou Gehrig played for the New York Yankees from 1923 to 1939.  He retired from baseball at age 36 because of the symptoms of ALS, and died two years later.  This illness has become known as 'Lou Gerhig's Disease' because of the attention brought to it through his life and death.  Many major league baseball teams, including the Philadelphia Phillies, hold fundraisers annually to help with the research that will someday lead to better treatment or a cure. This year the Phillies Phestival is scheduled for May 16.  Tickets go on sale April 12.  Read more about it on the Community page at http://philadelphia.phillies.mlb.com .

The book "Tuesdays with Morrie" by Mitch Albom tells the touching story about a student who, 16 years after graduation, reaches out to his professor who is dying of ALS.  If you haven't read it yet, check it out of the library and take the time.  For more information about this disease, try www.alsa.org.

Back to sewing...I saw this quilt block pattern on Pinterest.  It was designed by Megan Bohr.  It's called "Chevron and On" -- search for it here:  http://www.heyquilty.com/articles

A 'Chevron and On' block made in Irish print fabrics
The first thing I did was sketch out the design.  I decided to 'super-size' the blocks and make them 12" finished size.  

A quick layout of the baby quilt
By super-sizing the blocks, I would save time and money -- I needed only 16 fabrics, plus white, and the larger design would sew up quickly.  The fundraiser was only 12 days away, so this project needed to be fast.

Now, I have been making Irish-themed baby quilts for some time...my nieces ask for them when they are pregnant.  Every time I see a Irish-themed print, or even a green print or solid, I buy anywhere from 1/2 yard to 2 yards.  As a result, I have accumulated quite a stash of shamrock and Irish-print fabrics.  I didn't realize just how many fabrics I had collected until I began selecting prints for this quilt.  (I know, it's an addiction!)

My stash of 52 Irish print fabrics...that doesn't include the solid green or green prints!
After picking out light, medium and dark fabrics (and small, medium and large prints), I was ready to begin cutting.  

The pattern incorporates half-square triangles, so I cut one square of each print fabric 6 7/8", and another square 6 1/2".
Print fabrics cut into two different size squares
Half of the white fabric was cut into 6 7/8" by 42" strips.  From that, I cut 16 6 7/8" squares.  The remaining fabric was cut first into strips 6 1/2" x 42", then into 16 6 1/2" squares.

A rotary cutter and ruler makes the job go faster!
The 6 7/8" squares allow me to make 2  6 1/2" half-square triangle blocks quickly.  Here's how.   Layer the two 6 7/8" squares on top of one another (one print and one solid), right sides together. Draw a line across the diagonal of the square.  This is the cutting line.

Draw a cutting line on the diagonal, seen here in purple.
Now draw a line on either side of the cutting line, 1/4" away.  These are the stitching lines.

The stitching lines are drawn in blue.
Take the blocks to your machine and stitch along the stitching lines.  Cut the block along the cutting line, and open up the blocks.

With a quick snip, you'll have two 6 1/2" squares!
Press the blocks, with the seam allowances to the 'dark' side of each block.  Now you have two complete half-square triangle blocks.        

Viola!
I referred to my sketch frequently when I began to sew the blocks together.  To make it a bit easier, I sewed a half-square triangle block to the print first, then the other half-square triangle block to the white, pressing each seam allowance as I went.  Then I pinned the two pieces together and stitched them up.  The 16 blocks went together quickly.

The fun part of making a quilt like this is laying out the blocks.  I wanted to be sure I didn't put a dark fabric next to another dark fabric, and likewise, I wanted the spread out the large scale prints.  Once I had the layout down, I stacked up the rows and went back to the sewing machine to complete the quilt top.

I tried to mix up dark and light fabrics, large and small prints.
I gave the top a good pressing, and then layered the 'quilt sandwich.'  I had a 2 1/2 yard piece of green print in my stash that worked for the backing, although I did have to piece it together to make it large enough.  I laid the backing on my cutting table, wrong side up.  Then I topped it with a piece of batting.  I prefer "Warm and Natural" brand batting...it's not very thick, but it holds up well to repeated washing.  Then, I placed the quilt top over the batting, and smoothed out all of the wrinkles, and made sure that the backing and batting were large enough to cover the back of the quilt.  I use large safety pins to hold the quilt sandwich together for machine quilting, so the fabrics don't shift during the sewing process.  Some quilters hand-baste their tops together, but I find, for a small project, safety pins work great.

I try to use three or four pins on each square within the block.
For this quilt, I decided to simply stitch around each blocks, using a method called "stitch in the ditch."  Basically, that means the stitching should be made in the 'well' of the seam where the patches meet.  It takes a little practice to do this, and it really helps if you have a even-feed foot for your sewing machine.

After the quilting was finished, I clipped all the loose threads, and started with my binding.  I usually like to make bias binding, but I didn't have enough fabric for that, so I used strips cut on the straight grain of the fabric.  I did have to piece together several strips to make a binding long enough to go around the circumference of the quilt.  I sewed the strips together on a diagonal...that keeps the binding from getting bulky when it is sewn to the edges of the quilt.

This is easy to do -- just lay two strips at a right angle to each other, and draw a diagonal line from one corner to the other.  Stitch along the line, and trim off the excess.

I use a double-fold (also called French) binding.  To calculate the width to cut my strip, I use the following formula:  (2 x  finished binding width + seam allowance) x 2.  So, for a 3/8" wide binding, I made the strip 2" wide [(3/8" x 2) + 1/4" = 1" x 2 = 2" wide].  And you thought you'd never need math as an adult!

After cutting the strips, stitching them up and pressing them open, I folded the strip in half lengthwise and pressed it again. Now it was ready to stitch onto the quilt.

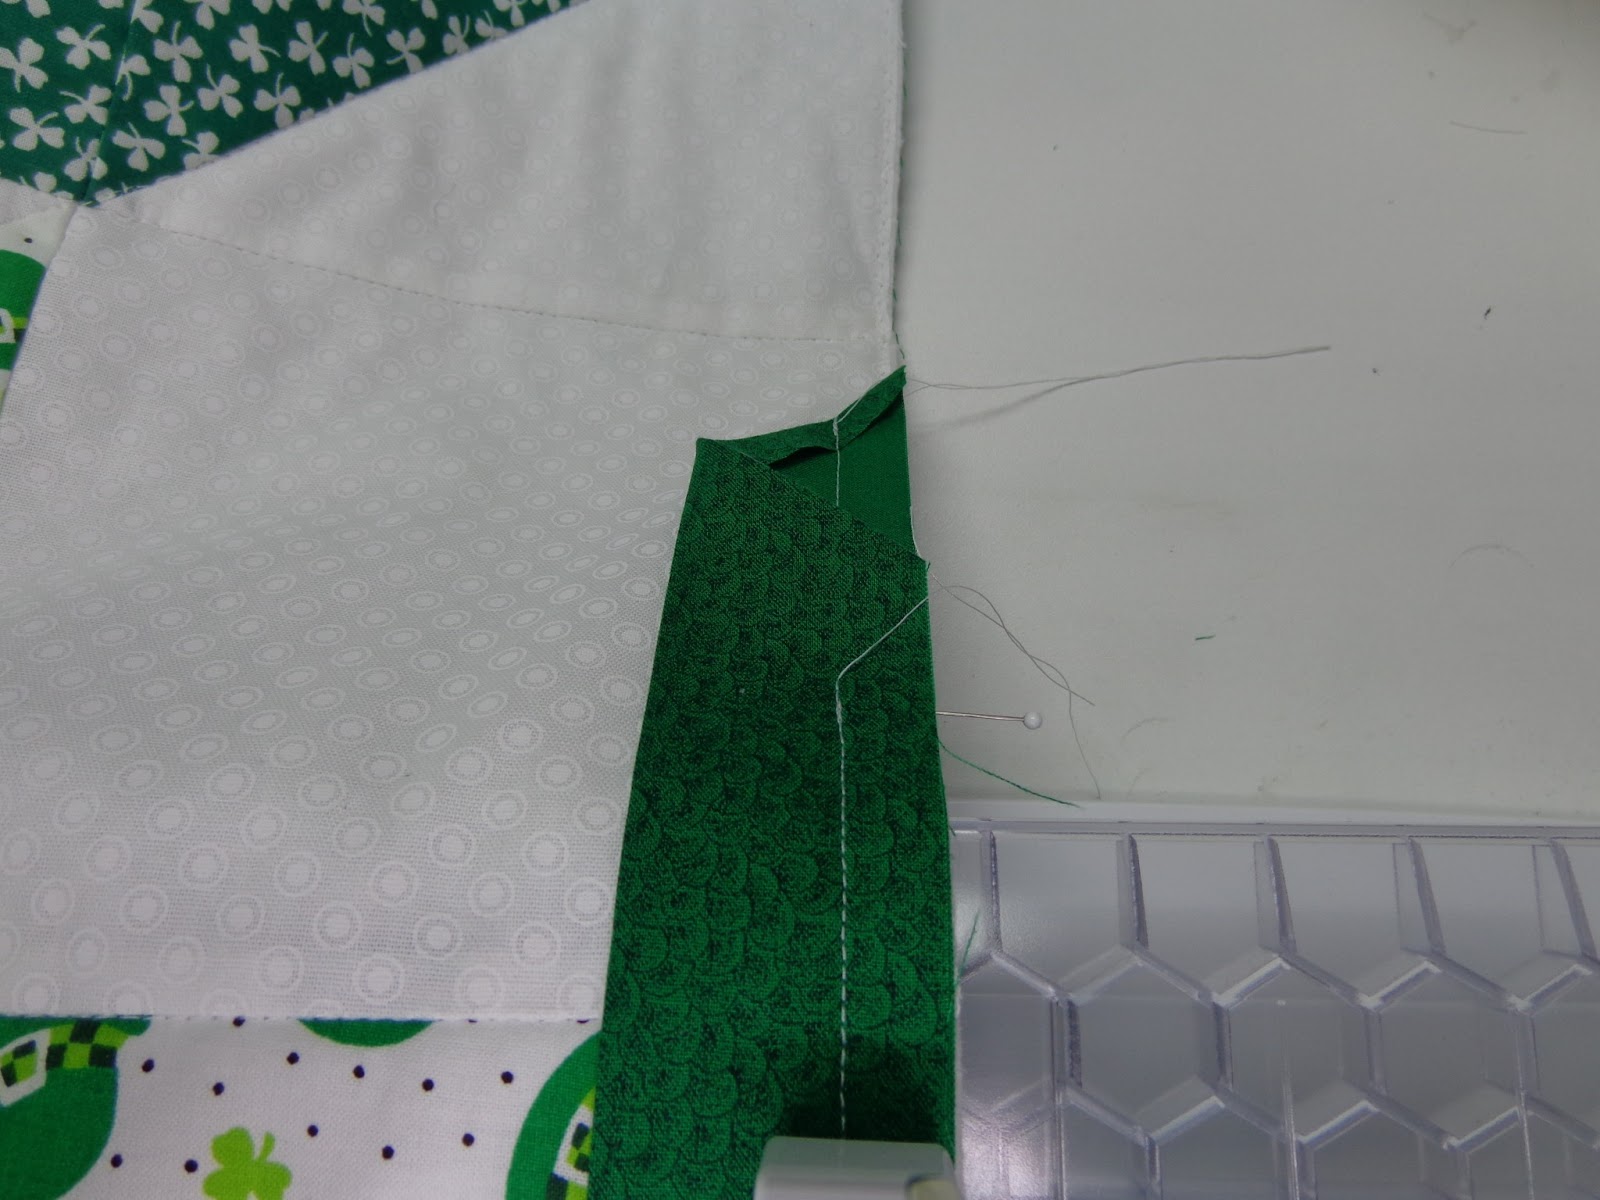
Starting and ending the binding was always a bit difficult for me, as I couldn't get it to lay smooth without a lot of bulk.  Then I discovered a method by Becky Herdle.


First, start at the end of the binding, open the strip, fold the end on the diagonal and press.  Trim a 1/4" away from the diagonal fold.  Starting on one side of the quilt, pin the first 3 to 4 inches of binding to the quilt with the fold open, keeping the raw edge of the binding and the quilt even.  Sew through one binding thickness for 3 to 4 inches, backstitch and clip the threads.


Lift the presser  foot and fold the binding into the doubled position.  Continue to sew the binding around the quilt.  After you have sewn around the whole quilt and return to the starting point, lower the needle into the first stitch.


Lay the binding over the single thickness sewn at the start and tuck the end into the pocket formed.  Cut off excess length.  Continue stitching through all thicknesses until you reach the second 'starting' point.


The beauty of this method is that the ends are hidden, and there is no bulk where you started and finished stitching the binding.

I also miter the corners of the quilt binding.  Most basic quilting books can teach you how to do this...here's what I do.  As I approach a corner, I stop (with the needle down in the fabric) and place a pin perpendicular to the stitching, exactly the distance of the seam allowance, from the side of the quilt.  This tells me where to stop stitching.

I continue stitching until the reach the pin, backstitch, and cut the thread.  Then I flip the binding up so it is perpendicular to the binding that I just stitched down, creating a diagonal fold from the corner to the center of the quilt.

Then I fold the binding back down on itself.  The fold should be even with the edge of the quilt on one side and the binding should align with the raw edge of the quilt on the other.  Start stitching down the side, beginning the width of your seam allowance from the top edge and from the side edge of the quilt (in this case, a quarter inch from the two sides of the corner).  You can place a pin exactly where to begin.  Having done this on several quilts, I can do it by 'feel' now and the pin is simply holding the binding so it doesn't move when I sew.
  

Make sure to use the same seam allowance width.  Continue on, and repeat the the next corner. (You may want to practice this before you try it on a quilt.  Just cut an 8" square and about 2 feet of binding, and play around until you get the hang of it.)  Press the binding well, pulling it away from the quilt so the seam is nice and flat, and fold the binding to the back of the quilt.  The corners will miter perfectly.


Now it's time for the needle and thread work.  I always blind stitch the binding to the quilt on the back side.  Some people prefer to pin the binding in place on the back of the quilt, but I find that pins get in the way.  Sometimes I use clips, other times I just hold it in place as I sew.  This baby quilt took about 3 hours of hand stitching, which I did while watching television with my d.h.

I was happy to deliver the quilt a couple of days early...I hope that someone will fall in love with it and make a hefty donation our friends coping with ALS.

Irish Chevron and On Quilt by Renee Devine
 P.S.  There's one more thing I'd like the non-quilters who read my blog to know...what it costs to make a 48" square baby quilt like this.  High quality quilting fabrics now cost $10.99 a yard.  There are 16 different fabrics that make up the blocks; a quarter of a yard of each would run $44.  Then, there are about 2 yards each of white and green fabric (for the back and binding), plus a piece of Warm and Natural batting for the middle of the quilt sandwich: add another $56.  So, before I spend even an hour of my time, the value of this quilt is $100.  The moral of the story is this:  if someone gives you the gift of a hand-made quilt, it is very special!  We do this because we love you!  And, if you ever consider buying a hand-made quilt, don't be surprised by the price and don't try to bargain with the artist.  It's worth every penny!

Monday, April 8, 2013

Easy Table Centerpieces

The past couple of weeks have been busy, preparing for the shower for my future daughter-in-law.  My daughter volunteered to create the table centerpieces, and drafted me to help.

The theme of the shower was "Spain" and she wanted to keep things simple and somewhat inexpensive.  I had been collecting wine bottles since Christmas (to make more luminaries, which were featured in a previous post) and my daughter thought we could use them (she may have seen something similar on Pinterest).


We removed the labels and most of the metal 'collars' at the top if each bottle, then sorted them by size and color.  We wanted to mix and match them a bit, so no one table would have three clear bottles on it.  for a dozen tables, we needed 36 bottles.

The day before the event, I made a run to Produce Junction, a local chain of bulk fruit/vegetable/floral stores.  Their prices on cut flowers are very reasonable.  In keeping with the theme, I found flowers the colors of Spain's flag -- sunflowers (yellow) and carnations (two shades of red) and a beautiful rose that was dark yellow at the base with tips of red.  I also picked up a bunch of fern and baby's breath for filler.

This whole bucket of flowers was only $27!


I selected a few stems for each of two wine bottles.  The necks of the wine bottles aren't very wide, so only two or three blooms would fit in each.  Then I used some raffia ribbon in red, orange and moss green to tie bows around the bottles.


For the third bottle, I cut a deep slit in a cork.  We had printed photos that my future daughter-in-law took during her many months studying in Spain.  We mounted those on colored card stock, and one photo went into the slit on the cork.  Each table had a different picture.


Here's the final product -- simple to create and just enough color to add interest to every table.  The future bride and her bridesmaids were thrilled to take home flowers at the end of the day, and I had plenty left over to create a bouquet to enjoy this week!

(P.S.  I made it home with about half of the wine bottles, so more luminaries will get made before summer!)

Thursday, March 28, 2013

Dying Easter Eggs, the Old-fashioned Way

Today at the grocery, I got side-tracked in the produce aisle.  Years ago, my sister dyed Easter eggs using onion skins, and those beautiful red onions were calling to me.  I bought one, and picked up a lot of loose, papery skins from the bin.  

Once I got home, I did a quick google search and discovered that Spanish onion skins create a nice, red color, but since I had a red onion and a few yellow onions at home, I decided to see what color they would produce.  

In addition to the onion skins and eggs, I gathered rubber bands and some muslin I cut into squares.  


I added a little water to each bowl to soak the onion skins and added the eggs to moisten them, too.
  

Next, I wrapped each egg in onion skins, trying to cover it completely.  


Then I wrapped the egg tightly in a muslin square and secured the ends with a rubber band. 
  
Into the pan and onto the stove!


For the perfect hard-boiled egg, fill a non-aluminum pan with warm water and the eggs.  Put the pan on the stove on medium-high and bring it to a boil.  Turn the temperature to 'low' and set a timer for 15 minutes, letting the eggs barely simmer.  When the timer goes off, run cold water over the eggs to cool them.  (If you want to eat them in a day or two, peel them immediately under running water and store in a ziploc bag in the refrigerator.)  Store dyed eggs in the refrigerator.  

After the eggs were cool enough to handle, I snipped of the rubber bands and opened the muslin bundle.


Wait for it....


Ta-da!!  I was surprised -- the red onion skins tie-dyed the eggs shades of green, red-brown and orange.  The yellow onion skins colored the eggs a beautiful shade of burnt orange.  To finish them off, I rubbed a little vegetable oil on each egg and wiped the excess off with a paper towel.  


Best thing about this method of egg-dying:  it didn't cost any more than an onion I will use, and it's non-chemical and non-toxic.  I think I'll be doing this for many years to come!

Saturday, March 16, 2013

Pinterest Project #4 - Completed!

Here it is -- the fourth DIY project I've made using Pinterest as inspiration!

My lovely daughter introduced me to Pinterest not too long ago, and while I don't browse it every day, I have managed to pin about 75 DIY projects onto my board.  (I also have a recipe board, a sewing board, and a 'words to live by' board, and sometimes the things I pin get put in the wrong place!)

But what is the point of pinning things to a board if you never go back and use them?

I've tried a few recipes, and have played around with some jewelry ideas, but I am really having fun with my DIY board.

Just a few weeks ago, I made this denim organizer...


And, although I haven't blogged about it, I did two other things:  I 'rolled' newspaper bags (so they pop out like baby wipes), tucked them into a empty bread crumb can and put it by my front door. Now I have a bag handy every time I walk the dogs.
Doggie 'doo' bags, ready to go!
And I followed someone else's instructions on how to create inexpensive 'foamy' soap using empty pump dispensers from a popular bath and beauty store.
One bottle of Suave bath wash = 4 bottles of foam soap!  All for $1.29!
But then I found an idea I could get my dear husband (d.h.) on board with helping me make -- a charging station for the phones and gadgets in the house.  All of us were trying to use the same outlet to charge our phones, and it was near the stove, which always made me nervous that I would spill something on the equipment.

I started with a decorative box that I found at Home Goods.  It's about 12 inches long and four inches high and wide, with a 'flap' style lid that has magnets in it to hold it closed.  It is made of very sturdy cardboard.
I found a strip extension cord in the house that was the right size to fit into the box.  My d.h. did a little tweaking to the cord -- he took it apart to clean (who knew that dust bunnies could make their way into a strip extension?) and decided to replace the electrical cord to make it longer.  That required about 15 minutes of work with a soldering iron.  D.H. has a set of large round bits for his drill, and found the one big enough for a hole that the plug could pass through.
I was worried that the cardboard wouldn't hold up to the drill, but the bit cut a clean hole. 
 The strip extension cord fit into the box nicely.

Since the strip had six outlets, we measured, marked and drilled six smaller holes on the back of the box for the charger cords to thread through.


The holes made by the smaller bit weren't quite as 'clean,' so I had to use an exacto knife to trim away the edges of the paper.  Plugging in the chargers took just a minute.
Three phone chargers, and my camera battery charger, plugged in.
I cleared off a space just inside the front door the house, and we were in business!  
The Electronics Docking Station, in use. 
The charging station is up and running!  When the phones are not plugged in, I tuck the cords behind the box, and it looks tidy.  My sons even recognize the value of having the cords corralled, and soon after I took this photo, the ipod charger was plugged in.

Follow me on Pinterest to see these and other projects I hope to get to make soon!


Friday, March 8, 2013

The Invitations Are Out!

My number one son is getting married this summer, and the mother of the bride and I are planning a little shower -- well, not so little!  About 90 people are invited!

Of course, I offered months ago to make the invitations.  Perhaps if I had known I needed to make 90, I would have given it a second thought, but once committed, I was ready for the challenge.

The bridesmaids wanted to feature all things Spain at the shower, since my future daughter-in-law studied there.  This created a design dilemma -- how could I get the theme across in the invitation?  I began flipping through "Card Ideas for Paper Crafters" by Papercrafts Magazine (volume one, summer 2011), and found a card template that used scalloped circle die by Spellbinders.  It triggered an idea:  make the invitations in the shape of a Spanish flamenco dancer's fan.


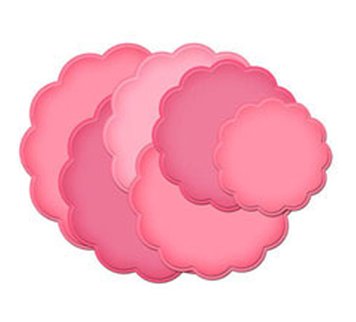
I found the dies on ebay, and purchased both the Nestabilities Big Scalloped Circle Large, and the Grand Big Scalloped Circles. The second set is designed for the "Grand Calibur" die cutting machine, which I don't have, but I figured one of the smaller dies would work with my little Cuttlebug.

If you're not familiar with Spellbinders dies, this particular style came in a pack of 6 dies of the same design, but each one is a little larger, with the smallest being 4 3/4" in diameter, and the largest being 7 1/2" in diameter.  This allows you to cut nesting shapes.  It also coordinates with three other die sets, progressively smaller.  My hunch was right -- I was able to use the third die, which was 5 3/4" in diameter. 

Here's a step-by-step for assembling the cards:

I measured the die and determined that the red cardstock needed to be 6" by 8". (Note to self:  don't go looking for red cardstock the week after Valentine's Day -- two craft stores were totally sold out of red!) After cutting the paper to that size, I used my Scor-It tool to crease the cards down the middle.  This was an extra step, but it gave me a nice, sharp crease, which made it easier to add the insert.   

I printed the party details on regular copy paper using the computer.  I trimmed each piece down to the 6" x 8" size, and adhered them to the inside of each card.  I did have the test them with the die cut machine first, to be sure I didn't cut off any of the information!
The next step was to die cut the cards.  Yes, I did this 90 times!
Notice I made a mark with a Sharpie on the die...this allowed me to line up the fold of the card in the correct spot every time. 
With the fold next to my marks, the card is ready to roll through the Cuttlebug.  Do you see the piece of tape on the left?  It's holding the card so it doesn't shift.  


Here we go!  I cranked through 90 cards the same way!

Here's the final card, cut exactly to the shape I wanted!  After I finished the red cards, I had to do the same with black card stock, patterned paper, and gold sticker paper, making each one a different size.  The gold circles later were cut in half with scissors.   
Here are stacks of paper, ready to be asssembled.
I put the embellishment papers together assembly-line style...adhering the patterned paper to the black cardstock, and then added the gold half-circle.  After that was finished, I added a black or gold eyelet to the embellishment.  I used a hole punch and setting tool to affix the eyelets.  
Punching the holes...
Adding the eyelet.

Why did I use an eyelet?  Well, the last step for the embellishment was adding a tiny tassel.  I found these at Home Sew, a notions company located in Bethlehem, Pa.  (http://homesew.com/).  I phoned in my order and they arrived just five days later!  


So here's the final product!  This is as close as I could get to a Spanish fan.  Although it did not involve rubber stamping at all, it was a lot of fun the take on the challenge, and I know my future daughter-in-law will be delighted when she sees it.