Thursday, March 28, 2013

Dying Easter Eggs, the Old-fashioned Way

Today at the grocery, I got side-tracked in the produce aisle.  Years ago, my sister dyed Easter eggs using onion skins, and those beautiful red onions were calling to me.  I bought one, and picked up a lot of loose, papery skins from the bin.  

Once I got home, I did a quick google search and discovered that Spanish onion skins create a nice, red color, but since I had a red onion and a few yellow onions at home, I decided to see what color they would produce.  

In addition to the onion skins and eggs, I gathered rubber bands and some muslin I cut into squares.  


I added a little water to each bowl to soak the onion skins and added the eggs to moisten them, too.
  

Next, I wrapped each egg in onion skins, trying to cover it completely.  


Then I wrapped the egg tightly in a muslin square and secured the ends with a rubber band. 
  
Into the pan and onto the stove!


For the perfect hard-boiled egg, fill a non-aluminum pan with warm water and the eggs.  Put the pan on the stove on medium-high and bring it to a boil.  Turn the temperature to 'low' and set a timer for 15 minutes, letting the eggs barely simmer.  When the timer goes off, run cold water over the eggs to cool them.  (If you want to eat them in a day or two, peel them immediately under running water and store in a ziploc bag in the refrigerator.)  Store dyed eggs in the refrigerator.  

After the eggs were cool enough to handle, I snipped of the rubber bands and opened the muslin bundle.


Wait for it....


Ta-da!!  I was surprised -- the red onion skins tie-dyed the eggs shades of green, red-brown and orange.  The yellow onion skins colored the eggs a beautiful shade of burnt orange.  To finish them off, I rubbed a little vegetable oil on each egg and wiped the excess off with a paper towel.  


Best thing about this method of egg-dying:  it didn't cost any more than an onion I will use, and it's non-chemical and non-toxic.  I think I'll be doing this for many years to come!

Saturday, March 16, 2013

Pinterest Project #4 - Completed!

Here it is -- the fourth DIY project I've made using Pinterest as inspiration!

My lovely daughter introduced me to Pinterest not too long ago, and while I don't browse it every day, I have managed to pin about 75 DIY projects onto my board.  (I also have a recipe board, a sewing board, and a 'words to live by' board, and sometimes the things I pin get put in the wrong place!)

But what is the point of pinning things to a board if you never go back and use them?

I've tried a few recipes, and have played around with some jewelry ideas, but I am really having fun with my DIY board.

Just a few weeks ago, I made this denim organizer...


And, although I haven't blogged about it, I did two other things:  I 'rolled' newspaper bags (so they pop out like baby wipes), tucked them into a empty bread crumb can and put it by my front door. Now I have a bag handy every time I walk the dogs.
Doggie 'doo' bags, ready to go!
And I followed someone else's instructions on how to create inexpensive 'foamy' soap using empty pump dispensers from a popular bath and beauty store.
One bottle of Suave bath wash = 4 bottles of foam soap!  All for $1.29!
But then I found an idea I could get my dear husband (d.h.) on board with helping me make -- a charging station for the phones and gadgets in the house.  All of us were trying to use the same outlet to charge our phones, and it was near the stove, which always made me nervous that I would spill something on the equipment.

I started with a decorative box that I found at Home Goods.  It's about 12 inches long and four inches high and wide, with a 'flap' style lid that has magnets in it to hold it closed.  It is made of very sturdy cardboard.
I found a strip extension cord in the house that was the right size to fit into the box.  My d.h. did a little tweaking to the cord -- he took it apart to clean (who knew that dust bunnies could make their way into a strip extension?) and decided to replace the electrical cord to make it longer.  That required about 15 minutes of work with a soldering iron.  D.H. has a set of large round bits for his drill, and found the one big enough for a hole that the plug could pass through.
I was worried that the cardboard wouldn't hold up to the drill, but the bit cut a clean hole. 
 The strip extension cord fit into the box nicely.

Since the strip had six outlets, we measured, marked and drilled six smaller holes on the back of the box for the charger cords to thread through.


The holes made by the smaller bit weren't quite as 'clean,' so I had to use an exacto knife to trim away the edges of the paper.  Plugging in the chargers took just a minute.
Three phone chargers, and my camera battery charger, plugged in.
I cleared off a space just inside the front door the house, and we were in business!  
The Electronics Docking Station, in use. 
The charging station is up and running!  When the phones are not plugged in, I tuck the cords behind the box, and it looks tidy.  My sons even recognize the value of having the cords corralled, and soon after I took this photo, the ipod charger was plugged in.

Follow me on Pinterest to see these and other projects I hope to get to make soon!


Friday, March 8, 2013

The Invitations Are Out!

My number one son is getting married this summer, and the mother of the bride and I are planning a little shower -- well, not so little!  About 90 people are invited!

Of course, I offered months ago to make the invitations.  Perhaps if I had known I needed to make 90, I would have given it a second thought, but once committed, I was ready for the challenge.

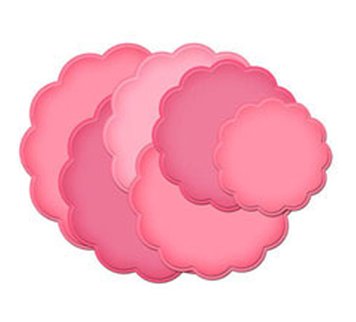
The bridesmaids wanted to feature all things Spain at the shower, since my future daughter-in-law studied there.  This created a design dilemma -- how could I get the theme across in the invitation?  I began flipping through "Card Ideas for Paper Crafters" by Papercrafts Magazine (volume one, summer 2011), and found a card template that used scalloped circle die by Spellbinders.  It triggered an idea:  make the invitations in the shape of a Spanish flamenco dancer's fan.


I found the dies on ebay, and purchased both the Nestabilities Big Scalloped Circle Large, and the Grand Big Scalloped Circles. The second set is designed for the "Grand Calibur" die cutting machine, which I don't have, but I figured one of the smaller dies would work with my little Cuttlebug.

If you're not familiar with Spellbinders dies, this particular style came in a pack of 6 dies of the same design, but each one is a little larger, with the smallest being 4 3/4" in diameter, and the largest being 7 1/2" in diameter.  This allows you to cut nesting shapes.  It also coordinates with three other die sets, progressively smaller.  My hunch was right -- I was able to use the third die, which was 5 3/4" in diameter. 

Here's a step-by-step for assembling the cards:

I measured the die and determined that the red cardstock needed to be 6" by 8". (Note to self:  don't go looking for red cardstock the week after Valentine's Day -- two craft stores were totally sold out of red!) After cutting the paper to that size, I used my Scor-It tool to crease the cards down the middle.  This was an extra step, but it gave me a nice, sharp crease, which made it easier to add the insert.   

I printed the party details on regular copy paper using the computer.  I trimmed each piece down to the 6" x 8" size, and adhered them to the inside of each card.  I did have the test them with the die cut machine first, to be sure I didn't cut off any of the information!
The next step was to die cut the cards.  Yes, I did this 90 times!
Notice I made a mark with a Sharpie on the die...this allowed me to line up the fold of the card in the correct spot every time. 
With the fold next to my marks, the card is ready to roll through the Cuttlebug.  Do you see the piece of tape on the left?  It's holding the card so it doesn't shift.  


Here we go!  I cranked through 90 cards the same way!

Here's the final card, cut exactly to the shape I wanted!  After I finished the red cards, I had to do the same with black card stock, patterned paper, and gold sticker paper, making each one a different size.  The gold circles later were cut in half with scissors.   
Here are stacks of paper, ready to be asssembled.
I put the embellishment papers together assembly-line style...adhering the patterned paper to the black cardstock, and then added the gold half-circle.  After that was finished, I added a black or gold eyelet to the embellishment.  I used a hole punch and setting tool to affix the eyelets.  
Punching the holes...
Adding the eyelet.

Why did I use an eyelet?  Well, the last step for the embellishment was adding a tiny tassel.  I found these at Home Sew, a notions company located in Bethlehem, Pa.  (http://homesew.com/).  I phoned in my order and they arrived just five days later!  


So here's the final product!  This is as close as I could get to a Spanish fan.  Although it did not involve rubber stamping at all, it was a lot of fun the take on the challenge, and I know my future daughter-in-law will be delighted when she sees it.  

Tuesday, February 26, 2013

Turning a Sweatshirt into a One-of-a-Kind Jacket

As I mentioned previously, I have recycled jeans into several different things over the years.  My sister in Arizona knows this, and when we saw each other two weeks ago, she brought me something she wanted recycled.

She was working on a denim throw.  She found some pre-cut 6 inch squares at her local thrift shop, but needed more to finish the blanket, so she went to her closet and pulled out a denim dress that no longer fit.  After cutting what she needed, she had this left over:

The front of the dress, with embroidered detailing.
The embroidery on the front of the dress was definitely worth saving!  She thought she'd like it turned into a jacket, so I went shopping and picked up an extra large grey sweatshirt.


I used the iron to crease the center front of the shirt, so I would know where to pin the placket.  Before I could start pinning, I needed to trim off the back yoke a bit to fold and press up a hem.


 Then I started pinning.  I aligned the shoulder seams of the dress with the shoulder seams of the sweatshirt.   I carefully pinned the front placket down the front of the sweatshirt, unbuttoning the front to pin right along the edge.  I pinned along the sides of each front piece and along the back yoke.


Once everything was pinned in place, I used my sewing machine to stitch it down, following the original stitching lines of the dress.  For most of the sewing, I used an 'even-feed' foot, a presser foot that moves both layers of fabric under the needle evenly.  When it came time to stitch next to the buttons on the front placket, I switched to the zipper foot so I could get in close.  Applique scissors were the tool I needed next.  They are sometimes called 'duckbill' scissors, because the have a wide flange on one side.  This allows you to cut the fabric on top very close without snipping into the fabric underneath.  


I turned the shirt inside-out, and started trimming away the sweatshirt, first by cutting up the center front, and then by trimming next to the stitching lines.  With sweatshirt fleece, you don't need to worry about fraying.

When using applique scissors, you lay the flanged side flat against the fabric, cutting carefully so you don't snip it!

In less than an hour, the jacket was complete!


Hope this is what my sister had in mind!

Sunday, February 24, 2013

Can you think of a way to use this?

Here's a quick little craft project that I worked on a few weeks ago.


It is a three tier terracotta display.  I saw something similar on Pinterest, but when I went to the local craft store, I was limited to the sizes of clay pots that I could buy.  I'm thinking that when Spring rolls around, I'll be able to find much larger pots and trays at the hardware store or local nursery.  The trays on this project are 5", 7" and 9" in diameter.  I used two clay pots, 2" and 4" in diameter.  Including paint and brushes, I spent less than $15.

The pieces are glued together with E6000 glue.  This adhesive it great for all kinds of applications!  I glued the pots together before I started painting, because I was afraid the paint would interfere with the bond.

I painted the pots with regular acrylic craft paint, which was a pain, because it soaks into the porous clay and takes three or four coats for complete coverage.  (I thought the craft store carried special paint for terra cotta, but I couldn't find it.)  Then, as a finishing touch, I sponged on metallic silver acrylic craft paint, which gave it a glossy shine.  You could top coat the project with an acrylic sealer spray, but since I didn't have any on hand, I skipped that part.

So what would you use this for?  I took this one to work, and it's sitting on the register counter at The Bead Garden.

Made up larger and painted differently, one of these would work great just inside your front door as a catch-all for keys, change, sunglasses, etc.  Can you think of another way to use it?

Wednesday, February 20, 2013

Another "Charming" Project

I can't believe it's almost the end of February! The days seem to be rushing by, but that's o.k., because it means Spring is on the way soon!

I did 'lose' a few days last week...my dear brother-in-law's father passed away on February 3, and although his dad had spent several decades in the western United States, he was buried in his home town of Spencer, West Virginia.  My d.h. and I decided to make the trip so my brother-in-law, sister and nephew would have some family with them during this difficult time (he is an only child).

My sister made reservations for all of us at a lovely bed-and-breakfast, The Cunningham House. Spencer is south of Morgantown and north of Charleston, and there are no hotels in the town.  
 
Ruby Bradley
The Cunningham House is one of two Bed and Breakfast inns in Spencer.
The owners, Sonny and Sherry, were gracious hosts.  In the late 90's, they purchased, gutted and restored the house to it's turn-of-the century glory, but added a private bath for each guest suite. Their website seems to be down right now, but you can contact them at 304-927-2022 if you're interested in staying there sometime.  Spencer hosts a Black Walnut Festival in the fall every year (http://wvblackwalnutfestival.org) and there are two vineyards within a short drive of the town.

Before we left Philadelphia, my sister called and asked me to bring my jewelry tools along because she had a few things that need to be fixed.  I did some on-the-spot repairs for her, but one project needed to come home with me to finish up.

She had collected a number of heart charms, and a couple of inexpensive cameos, and was wearing them clumped together on a chain.  What she really wanted was to space them out somehow, so you could see each charm.  A long chain was included in the pile, so I decided to use that for the re-make.

While I could have hung each charm from the chain with a jump ring, like I did with the religious medal necklace featured in a previous post, I decided to use some gold-plated beads for spacers. The holes were large enough to string onto the chain, and by using two between each charm, there is just enough room for the charms to hang free but still be close enough to jingle a bit when she wears it.


While you wouldn't classify this as 'fine' jewelry, it's a fun piece to wear and show off a collection of similar charms.  Best thing is that we recycled bits and pieces of jewelry to make something new!

Thursday, February 7, 2013

A little Valentine

St. Valentine's Day is just a week away and it's time to start thinking about making a little gift for the people you love in your life.

(Did you notice that I said SAINT Valentine's Day?  I think people have forgotten that February 14 is the feast day of St. Valentine...not purely a Hallmark holiday.)

I digress.  Back to making a little gift for someone you love.

Here is a simple bracelet that will take an experienced beader just 15 or 20 minutes to put together; a newbie can finish it up in about 30 minutes, with a little help.


I used red rondelle crystal beads, with gold beadcaps, strung on Softflex beading wire for one half of the bracelet.  To give the beads some 'breathing room,' I added a size 11 seed bead between each crystal unit.

I crimped one end of the beading wire to an open jump ring and added a lobster claw clasp.  The other end was crimped to about three inches of chain to complete the bracelet.  I covered the crimp beads with gold-plated crimp covers to give it a finished look.

Selecting the charms was the fun part!  Most were attached with open jump rings, except for the red crystal ball.  I used a headpin and two small gold beads on the top and bottom, then attached it to the chain with a wire-wrapped loop.  There are ten charms on this bracelet, but it can be made with fewer.  Depending on the number of charms and the cost of each, a bracelet like this can be made for between $10 and $20 dollars.  (All of my supplies came from The Bead Garden (www.thebeadgarden.com), my local bead store.)

Don't you think it's charming?