Thursday, April 23, 2015

Surrounded by Quilts

I was out in Missouri just before Easter for a funeral and a few days of visiting with my sister. The guest bed mattress is a little firm for my taste, but I was snuggly warm under a quilt made nearly 50 years ago by my grandmother, Mae Prost.


It's a Sunbonnet Baby, with applique dresses and bonnets and embroidery 'trim.'  My grandmother made a few of these, plus Sunbonnet Sue and Overall Boy quilts.  But my all-time favorite quilt that she made was the "Trip Around the World."


She made two of these...this one started with red in the center and worked its way through the rainbow to end with purple (she would say 'violet') at the border.  The other started with purple in the center and ended with red around the edge.  As a little girl, I was fascinated with the print fabrics she selected in each color family, and how small the squares were.  My cousin has this one; the other went to my Uncle Jay, who had it buried with him.

My mother loved to make clothing and didn't take up quilting until later in her sewing life.  This tiny quilted wall hanging decorated her seashore-themed bathroom.

  
She made a shower curtain with sailboats and lighthouses on it, too.  I have it hanging on the wall of my sewing room.

When my mom died, she left two partially finished quilts...one was called Cream and Sugar, and was a block of the month project made of cream and cafe-au-lait colored fabrics.  I added borders to it, had it quilted and gave it to my nephew Chris, her oldest grandson.  She had made quilts for all of the granddaughters and had told me that she ought to start on quilts for the boys.  She didn't live long enough to make 10 (the number of grandsons she had), but at least this one got finished!

The second unfinished quilt was another block of the month project using 1930's inspired fabrics.  She really had trouble with this particular block.


She was working on it while recuperating from a heart attack and I guess the medicine made her a bit loopy.  She struggled with the quarter-square triangle blocks and cut them too small.  Luckily, the quilt shop had more of the fabric, so I made a run to pick it up and helped her with the math.

After she died, my niece Melissa saw the blocks and really liked them.  She asked me if she could have them so she and her mom could complete the quilt.  I sketched out a 'modern' layout for the 12 blocks.


I don't know how much work Melissa did on the quilt, but my sister got it finished and sent to the long-arm quilter.  I was hoping to finish the binding for it while I was in Missouri, but we couldn't find the piece of fabric she had set aside for the binding.  She'll get to it eventually!  

My sister loves to make baby quilts.  Many of her friends and acquaintances have been the beneficiary of her enormous stash of fabrics.  While I was visiting, I worked on the binding for this bright quilt, made of jelly roll strips and charm squares.  (For those of you who don't know, jelly roll strips are pre-cut pieces of fabric 2 1/2" wide by 42" long.  Charm squares are precut 5 1/2" squares.)


She had already finished another baby quilt (or wall hanging, I couldn't be sure) that I just loved!


It is made up of 'jars' of aquatic life -- fish, turtles, alligators, frogs and octopi (or octopusses, if you prefer Greek over Latin).  Isn't it adorable?!


I bought a kit and fabrics to make a similar quilt, but instead of sea life, my 'jars' will be filled with different kinds of candy and snacks -- jelly beans, peanuts, licorice, and candy corn are just a few of the fabrics in the kit.  My sister's quilt has me motivated to find my kit and get it started!

There's one more quilt I'd like to share today...this one was made by my mother's friends to commemorate the 25th anniversary of the American Sewing Guild.  When the ASG started in 1978, my mother was among the first in the St. Louis area to join.  During the ASG's silver anniversay year, her neighborhood group made a quilt for her, each person designing her own block.  My sister, Carol, made the block in the center -- the black sewing machine bordered in red.


Her friends gave my mother this gift to acknowledge her years of service to ASG and her friendship to more than one generation of sewers.

It's funny how my mom, sister and I have 'fallen' into quilting, while my grandmother was known as a quilter.  It's another artistic endeavor using the skills we learned as we began sewing clothing.

My daughter has a friend who is expecting her first child this fall...I think she'll be coming out to my house soon, to dig through my stash and design a special gift for a sweet new baby.  And so the tradition gets passed along...

Thursday, February 26, 2015

Sewing Heaven

My sewing buddy, Martha, and I got together a few Sundays ago to do some stitching.  She was finishing up some pillowcases to donate to ConKerr Cancer, a local charity that the American Sewing Guild supports (http://www.conkerrcancer.org/volunteer/sew-pillowcases).  I was working on a gift for my daughter-in-law, whose birthday is fast approaching.  Sometimes, sewing is more fun when you have someone to talk to while you work!

But, I couldn't leave her house without asking permission to take a few pictures of her sewing space -- truly a Sewing Heaven!  The post about my sewing room organization has been one of the most-viewed since I started my blog (Dec. 3, 2012), and while I love my space, it doesn't compare to Martha's.

She lives with her husband in a lovely home in suburban Philadelphia.  Her only daughter is married and has two children, so Martha and her d.h. have the place to themselves.  Her sewing space is on the second floor of her home, next to her bedroom.  Her room is large enough that she set up a narrow six foot table for my sewing machine on the day I visited


A sewing cabinet for her machines is centered in the room.  Her serger is to the left by the window, her sewing machine takes center stage, and she has a machine dedicated to embroidery on the right. With this configuration, she can move around the cabinet to each machine, and use the wall space for storage cabinets.

 
Some of the cupboards are open, others have doors and drawers.  By keeping the storage units white, the room seems spacious.  Martha loves to decorate with sewing-themed items, and they are sprinkled throughout her space.

She made a great score when a local fabric store was closing.  She was able to buy two pattern cabinets for a very reasonable price, then had a formica top made to cover the tops, giving her a lot of space for her collectibles.  The drawers are used for patterns, fabrics, machine manuals and a whole lot more.


I would really love to find a pattern cabinet, but I'm not sure it would fit in my space because of the sloped walls.

A few years ago, Martha splurged on a special piece of sewing equipment, a six needle embroidery machine.


This machine can do some amazing things.  Martha helped me monogram the fronts of tote bags that I otherwise I couldn't have done, because this machine has an open throatplate.  It can change thread colors without having to stop and re-thread the machine.  It also features a very large hoop, which allows her to create large monograms and stitch large designs without re-hooping.

What you don't see here is what's behind the door to the right of this machine...it's a walk-in closet.   Martha had it outfitted with shelving so she can store her stash of fabric and supplies sorted into clear plastic bins. It makes it easy for her to find things.

Martha has a comfortable room that would be any sewer's dream.  Lucky girl!!  


Sunday, February 22, 2015

And baby makes...five!

My lovely niece Mary and her husband recently welcomed her THIRD baby -- another boy!  Yea!

When her oldest son was born, I made my 'traditional' Irish print fabric quilt, at his mother's request.


 Two years later, when his little brother was born, I decided to make the new baby something fun.  And a funny thing happened...Big Brother recognized the animals and wanted to claim it for his own!


I told my niece to let him have it, and Little Boy Two's blanket could be the Irish one. Now that Number Three Son has come along, I wonder if Mary's middle child, who is just two, will have the same reaction, and want this new quilt for himself!


This toddler blankie started life as a 24" by 44" panel called "Barnyard Counting," by Laurie Wisbrun for Robert Kaufman fabrics.  My daughter and I found it at a quilt shop in Maine 18 months ago.  It has been in my stash, waiting for the next great-nephew to come along.

As with most of my quilts, I started with the sketch.  I decided to cut the panel into blocks, which measure 8 1/2" by 11", and mix them with brightly colored prints.


Digging through my stash, I found several prints that would work.  After trimming them into the same size block, I began to lay out the rows.


Sewing this together was easy-peasy!  The blanket is five blocks wide by four rows long.  I added a solid yellow border to tie everything together.  The green polka-dot fabric was used on the back of the quilt.


I also made bias binding out of the green polka-dot to finish the edges.


I used my sewing machine to make even lines of quilting, both horizontal and vertical, including stitching in 'the ditch' between the blocks.


It's so stinkin' cute, isn't it?!  I just love it, and I hope Number Three Son loves it, too!!


Saturday, February 14, 2015

Yea! I Mastered the "Pinecone Delight"!!

What's that, you say?  Well, the "Pinecone Delight" is a beading pattern created by Barbara Grainger.
Beaded Pine Cones
I saw this really cool photo (above) on Pinterest, but, as happens to me a lot, when I clicked on the page for the photo, there were no directions there.  (The page was in Russian!)

I went back to Pinterest and narrowed my search, using the name of the beads used in the project (long magatama).  After scrolling down a bit, found Barbara's name and a link to a website where I could purchase the directions (http://stitchboard.com/mall/showItem.php?in=10222)
It costs $10, which you pay via paypal, and then the website sends you a link to download a PDF file of instructions.

After teaching beading and writing instructions for nearly 10 years, I can tell you that Barbara knows what she's doing.  Her step-by-step instructions were thorough, had excellent graphics and had been tested for clarity.

And, for this project, she knew to say the skill level was for intermediate to advanced beaders.  Take my word for it...she's right!  This is not a project for beginners!

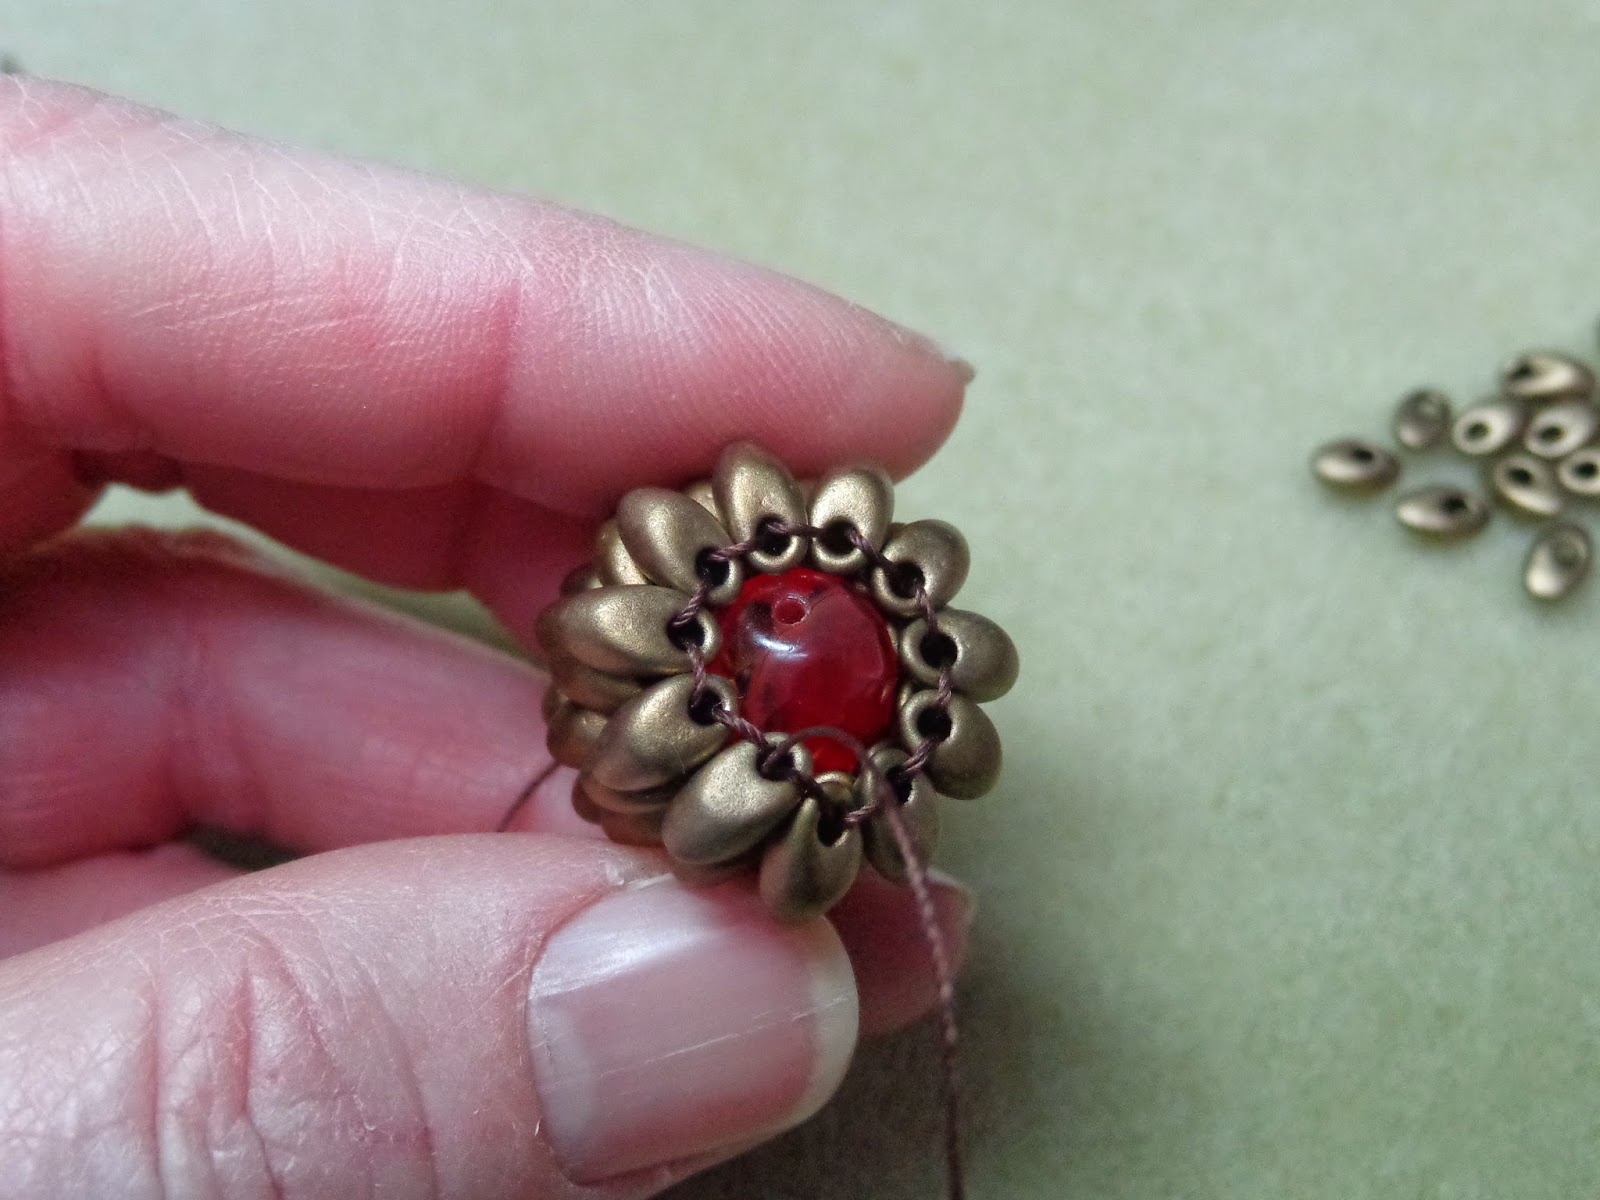
Long magatama beads are elongated, and have a hole toward the top.  They have a right and wrong side, and this pattern requires that you know the difference.
The bead on the left is right side up, the bead on the right is wrong side up.

Some beads are picked up on the needle 'right side up' and others are picked up 'wrong side up.'
What makes the piece look like a pinecone is the shape of the beads, all pointing in the same direction.  The beading went quicker when I sorted the beads into two piles, one pile right side up, the other pile wrong side up.

Rights side up beads on the left, wrong side up beads on the right, made it easier to follow the directions.  
I generally use Fireline brand braided bead thread by Beadsmith for seed bead projects, and started my pinecone with that.  After four or five rows, I had a mess that I couldn't fix, and decided to start over.  Magatama beads have very large holes, and I thought that thicker thread would fill the holes and hold the beads in place better.  Size 4 no-stretch nylon bead stringing thread by Beadsmith was thicker, so I switched to that.  The change was a good one, and the project went much easier.    

The starting row of this project is ladderstitch.  Subsequent rows are worked in brickstitch.  One thing I discovered is that the tension on this project is loose...if you pull the thread too tightly, the beads will flip, over.   Most projects I've done require a tighter tension. As I added each bead, I held it in place right side up with my left thumb as I stitched through it.  It's a little awkward, but, as I said, the beads tend to want to flip over until you get them locked into place.

As the pinecone grew longer, it was getting 'squishy,'  I fixed that by dropping a 10mm bead in the center of the cone.  Just having that filler bead in place made adding the rows easier.

I ended up leaving the bead inside the pinecone, just to give it some 'stuffing' to hold its shape.  You can't see it on the finished project, so I will continue to add a bead when making more pinecones.  

One other note about Barbara's directions...she says "you work from the top of the pinecone downward, but you hold the pinecone upside down as you work it."

This is opposite of how I would describe a pinecone.  I think the TOP of a pinecone is the part attached to the twig on the tree, and the BOTTOM is the pointy part at the other end. If you think of it the same way as I do, you will be working from the bottom of the pinecone toward the top, in which case it isn't being held 'upside down,' as the instructions say.  I mention this so you don't wonder why the pinecone 'leaves' are laying the wrong way.  If you follow the directions, it will turn out fine...the top/bottom description is a bit confusing.  

Oh, the bead cap with the wire wrapped loop at the top was added by me so the pinecone could hang, either as an ornament or as a pendant. (See, I called it the 'top.'  Barbara would call it the bottom!)


The project took about three hours.  I can't wait to get some other colors of long magatamas and try this again!


Sunday, February 8, 2015

Something Cute for a Baby Boy


While I make four or five baby quilts every year, sometimes I need a little something to give as a baby gift that isn't as labor intensive or cost expensive.

Now, there are a lot of cute patterns for baby GIRL things, but not so many for baby BOYS. Maybe it's because I have three sons, but I get a little frustrated when I find so much designed for little girls and nearly nothing I can make for a boy.  Then, while on vacation in Branson, Missouri, last fall, my sister and I popped into a very nice quilt shop, Quilts and Quilts (http://www.quiltsandquilts.com/).

BINGO!  I found the cutest 'boy' project that doesn't take much time or fabric.

p189It's called "Dude Babies" -- a collection of three bibs for little boys.  Designed by Barbara Brunson of Vanilla House Designs (www.vanillahousedesigns.com), it includes Mr. Businessman, Mr. Formal, and my favorite, Mr. Cowboy.
 
The fabric requirements are minimal:  1/3 of a yard for the bib, a fat quarter for the scarf, and a small scrap for the star.  Notions include thread, three buttons and snaps or velcro.

While her pattern is great, I tend to tweak things a little, sometimes to save time, sometimes because it makes more sense from a construction point-of-view.  I did that in this case.

The pattern for the 'shirt' has two pieces, which are overlapped and stitched together on the back side of the bib.  Instead, I taped the pattern pieces together and cut just one front and one lining piece from a lightweight denim.

Two front pieces can be taped together to make just one for easier construction.
Use medical tape, and you can always take the pieces apart later!
My sister gave me a fat quarter of the bandana fabric, and I cut out the neckerchief and pocket.  The neckline application did require a lot of pins, but turned out fine.
After sewing the bandana, right sides together to the bib front, you layer the bandana 'lining' right sides together
and stitch the two neckerchief pieces together.  
The pattern calls for hand-stitching the neckerchief lining to the back side of the bib, but that kind of work slows me down.  I opted to pin it carefully and edge-stitch it, since the stitching wouldn't be visible from the front side.
Close up of edge-stitching

The faux 'pocket' was stitched down on the lower right-hand side of the bib.  It's a cute little detail that makes the bib look like a shirt.
I found three blue buttons in my stash...red would have been cuter, but alas, there were none in the button box.  The placement of the buttons was measured from the bottom up because the neckerchief covers a bit of neckline.
Zig-zag stitching the point of a star is tricky!


The star 'badge' took the most time.  There was a scrap of fabric in my stash just the right color.  I used fusible web (wonder-under) to hold it in place so it could be appliqued.  I used a 30 weight rayon embroidery thread to match.  Turning the corner at the point of the star was a bit tricky...I think I should have practiced that a few times before I did it on the bib, but unless you're looking really close, I don't think you'd notice!


The pattern called for snaps or velcro at the neckline, and behold, I found red velcro in my stash!
OMG!! Red velcro!
In under two hours, here is the cutest darn bib for a boy in the whole Wild West!  In the whole country, for that matter!  Yippee!


Mr. Businessman will be next!!

A little footnote about Quilts and Quilts.  It's a locally owned and operated business in Branson, Mo., with three generations of the same family working in the shop.  On February 29, 2012, the shop was hit by a tornado and destroyed.  The owner found a new location immediately, and the shop re-opened just FIVE weeks later.  They carry 14,000 bolts of fabric and over 2,000 patterns.  The staff is so knowledgeable, it is a pleasure to shop there.  Check out their on-line store!  

Thursday, January 22, 2015

R-TV Revisited -- Making an iMovie

Most of my friends don't know that I have a Bachelors of Science in Radio-Television from Southern Illinois University - Carbondale.  I started my professional life as a radio newscaster before jumping to public/media relations.  I do admit I miss those news-gathering days.

I joined the American Sewing Guild many years ago -- it is a national organization that promotes sewing as an art and life skill.  But really, it is a group of (mostly) women who meet on a local level to share the common bond of sewing.  We welcome beginners and experienced sewers, and have a lot of fun at monthly meetings and chapter events.  One of my favorite activities is Sewing Camp, five days of uninterrupted sewing, held each year in May by the Philadelphia Chapter.  It's like a sleep-over party for adults!

All packed up for Sewing Camp!
This year, the national organization is sponsoring a contest, asking individuals or groups to submit videos on the theme of "What ASG Means to Me."  Given my background, I couldn't resist.

Me, with my fourth cousins!
For the last few years, I have been collecting and sorting through family genealogical papers and photos.  My grandmother didn't throw anything away, so I have a pretty good stack of letters, some dating back to 1870, newspaper articles and photographs.  I also have some first-person accounts about various relatives. Then, a woman approached my sister after church one Sunday, introduced herself and said "I think we may be related."  Sure enough, she was!  I met her and two of her cousins for dinner, and they were kind enough to bring along what family genealogy and photos they had to share with me.

When I starting thinking about producing a video, I decided to take a unique approach and write a story about how sewing has been passed down from generation to generation of women in my family. I drafted a script and began pulling together photos to tell the story, but didn't know how I would make it into a video.  (I should tell you that I'm not much of a techie.)

My young friend, Niyi, was happy to help.  He downloaded iMovie onto my iphone, and gave me a quick lesson on how to drop in photos, add music and record my voice.  Under his direction, I learned the basics of putting photos to text, and then played around with iMovie until I had something I was pleased with.    

 Here is the finished product:


I can't believe how easy it was to use iMovie.  Yes, there were some limitations.  For instance, I wanted to start with a black screen and fade up to my first video clip, but couldn't figure out how to do that or if it was possible with iMovie.  And I wanted the music to begin with the first photo, but could get that to work either, so it's under the entire video.  Minor things that I don't think affected the overall video.  Maybe if I play around some more, I'll figure those things out.

Now that I know what I'm doing, I hope to use it again!  I see tutorials in my future!

And here's a request...if you are so inclined, would you please share this video with someone you think would enjoy it?  This is a competition, after all, and the video with the most views by June 15, 2015, will win a prize for the video and for their ASG Chapter.  Thanks in advance for your help!


Tuesday, January 6, 2015

Scrabble Tile Fun

Hello again!  I've been slacking off on my blog posts...but one of my New Year's resolutions is to be more consistent with my writing, so hopefully, this will the one of many new posts for 2015!

If you peruse Pinterest, you may have seen this project -- coasters made out of Scrabble tiles.


I pinned this idea right away.  Scrabble is my favorite board game, and last year, when my son's friend was living with us, he and I played frequently.  (I hate to admit that he beat me often, but every now and again, I would come through with a triple word score and take the game!)

Last year, I made him a quilt using a panel of Scrabble fabric, and I knew this would be a fun gift for him this year, as he is moving on in life and starting his first 'real' job.
A Scrabble Quilt
The biggest challenge?  Finding Scrabble tiles!  I did a quick run through my favorite thrift stores, but there were no Scrabble games to be had.  An internet search led me to a great website with very reasonably priced new Scrabble tiles:  www.sunandmooncraftkits.com.  (Look under 'supplies' for the tiles.)  Better still, you can purchase them by the bag or select exactly what you need!  By the piece tiles are 10 cents each -- a real bargain!  I ordered two bags of 100 letters, plus extra vowels.

You will also need a backing material.  I headed to another favorite recycling store, The Resource Exchange, in the Fishtown section of Philadelphia (www.theresourceexchange.org). This great store recycles all kinds of neat and interesting stuff, mostly from theater and movie sets, including furniture, wood, yards of fabric and trims, old photos and posters and, for this project, a couple of 12" square tiles of cork.

The right kind of adhesive makes all the difference, and I reached for my tube of E 6000.  This clear glue is strong, won't stick your fingers together, and yields a permanent bond when it cures for 24 or more hours.
It's better to spread the glue onto the cork than onto each Scrabble tile.  An old credit card helps with this!
My 28-year-old daughter and I were working together to come up with some good four letter words for the coasters, until she accused me of 'cheating' when I used a blank tile!  The coasters were 2 7/8" wide by 3 1/4" long, but if you wanted to use five letter words to make a larger coaster, you certainly could.  My favorite is:

READ
COZY
FIRE
CHAT

Do you get it?  Read and chat around a cozy fire!  My daughter's included "Wine Stem Goes Here" and "Beer Pint Goes Here."

When you have the tiles arranged, it is a good idea to tape them with a piece of wide packing tape...that way, if you can't finish them right away, you won't forget the words!

After spreading glue on the cork, I positioned each letter, and when they were all down, I made sure they lined up well.  (Note:  these tiles aren't perfectly square, so they don't always make a straight line across and down).
I added an apostrophe with a black sharpie after the glue dried.  

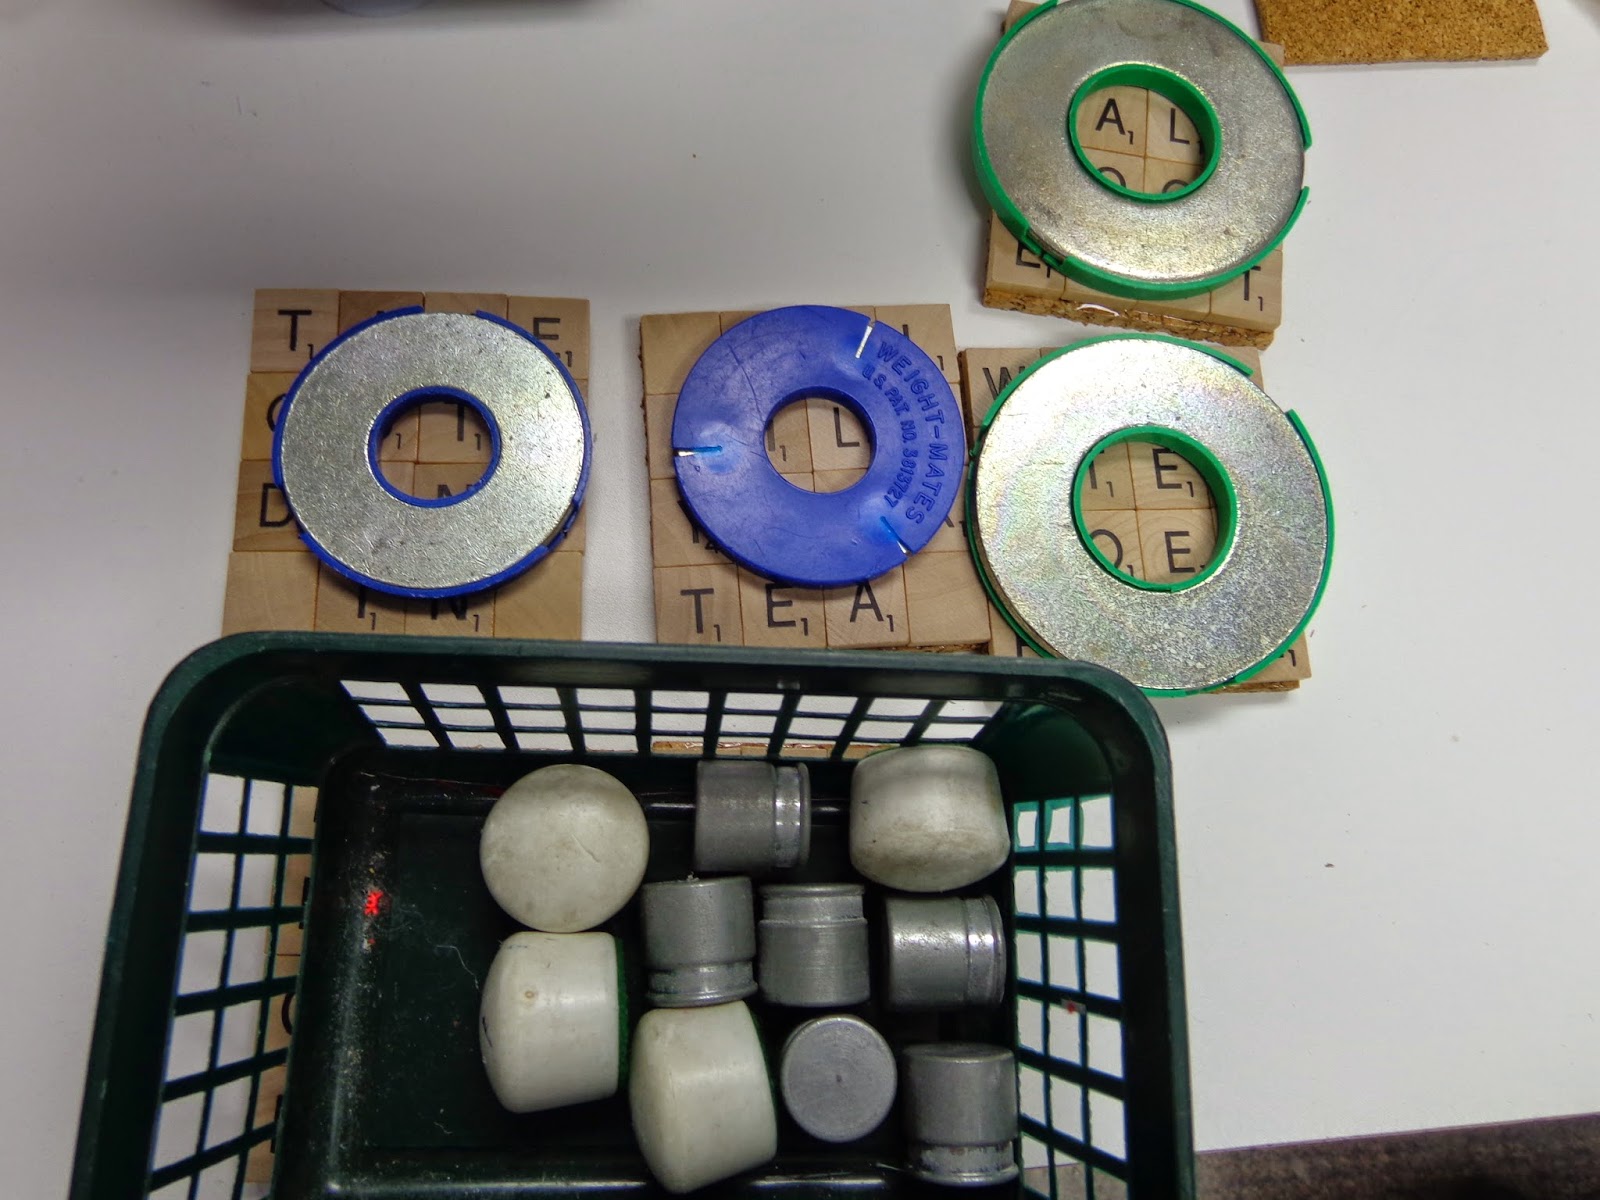
I used a weight to hold everything in place while the glue was setting.

Each coaster was finished with two coats of clear poly-acrylic sealer.  A dozen coasters cost about $33.00.  I packaged 6 together for a gift -- just about right for a gift exchange.

I had about 30 or so tiles left over, and then saw this on Pinterest.


I searched through my tiles, ordered a few more from Sun and Moon, and now have 7 Christmas ornaments ready for gift-giving next holiday season.

Which got me thinking...you could spell anything and turn it into an ornament.  How about "The Devine Household"  or "Nathan's First Christmas".  They also sell a few punctuation marks...how about "#we'reengaged" or "Let it Go!"  This could turn into an addiction!

While this isn't an original idea, I hope it inspires you.  So many times we pin things on Pinterest, but never bother to make them.  Sometimes it's because there are no instructions!  I'm sure there are more ways to use Scrabble tiles out there, and now that you know where to get them, you'll come up with some fantastic ideas, too!


Monday, August 11, 2014

The harvest is coming in...time to can and freeze the bounty!

It's been a while since I last posted.  The summer has just flown by!  While a lot of people relax and take it slower in the summer, my June and July has been very busy.  I'll be posting more about the projects I've been working on over the next few weeks.

But now in mid-August, the bounty of my garden and local farms is amazing, and I find myself following my mother's and grandmother's footsteps to the kitchen to can or freeze the fruits and vegetables that are in season.

One day's harvest from my garden.
The two new garden beds that my dear husband built are small but mighty.  Production for such a small space is somewhat astounding!  Each bed is 3' x 8'.  This spring, I planted three tomato plants (one heirloom, one roma and one 'Juliette', a variety of cherry tomato), two rows of radishes, three rows of green beans (with about 8 plants in each), five cucumber seeds, six broccoli plants, three different pepper plants, and a few herbs.  The garden went from this:


to this:


Radishes were first to be harvested, followed shortly by green beans.  There were a lot of beans!!  By the third time I'd picked, I had so many that we decided to can them.


Canning beans is not difficult...no brines or seasonings required.  But you must have a pressure cooker/canner in order to seal the jars properly.  With my d.h.'s help, we canned five pint jars in an evening. A small batch for sure, but the right amount for my pressure canner, plus we will eat these in the fall and winter -- no waste.

The Juliette tomatoes are going wild -- I've never seen a tomato plant this large before!  It has grown out of the top of our 6' 'squirrel' cage, and over the top of the re-purposed cast iron clothing rack that I use to tie them up.  I finally had to cut back some of the branches because they were casting shade on the other plants.
Luckily, that meant picking my first tomato of the season on July 4th -- my mother's gold star date for the first tomato!  While my son eats these like grapes, we have so many that I have given tomatoes away.  Pretty soon I will be canning them, simply because I can't keep up with the harvest.

In the meantime, local farmers are having a good year, too.  I made it out to Highland Orchards (www.highlandorchards.net) in West Chester, Pa., to pick black raspberries the first week of July.  The season for my favorite jelly-making fruit is very short -- about a week or two, but I picked plenty!  I brought them home, juiced them and froze the juice.  When I run out of jelly, I'll pull juice from the freezer and make a new batch.

I've also been hitting up the local farmer's market for corn, blue berries and blackberries to eat.

The humble Lodi apple. 
This weekend, d.h. and I made another trip to Highland Orchards, this time to pick up some peaches and apples. Yes, I said apples.  It's early for apples, but that's exactly the variety I want.

My mother always made applesauce, favoring the 'early, green' apples of July.  I finally found out the name of the apples she liked:  Lodi.  This apple variety was introduced in 1924 in upstate New York, a cross between a Montgomery and a Yellow Transparent.  The trees grow about 10-25 feet tall, making it a bit easier to pick than some varieties.   It's tart, cooks down quickly and makes delicious applesauce.


We bought a half-bushel of apples (that was about 55 apples, but I set 10 aside for a pie).  Like any project, it helps to have the right tools.  For applesauce, this includes an apple slicer/corer, a cutting board, a potato ricer*, large (6 quart) pans, a large bowl (or in my case, the top to my Tupperware cake carrier), and containers for the finished product.


Potato Ricers consist of a cone-shaped sieve, a pestle and a stand.
Look for them at old-time hardware or cooking stores.


Fill the kitchen sink with clean water, and dump in the apples to wash them.  One by one, use the apple slicer/corer to cut the apples.  Discard the cores.  Notice I didn't tell you to peel the apples -- no need to! You'll see.

Fill your pan/s with apples and add about 1 cup of water.  (For my half-bushel, I cooked the apples in four batches.)  Cover and place on the stove on medium-high heat until the water boils, then lower the heat and simmer the apples for about 8-10 minutes, stirring frequently.    As the apples cook, the will begin to fall apart and get mushy. When no single slice of apple still holds its shape, remove the pan from the heat and let the apples cool for about 5 minutes.

While the apples are cooking, wash the containers in warm, soapy water, rinse well and dry.

Set the potato ricer over a large bowl.  Spoon or pour about 1/2 of the pan of apples into the ricer at a time, using the pestle to push the sauce through the sieve.


When all of the sauce has been removed, all that is left are the skins and a few seeds.  Use a rubber scraper to discard this from the ricer.  Repeat until all of the apples have been cooked and run through the ricer.
 
The ricer separates the applesauce from the peels and seeds.
Now taste the applesauce.  You get to decide how much sweetener, if any, you want to add -- a great way to control the sugar in your family's diet.  Since Lodi apples are tart, I added 2 cups of sugar to the whole batch of applesauce.  Stir the sugar in well.

Ladle the applesauce into the prepared containers.  Be sure to leave 'head' space to allow the frozen applesauce room to expand.  Seal each container, label and date it, and place all of them in the freezer.  Enjoy for the next year or so.

A half-bushel of apples yielded 27 cups of applesauce.  I used 2-cup plastic Rubbermaid containers, plus a few assorted 2- and 1-cup plastic containers from the cabinet.


If you don't have a large freezer, it is possible to can applesauce so it is shelf-stable.  You will need a boiling water canner (not a pressure cooker), glass canning jars and lids/rings.  I found some great instructions here: http://www.freshpreserving.com/recipes/applesauce  

I grew up eating my mother's applesauce, and so did my nieces and nephews.  When they were here for a visit last year, they nearly had a fight over who would get to take some home from my freezer! (That was after they each got 2 jars of Black Raspberry jelly, another of Grandma's favorites).  

*P.S.  If you don't have a potato ricer, don't fret -- you can still make applesauce.  You simply have to peel and core every apple before you begin cooking.  Let each batch of apples cook a full 10-15 minutes, and use a potato masher or a dinner fork to smash up any apple slices that are still holding their shape.  Transfer apples to a large bowl, and stir well until the sauce has an even consistency.  

And another note:  my applesauce is pale yellow-green.  If you use red apples and don't peel them, your applesauce will be light pink...your kids will think it's weird, but it still tastes yummy!! Or peel the apples to make pale yellow sauce.  It's that easy!